Gambonanza Guide
Gambonanza Boss Guide and Modifiers
Learn Gambonanza boss timing, key boss modifiers, cursed tiles, Elite pieces, Crumblers, and what to buy before boss fights.
Bosses are where many Gambonanza runs fall apart.
A normal board asks you to capture every enemy piece. A boss board changes the rules. One boss can disable your stock. Another can scramble your pieces. Another can hide the enemy formation. Another can force you to wait before key pieces become capturable. Another can turn your safest tiles into cursed hazards.
This guide explains boss timing, known boss modifiers, first-clear preparation, Game 4 shopping decisions, special enemy pieces, cursed tiles, crumble pressure, and which Gambits or tiles help against each boss.
Boss Timing and Run Structure
A full Gambonanza run is best understood as about 25 games with 5 boss checkpoints.
Available tutorial footage describes the run as five stages with five games per stage. For players, the practical rule is simpler:
After every 4 normal games, expect the 5th game to be a boss.
| Run point | What it means |
|---|---|
| Games 1–4 | Build money, pieces, tiles, Gambits, and board space. |
| Game 5 | Boss checkpoint. |
| Between bosses | Rebuild losses and prepare for the next modifier. |
| Full clear | Roughly 25 games and 5 boss fights. |
The exact boss identity can vary between runs in available footage, so this page treats boss timing as reliable, but boss order as not fully fixed unless confirmed by your current run.
The most important shopping rule is:
The shop before a boss is your last chance to fix the weakness that boss will punish.
Boss Modifier Quick Reference
| Boss | Confirmed or high-confidence modifier | First response | Difficulty |
|---|---|---|---|
| Hikarul the Banished | You cannot use stock during the game. | Deploy important pieces before the fight. | Medium early, hard late |
| M3CH4GNU5 C4RL53N | Shuffles your pieces and makes them unreadable during formation. | Use flexible pieces; avoid exact-square plans. | Medium |
| Judit Polgeisha | You cannot see the opponent’s formation during setup. | Start with flexible attackers and safe backup pieces. | High |
| Kev Borclick | Applies Stasis to selected boss pieces; those pieces cannot be captured until enough waits remove Stasis. | Clear normal threats first, then create safe wait turns. | High |
| Tàl the Cursed | Randomly places cursed tiles around the board. Cursed tiles can disrupt upgraded tiles and may downgrade pieces into pawns. | Keep queens and promoted pieces away from cursed squares. | High |
| Jawby Fisher | Can punish your reserve / stock, including destroying stock pieces after boss captures. | Do not keep your entire recovery plan in reserve. | Very high |
| Botezarro | Modifier not directly confirmed in available screenshots. | Verify tooltip before writing exact strategy. | Unknown |
| Mighty Kasparov | Modifier not directly confirmed in available screenshots. | Verify tooltip before writing exact strategy. | Unknown |
This page focuses on bosses with usable evidence. Botezarro and Mighty Kasparov are listed for completeness, but they are not given full strategy sections until their current-version tooltips are captured.
Boss Difficulty Ranking for First Clears
This ranking is based on currently available gameplay footage, tooltip screenshots, and public gameplay commentary. It is a practical first-clear ranking, not an official difficulty order, and it may change with patches or new boss evidence.
| Rank | Boss | Why it is dangerous |
|---|---|---|
| 1 | Jawby Fisher | Can destroy your reserve plan, which is usually how first-clear players recover. |
| 2 | Tàl the Cursed | Cursed tiles can erase safe squares, disrupt upgraded tiles, and downgrade valuable pieces. |
| 3 | Kev Borclick | Stasis forces waiting, which is dangerous when crumble, enemy movement, and Stalemate Counter are active. |
| 4 | Judit Polgeisha | Hidden enemy formation punishes fragile setup plans. |
| 5 | Hikarul the Banished | Stock restriction is manageable if you prepare the active board before starting. |
| 6 | M3CH4GNU5 C4RL53N | Scrambling is less dangerous if your pieces are flexible or mostly the same type. |
The hardest bosses are the ones that attack your recovery system. Losing a queen is bad. Losing the stock or tile plan that was supposed to recover that queen is worse.
Universal Boss Preparation
Most boss-specific advice can be reduced to one rule:
Do not enter a boss with only one plan.
Before each boss checkpoint, check these five things:
| Check | Why it matters |
|---|---|
| Active board | Some bosses disable or punish stock, so your board must already work. |
| Recovery money | You may win the boss and still need to rebuild afterward. |
| Backup attacker | One queen can die, get blocked, or become unsafe. |
| Defensive tile | Blessed, Protective, Trap, or Phantom can turn bad trades into recoverable ones. |
| Boss modifier | Your first move should answer the modifier, not ignore it. |
Good universal boss tools:
| Tool | Best use |
|---|---|
| Queen | Flexible cleanup and emergency solving. |
| Rook | Row and column control on crowded boards. |
| Bishop | Long-range diagonal pressure. |
| Knight | Useful when bosses create awkward protected positions. |
| Pawn | Cheap blocker, promotion route, Gambit trigger. |
| Blessed Tile | Recovers valuable pieces after capture. |
| Protective Tile | Gives a high-value piece one safer turn. |
| Trap Tile | Stops dangerous enemy pieces or buys time. |
| Phantom Tile | Creates disposable bait or sacrifice pieces. |
| Money | Lets you recover even after a messy win. |
Game 4 Shopping Decisions Before a Boss
The shop before a boss is not a normal greed shop. It is a repair shop.
Your goal is to answer one question:
What does the next boss punish, and can my current board survive it?
Use this priority table when the incoming boss or modifier is visible.
| Incoming boss problem | Buy first | Buy second | Avoid |
|---|---|---|---|
| Stock may be disabled | Board upgrade or active piece | Queen, rook, bishop, or pawn already deployable | Keeping your best piece in stock |
| Reserve may be destroyed | Board upgrade or money buffer | Phantom bait or replacement pieces | Hoarding all value in reserve |
| Hidden enemy formation | Flexible attacker | Protective / Blessed / Phantom tile | One-line setup pieces |
| Your pieces may be shuffled | More flexible pieces | Board space | Exact-square combo pieces |
| Stasis / forced waiting | Trap, Protective, Jumps, or blockers | Extra pawns / kings | Entering with only one exposed queen |
| Cursed tiles | Backup attacker or mobility | Money buffer | Relying on one upgraded tile |
| Crumble-heavy board | Jumps / mobility | Phantom or extra pieces | Waiting-based plans with no capture route |
Simple spending rule
If you have limited money before a boss:
- Buy board space if your best pieces are stuck in stock.
- Buy a flexible attacker if you cannot currently clear threats.
- Buy a defensive tile if your queen or rook must take risks.
- Save money if your board is already stable and the boss may cause losses.
- Only buy Gambits if the effect helps immediately against the visible modifier.
A flashy Gambit is worse than a boring board upgrade if the board upgrade lets you deploy the queen that wins the boss.
Crumble Pressure During Bosses
Crumble is not a boss modifier, but it becomes much more dangerous during boss fights.
If you go too many turns without captures, crumble pressure rises. When it reaches the limit, tiles begin to fall away. This can remove enemy routes, but it can also destroy your own pieces, defensive tiles, and final capture paths.
Bosses make crumble worse because they often force delays:
| Boss situation | Why crumble gets worse |
|---|---|
| Kev stasis | You may need to wait before pieces become capturable. |
| Elite pieces | You may need to clear the rest of the board first. |
| Hidden formation | You may spend turns repositioning after the reveal. |
| Cursed tiles | You may avoid otherwise useful routes. |
| Stock restriction | You cannot always deploy a new piece to break a stall. |
During boss fights, every wait should have a purpose. If you must wait, move queens and key pieces away from tiles that may collapse.
Special Enemy Pieces in Boss Fights
Boss boards often combine the boss modifier with special enemy pieces. These can be more dangerous than the boss itself.
Elite Pieces
Elite pieces usually have to be captured last.
If an Elite knight, queen, rook, or boss-linked piece looks capturable but the game blocks the capture, do not waste turns trying to force it. Clear the rest of the board first.
Against Elite pieces:
- remove supporting pieces first
- keep a queen, rook, bishop, or knight ready for the final capture
- avoid stalling so long that crumble takes over
- use Trap or Phantom pieces to buy time
- remember that crumble may still remove an Elite piece if the board collapses under it
Elite pieces are especially dangerous with hidden formations, stasis boards, or crowded boss layouts because they can delay the final capture route.
Crumbler Pieces
Crumbler pieces can make random tiles crumble when you capture other pieces.
This can absolutely ruin a boss fight. A safe queen can fall with the tile under her. A promoted pawn can lose its route. A boss board can become unwinnable because the last enemy is unreachable.
Against Crumbler pieces:
- identify the Crumbler before starting a capture chain
- move your queen or carry piece away from unstable tiles
- avoid greedy captures when one crumble can kill your best piece
- use Jumps Gambit or extra mobility if holes are already blocking routes
- finish faster if crumble pressure is rising
Do not assume a boss board is safe just because no enemy attacks your queen. The board itself can become the threat.
Hikarul the Banished
Modifier: You cannot use your stock during the game.
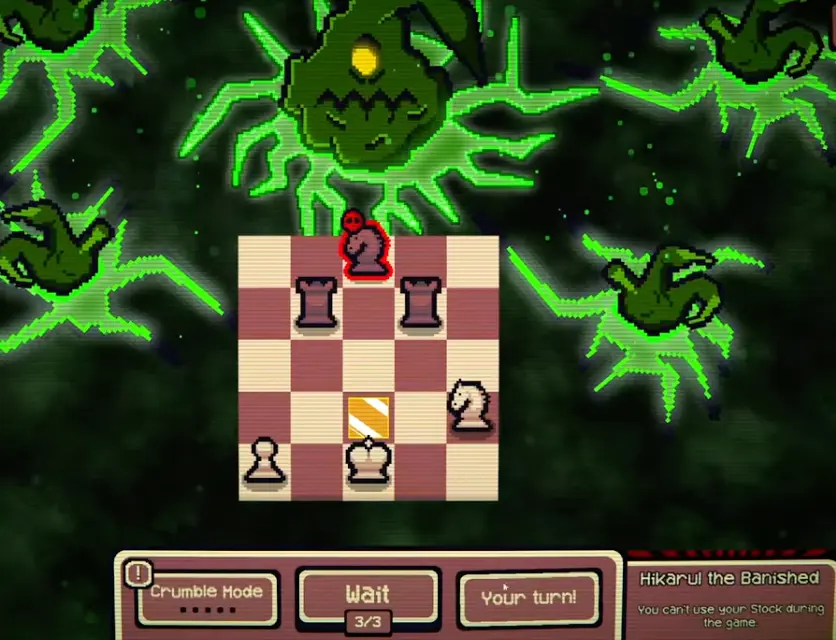
Hikarul is the boss that teaches you not to rely on reserve pieces too much. If your plan is “I will deploy my queen later,” Hikarul can ruin that plan immediately.
Unique strategy
Before pressing GO, deploy the pieces you actually need.
Best tools:
| Tool | Why it helps |
|---|---|
| Board upgrades | Let you place more of your stock before the fight. |
| Queen or rook already on board | Gives you active reach without needing stock. |
| Pawns already placed | Can block, trade, or promote without reserve help. |
| Blessed / Protective tiles | Still help if your pieces can reach them naturally. |
Avoid:
- entering with your best piece stuck in stock
- assuming Phantom stock tricks will work
- sacrificing your only active long-range piece
- delaying the fight with no capture route
Hikarul is usually manageable early, but it can become painful later when enemy formations are larger and your stock contains most of your power.
M3CH4GNU5 C4RL53N
Modifier: Shuffles your pieces and makes them unreadable during the formation phase.
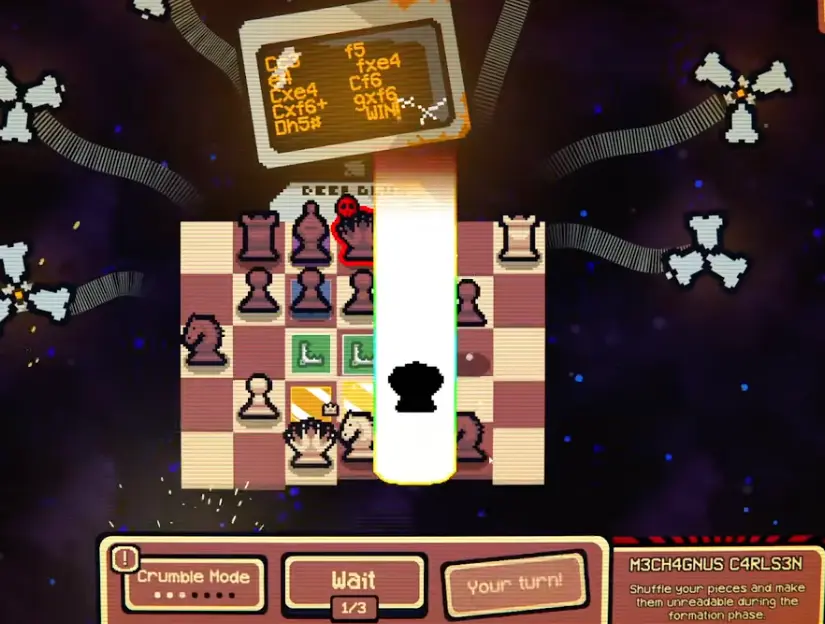
M3CH4GNU5 is not primarily about hidden enemy pieces. It attacks your own setup. Your pieces may be shuffled, obscured, or difficult to identify before the board begins.
Unique strategy
Build a formation that still works even if you do not know exactly which piece is which.
Best tools:
| Tool | Why it helps |
|---|---|
| Multiple queens | If most of your pieces are queens, shuffling matters less. |
| Flexible attackers | Queens, rooks, and bishops work from more squares. |
| Simple formations | Fewer exact dependencies means less damage from scrambling. |
| Backup pieces | Let you recover after identifying the board. |
Avoid:
- relying on one exact starting square
- sacrificing a piece before you know what it is
- placing fragile pawns where only one identity works
- building around a single opening capture
If your run is mostly queens, this boss can become much easier because the shuffle matters less. If your run has one queen and many fragile support pieces, slow down before the first move.
Judit Polgeisha
Modifier: You cannot see the opponent’s formation during the formation phase.
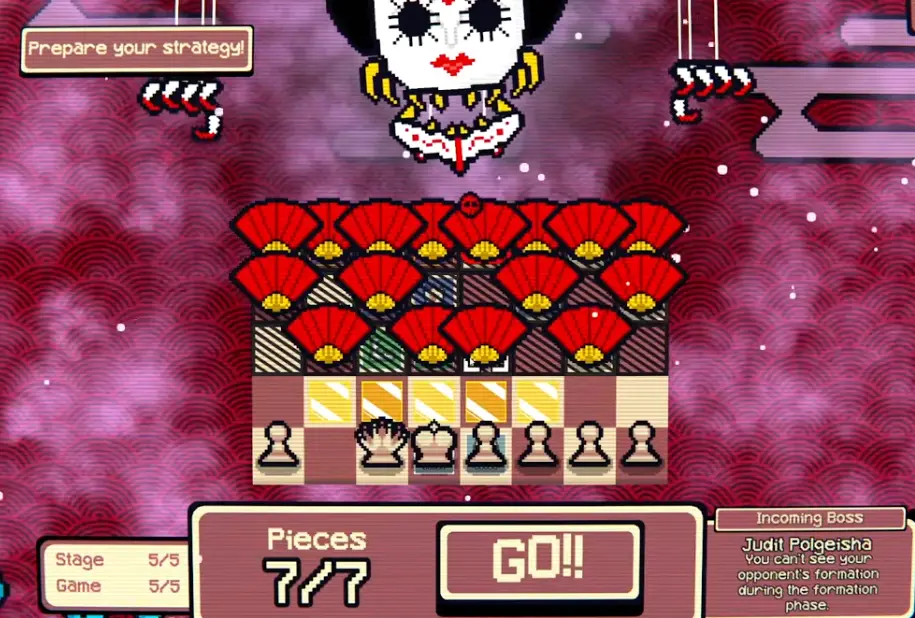
Judit, sometimes searched as Judith Polgeisha, punishes perfect pre-planning. Since the enemy formation is hidden, you cannot place every piece around exact enemy threats.
Unique strategy
Start with flexible coverage, not a narrow tactic.
Best tools:
| Tool | Why it helps |
|---|---|
| Queen | Can respond after the reveal. |
| Rook / bishop | Gives long-range lines once threats appear. |
| Phantom piece | Can scout or bait after the board is revealed. |
| Extra active piece | Gives you options if the reveal is bad. |
| Money | Lets you rebuild after a messy win. |
Avoid:
- placing your only queen where she has no escape
- using all pieces in one fragile lane
- assuming the enemy has no long-range attackers
- making a rushed first capture after the reveal
After the reveal, check enemy queens, rooks, bishops, and promotion threats first. Your first move should reduce danger, not just take the closest piece.
Kev Borclick
Modifier: The boss selects pieces and applies Stasis. Stasis pieces cannot be captured until enough waits remove the state.
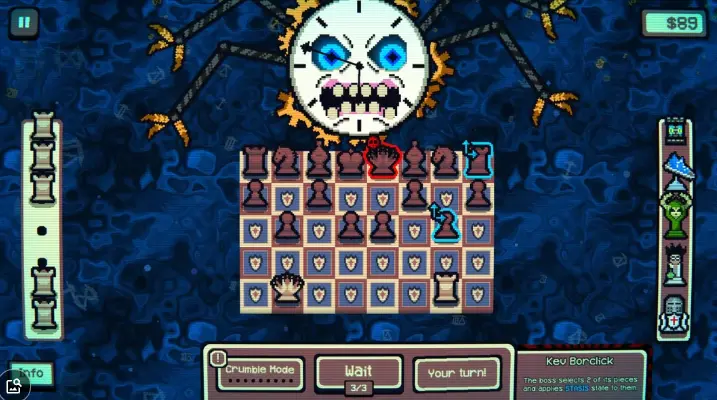
Kev is dangerous because he forces patience in a game that punishes waiting.
Unique strategy
Do not try to capture stasis pieces immediately. Clear normal threats first, then create safe turns to wait.
Best tools:
| Tool | Why it helps |
|---|---|
| Trap Tile | Can freeze non-stasis threats while you wait. |
| Protective Tile | Helps a key piece survive one turn. |
| Phantom pieces | Can bait attacks while stasis counts down. |
| Jumps Gambit | Helps if crumble creates holes during the delay. |
| Pawns / kings | Can block while you wait. |
Avoid:
- wasting attacks on uncapturable pieces
- waiting while your queen is exposed
- leaving enemy pawns free to promote
- letting crumble cut off the final capture route
The safest Kev pattern is:
- Remove non-stasis long-range threats.
- Block or trap anything that can punish your wait.
- Wait only when your key pieces are safe.
- Capture stasis pieces as soon as the state is removed.
Tàl the Cursed
Modifier: Randomly places cursed tiles around the board.
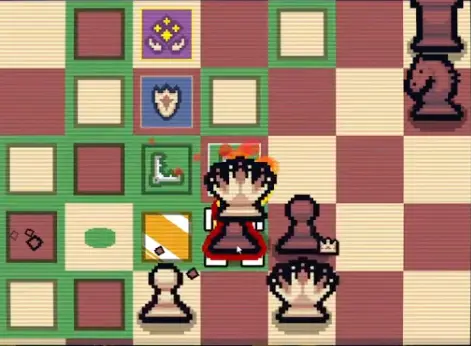
Tàl is dangerous because cursed tiles attack your tile plan and your piece value.
Cursed tiles can:
- replace upgraded tiles such as Blessed, Protective, or Phantom
- fail to restore the original upgraded tile after the fight in some reported cases
- make safe-looking squares dangerous
- downgrade or transform valuable pieces into pawns when triggered
- block promotion or queen routes
Unique strategy
Treat cursed tiles as boss-created hazards, not normal tiles.
Best tools:
| Tool | Why it helps |
|---|---|
| Multiple routes | Lets queens avoid cursed squares. |
| Extra attackers | Reduces dependence on one promoted piece. |
| Jumps / mobility | Helps route around cursed or broken tiles. |
| Money | Lets you recover if a tile plan is ruined. |
| Blessed / Protective backup | Useful, but do not depend on one tile staying intact. |
Avoid:
- parking a queen or promoted piece on a cursed square
- promoting through cursed tiles unless you have no safer path
- relying on one upgraded tile the boss can overwrite
- assuming cursed tiles are harmless after the boss ends
Against Tàl, the key question is:
Can my queen still reach targets without stepping on cursed squares?
If the answer is no, slow down and create another route before committing your best piece.
Jawby Fisher
Modifier: Can punish reserve / stock value. In observed footage, when a boss capture happens, a random piece in stock can be destroyed.
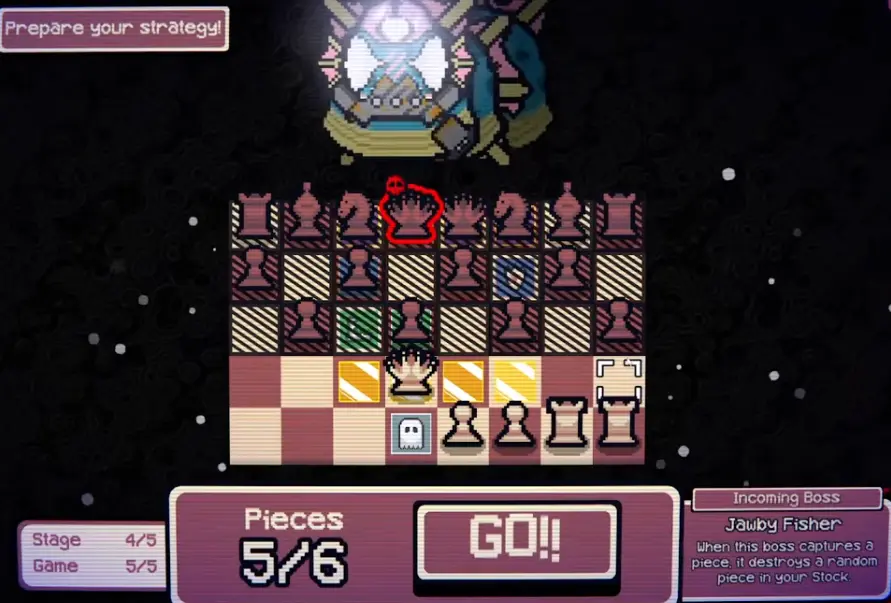
Jawby is one of the scariest first-clear bosses because new players often rely on stock as their recovery plan.
Unique strategy
Do not keep all your future value in reserve.
Best tools:
| Tool | Why it helps |
|---|---|
| Active board deployment | Reduces what Jawby can destroy in stock. |
| Board upgrades | Let you place more important pieces before the fight. |
| Phantom bait | Can absorb captures without risking real stock value. |
| Blessed / Protective | Reduces the chance that a boss capture starts the punishment chain. |
| Money | Lets you rebuild after reserve losses. |
Avoid:
- keeping your only queen in stock
- leaving valuable reserve pieces unused when you have board space
- letting Jawby capture cheap pieces for free if it destroys valuable stock
- assuming reserve pawns will safely become future queens
The goal is not to empty stock blindly. The goal is to make sure losing stock does not destroy the entire run.
Botezarro and Mighty Kasparov
Do not include full “how to beat” sections for these yet.
Their names are useful for future search coverage, but without direct current-version tooltip screenshots, detailed strategy would be guesswork. For now, keep them in the quick reference only and add full sections later when you capture:
- boss name
- exact modifier tooltip
- board screenshot
- one observed failure case
- one observed successful response
This is better for trust than publishing thin placeholder advice.
Boss Gambit and Tile Recommendations
The best boss tools depend on what the modifier attacks.
| Boss problem | Specific tools to look for | Why it helps |
|---|---|---|
| Stock disabled | Board upgrades, active queens, Thunder’s Gambit | You need pieces already on the board and safe tempo from pawn captures. |
| Reserve destroyed | Phantom Tile, Blessed Tile, money Gambits, board upgrades | You need value outside stock or enough money to rebuild. |
| Hidden enemy formation | Queen builds, Phantom Tile, Protective Tile | Flexible pieces and temporary bait help after the reveal. |
| Your pieces shuffled | Multiple queens, simple formations, board upgrades | If your pieces are flexible, shuffle matters less. |
| Stasis / forced waits | Trap Tile, Protective Tile, Jumps Gambit | You need safe turns while waiting for stasis to drop. |
| Cursed tiles | Jumps Gambit, backup attackers, extra money | You may need alternate routes and recovery if tiles are overwritten. |
| Crumble pressure | Jumps Gambit, Phantom Tile, Thunder’s Gambit | Mobility, bait, and tempo help before routes disappear. |
| Elite pieces | Trap Tile, Phantom Tile, queen backup | You need to delay the final capture without stalling out. |
| Crumbler pieces | Protective Tile, Jumps Gambit, careful queen routing | Board collapse can kill your carry piece even without an enemy attack. |
If you already know the next boss modifier, buy the tool that answers that modifier. If you do not know the next boss yet, prioritize flexible value: queen, board space, money, Blessed, Protective, Phantom, or Trap.
Boss Preparation and Mistakes Checklist
Use this single checklist before every boss:
| Question | If no, fix it before starting |
|---|---|
| Do I understand what this boss punishes? | Read the modifier again. |
| Can I win if stock is disabled? | Deploy key pieces or buy board space. |
| Can I survive if reserve is destroyed? | Move value onto the board or save rebuild money. |
| Do I have at least one flexible attacker? | Buy or deploy queen, rook, bishop, or knight. |
| Do I have a backup if my queen dies? | Add stock, money, Phantom, Blessed, or another attacker. |
| Can I handle Elite or stasis pieces? | Prepare safe waits and delayed capture routes. |
| Can I avoid cursed or crumbling tiles? | Move key pieces before committing. |
| Am I making a rushed first capture? | Stop and check long-range threats first. |
The most common boss mistake is not “bad chess.” It is using a normal-board habit against a boss that specifically punishes that habit.
FAQ
When do bosses appear in Gambonanza?
Expect a boss checkpoint every 5th game, across about 25 games total. In practical terms, every 4 normal games lead into a boss fight.
Are Gambonanza bosses always in the same order?
The timing is reliable: expect a boss checkpoint every 5th game. The exact boss order appears to vary between runs in available footage. If you capture evidence of a fixed boss order in a current version, update this page with the screenshot and tooltip.
What is the hardest boss for beginners?
Jawby Fisher and Tàl the Cursed are the most dangerous for many first-clear players because they attack recovery systems: reserve pieces and safe tiles.
How do I beat Hikarul the Banished?
Put important pieces on the board before starting. You cannot rely on stock during the fight.
How do I beat M3CH4GNU5 C4RL53N?
Use flexible pieces and simple formations. Since your pieces can be shuffled or made unreadable, avoid strategies that depend on one exact starting square.
How do I beat Judit Polgeisha?
Start with flexible attackers. Since you cannot see the enemy formation during setup, check long-range threats immediately after the reveal.
How do I beat Kev Borclick?
Clear non-stasis threats first, then create safe turns to wait out Stasis. Do not waste attacks on pieces that cannot be captured yet.
How do I beat Tàl the Cursed?
Avoid cursed tiles with queens, rooks, and promoted pieces. Do not rely on one upgraded tile, because cursed tiles can disrupt or replace your tile plan.
How do I beat Jawby Fisher?
Do not keep your entire recovery plan in stock. Deploy important pieces when safe, use Phantom bait when possible, and keep money to rebuild.
What are Elite pieces?
Elite pieces usually need to be captured last. Clear the rest of the board first, then use a flexible attacker for the final capture.
What are Crumbler pieces?
Crumbler pieces can make the board crumble when captures happen. Move key pieces away from unstable tiles before starting capture chains.
What should I buy before a boss?
Buy the thing that answers the incoming modifier. If stock is disabled, buy board space or deployable pieces. If reserve can be destroyed, move value onto the board or keep money. If stasis or crumble is likely, prioritize Trap, Protective, Phantom, or Jumps-style mobility.
Continue Reading in the Gambonanza Guide Cluster
This article is part of our Gambonanza strategy cluster. Use these guides to keep learning the game's core systems and routes.
Learn how to play Gambonanza with beginner tips for win conditions, stock, promotion, shops, mini-games, tiles, bosses, crumble, and special pieces.
First Win GuideHow to Win Your First Gambonanza RunA first-clear Gambonanza strategy covering early pawns, queen promotion, shop choices, mini-games, Elite pieces, Crumblers, bosses, and common mistakes.
Build GuideGambonanza Pawn and Queen Build GuideLearn how to build around pawns, promotion, queen carry, multiple queens, Blessed and Protective tiles, Phantom copies, and queen farming in Gambonanza.
Tiles GuideGambonanza Tiles GuideLearn how Phantom, Ghost, Blessed, Protective, Trap, Gold, Cursed, and Crumbling tiles work in Gambonanza, plus Chemist tile-copy tips.
Gambits GuideGambonanza Early Gambits Tier ListA practical early Gambits tier list for Gambonanza, covering Thunder, Falling Crown, Chemist, Valkyrie, Banana Peel, Silver Fork, Demon, Jump, Beth, and key combos.