Battlestar Galactica Guide
Meta Progression & Favors Guide: BSG Scattered Hopes
Master meta progression in BSG: Scattered Hopes. Learn how to earn Fate Points, unlock Favors and fleets, conquer Trials, and what to upgrade first.
Meta progression in Battlestar Galactica: Scattered Hopes is what turns failed runs into stronger future attempts. Even when the fleet collapses, you still gain knowledge, unlock progress, Fate, and better understanding of which crises, enemies, and resource decisions actually killed the run.
The important thing is not to treat your first few failures as wasted attempts. They are scouting runs.
This guide explains how Fate Points, Favors, post-run rewards, fleet unlocks, Trials, and Extinction modifiers work — and what you should prioritize first.
Quick Answer
For your first few runs, spend meta progression on safety before damage.
| Priority | Unlock focus | Why it matters |
|---|---|---|
| 1 | Retry / battle recovery Favors | One missed nuke, bad target priority, or late recall can ruin a run. |
| 2 | Starting resources | Extra supplies, Tylium, or scrap makes early crises less punishing. |
| 3 | Fleet durability | More hull or reduced losses gives you more room to learn. |
| 4 | Economy support | Strong once you can survive long enough for it to pay back. |
| 5 | Squadron / combat consistency | Good if your runs die in battles. |
| 6 | New fleets and pool unlocks | Great later, but only after you understand the baseline loop. |
| 7 | Trials and Extinction | Long-term goals, not first-run priorities. |
The safest early meta priority is:
buy forgiveness first, then resources, then durability, then damage.
What counts as meta progression?
Meta progression is anything that makes future runs stronger, more flexible, or more informed.
| Progression type | What it improves |
|---|---|
| Fate Points | Long-term currency used for Favors and future-run advantages. |
| Favors | Persistent bonuses or run-start advantages. |
| Fleet unlocks | Different starting ships, weapons, squadrons, and playstyles. |
| Compendium / pool unlocks | New squadrons, civilian ships, weapons, systems, or event options. |
| Trials | Optional challenge objectives that can unlock future tools or rewards. |
| Extinction modifiers | Higher-difficulty replay layers after normal wins. |
| Player knowledge | Better target priority, crisis triage, routing, and reward choices. |
The last one matters more than it sounds. In Scattered Hopes, knowing which crisis penalty is survivable can be as powerful as a permanent upgrade.
How Fate Points work
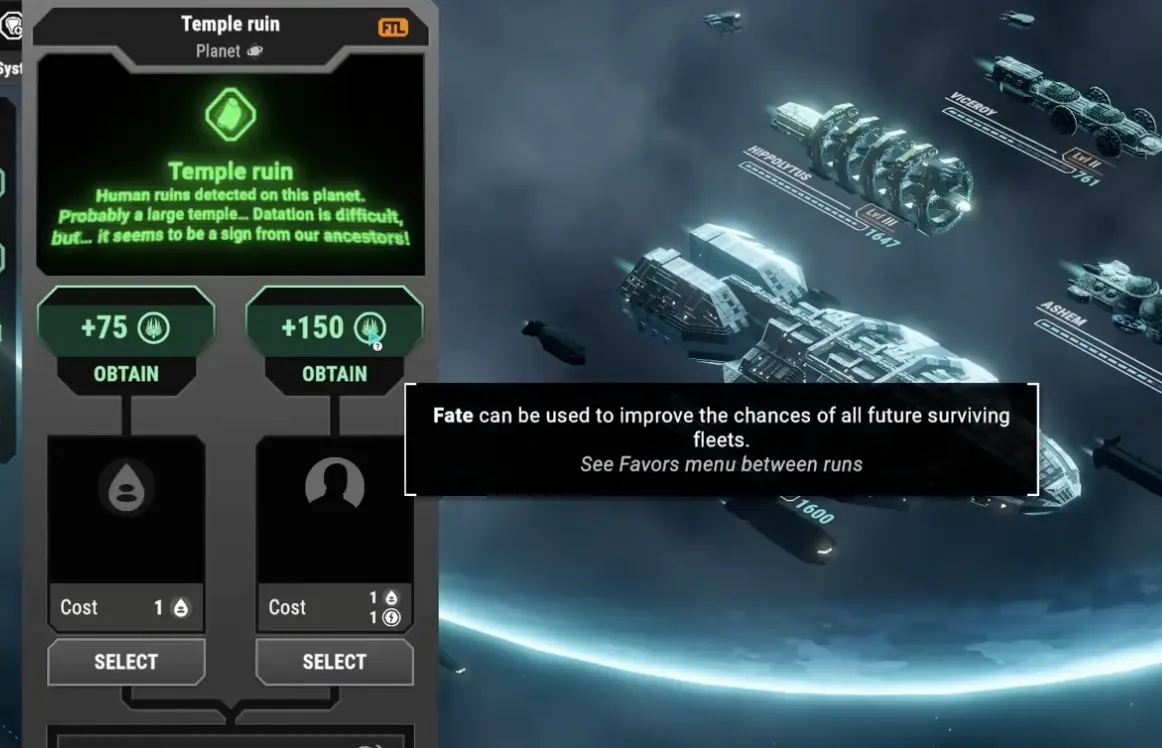
Fate is the game’s meta-progression currency. It is different from sector resources like Tylium, supplies, and scrap.
Use Fate as your future-run currency. It exists to improve the odds that future fleets survive longer than the last one.
How to think about Fate
Fate is best spent on whatever prevents your most common failure.
| Your runs usually fail because… | Spend Fate toward… |
|---|---|
| One bad battle ends the run | Retry, recovery, or battle-safety Favors. |
| You cannot afford early crises | Starting supplies, scrap, or resource support. |
| You run out of Tylium | Fuel support, route flexibility, or POI economy. |
| Gunstar or civilian ships take too much damage | Hull, repair, durability, or loss-reduction effects. |
| Missiles, nukes, and boarders get through | Squadron consistency or combat-start advantages. |
| You survive early but fall behind later | Economy scaling or better reward-pool options. |
| You are bored of one start | Fleet unlocks and alternate starting playstyles. |
Do not spend Fate only on damage if your real problem is resource collapse, poor crisis timing, or missed FTL recalls.
Favor priority tier list
This is an effect-based Favor tier list. Replace the “Favor effect” labels with exact in-game names once your Favor screen is documented.
| Tier | Favor effect | Buy when… | Why |
|---|---|---|---|
| S | Battle retry / lost-fight recovery | You lose runs from one bad combat mistake. | Gives the highest learning value and prevents sudden run loss. |
| S | Destroyed or wrecked squadron recovery | Your core interceptor often gets wrecked. | Keeps the next sector from becoming impossible. |
| A | Starting supplies | Early crises or repairs drain you. | Gives immediate flexibility in Sectors 1–4. |
| A | Starting Tylium | Routing and POIs feel too tight. | Prevents weak route choices and bad fuel spirals. |
| A | Starting scrap | Repairs and R&D compete too early. | Helps stabilize ships before buying upgrades. |
| A | Gunstar hull / fleet durability | You enter Boss fights damaged. | More room for mistakes and critical thresholds. |
| B | Fleet Health protection | You lose to stacked event penalties. | Useful if crises and faction events bleed population. |
| B | Resource generation | You survive early sectors consistently. | Scales better in longer runs than in short failed runs. |
| B | Squadron damage or speed | Combat is your main failure point. | Good after you already have basic resources. |
| C | Pure damage bonus | Your fleet is stable but kills too slowly. | Strong later, but not the safest first buy. |
| C | Wide unlock-pool expansion | You want variety and understand the basics. | Can dilute reward predictability if bought too early. |
| Situational | Fleet-specific or build-specific Favor | You already know that fleet/build well. | Excellent in the right setup, weak if chosen blindly. |
Best first Favor
Your first Favor should usually be one of these:
- retry / recovery, if available;
- starting resources, if you keep failing before the first Boss;
- hull or durability, if you reach Boss fights already damaged;
- combat consistency, if nukes, boarders, or snipers are the main problem.
If a Favor does not help you survive longer or learn more, it is probably not your first purchase.
What to unlock first
Use this purchase route for your first few runs.
Run 1–2: Buy safety
Prioritize:
- retry or recovery effects,
- starting resources,
- Gunstar or fleet durability,
- anything that prevents early collapse.
Your goal is to survive long enough to see more sectors and learn more crisis outcomes.
Run 3–5: Fix your actual failure point
After each loss, ask what killed the run.
| What killed you | Next meta focus |
|---|---|
| Bad combat mistake | Retry, recovery, or squadron consistency. |
| Resource starvation | Starting resources or economy support. |
| Fleet Health collapse | Durability or crisis-buffer effects. |
| Gunstar damage | Hull, repair, or threshold protection. |
| Squadron wrecks | Squadron recovery or better combat start. |
| Weak late-game scaling | Economy, unlock pool, or fleet-specific upgrades. |
After your first win: Specialize
Once you can survive a normal run, start investing into:
- fleet-specific strengths,
- favorite squadron builds,
- Trials,
- Extinction preparation,
- wider unlock pools.
Do not change everything at once. If you change fleet, Favors, squadron plan, and route priorities all together, you will not know what actually helped.
Post-battle rewards and blessings
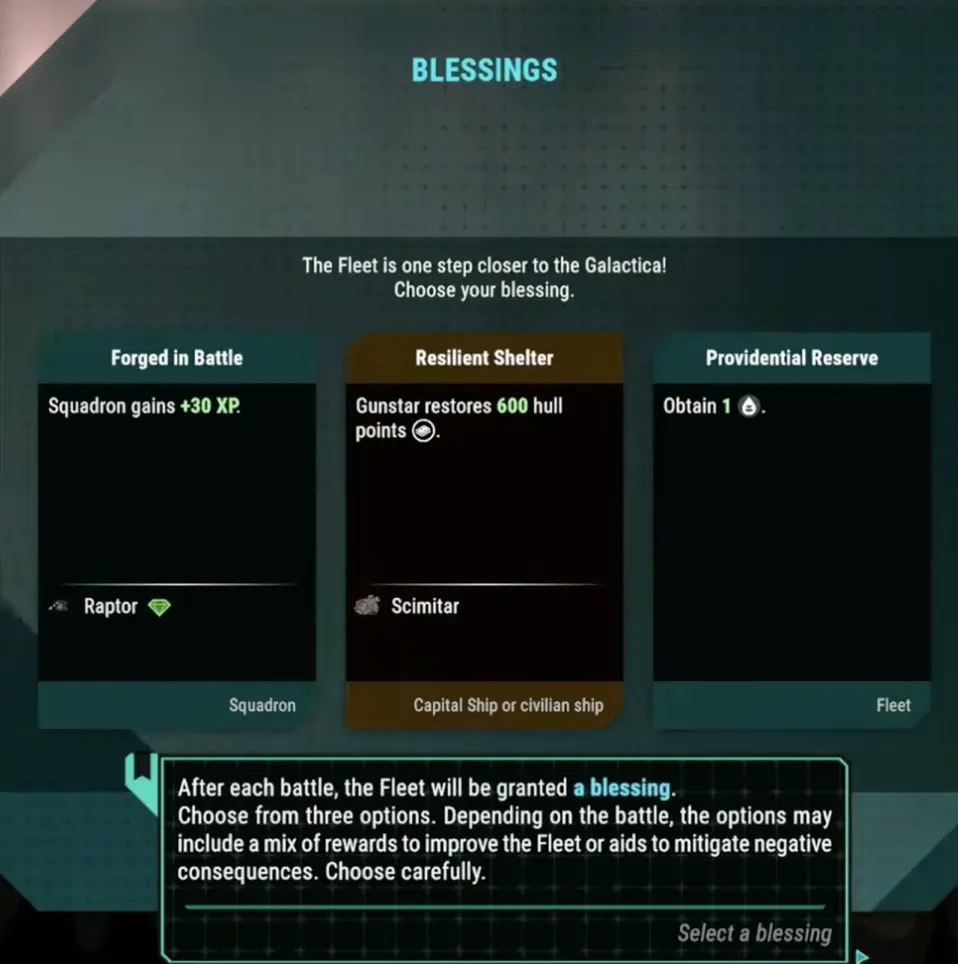
After battles or jumps, you may get reward choices such as squadron XP, hull recovery, extra safe turns, resources, or other run support.
Pick based on the next sector, not on generic value.
| Reward type | Pick it when… |
|---|---|
| Squadron XP | Your core squadron is close to leveling or carries most fights. |
| Hull restoration | Gunstar or key civilian ships are near thresholds. |
| Extra safe turn | A crisis, repair, or high-value POI needs time. |
| Resource gain | You are short on Tylium, supplies, or scrap. |
| Fleet Health | You are close to collapse from accumulated penalties. |
| Utility / passive bonus | It solves a repeated problem across several sectors. |
If the next sector looks dangerous, choose the reward that prevents immediate collapse. If the fleet is stable, choose the reward that scales.
Fleets and starting playstyles
Fleet choice matters because each starting fleet changes the opening problem you need to solve.
Confirmed fleet-related achievement names include:
| Fleet | What to evaluate before choosing |
|---|---|
| The Wanderers | Starting squadron coverage, resource safety, and first Boss readiness. |
| The Convoy | Civilian protection, economy stability, and defensive pressure. |
| The Vanguard | Combat tempo, aggressive starts, and whether resources can keep up. |
| The Guerilla | Burst tools, risk tolerance, and how well you handle uneven fights. |
Do not judge a fleet only by starting firepower. In Scattered Hopes, a fleet with better early stability can outperform a stronger-looking combat fleet.
How to choose a fleet
| Failure pattern | Better fleet direction |
|---|---|
| You lose in combat | Defensive or combat-stable fleet. |
| You run out of resources | Economy-focused or resource-safe fleet. |
| Civilian ships keep dying | Fleet with better protection or durable starts. |
| You want faster clears | Aggressive combat fleet. |
| You are learning | Balanced or forgiving fleet. |
| You are chasing Extinction X | Fleet-specific mastery matters more. |
Compendium and unlock pool
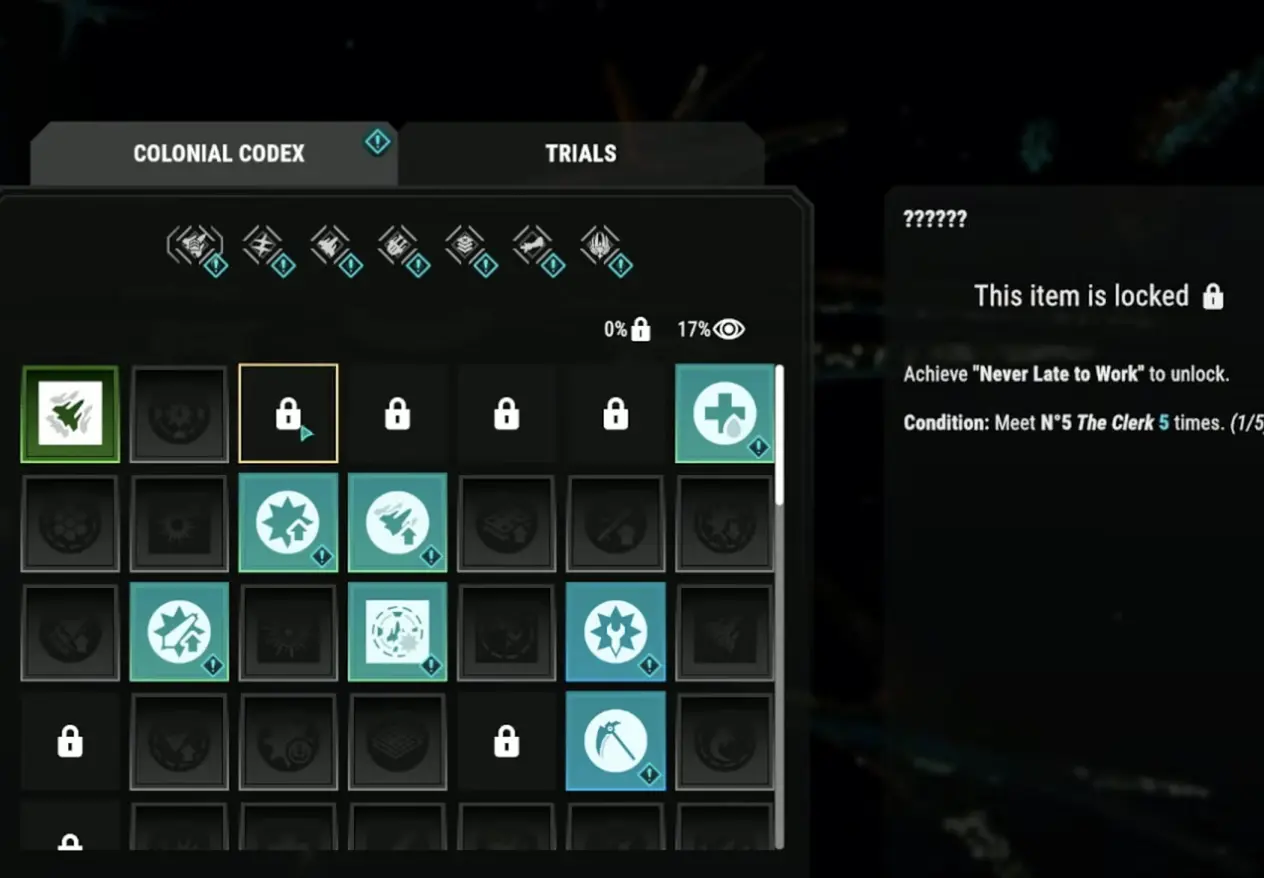
Compendium-style unlocks can add:
- new squadrons,
- new Gunstar weapons,
- new civilian ships,
- new support systems,
- new passive effects,
- new event or reward possibilities,
- new build paths.
Unlock pool warning
Unlocking more options is not always the same as becoming stronger.
A bigger pool can mean more variety, but it can also make future rewards less predictable. Early on, prioritize unlocks that fit your survival plan rather than unlocking everything randomly.
Trials
Trials are optional challenge objectives that add long-term unlock goals to your runs. They are not the same as normal situations or crises. A situation asks you to prevent a penalty in the current sector. A Trial asks you to take on an extra condition for a future reward.
Trials can ask you to play under restrictions or pursue specific goals, such as:
- surviving a certain number of sectors,
- clearing a run with a specific fleet,
- winning while protecting key civilian ships,
- completing objectives without relying on a certain resource or tool,
- defeating Bosses under harder conditions,
- using or unlocking specific squadrons, weapons, or systems.
Exact Trial objectives depend on what you have unlocked, but the reward logic is the same: completing Trials can expand future-run options by adding new tools, unlocks, or challenge progression.
Treat Trials as risk/reward objectives.
| Trial question | Why it matters |
|---|---|
| What does the Trial require? | Some Trials may force risky combat, routing, or resource choices. |
| What does it unlock? | Prioritize Trials that add squadrons, weapons, systems, or fleet options you actually want. |
| Does it weaken this run? | Do not sacrifice a stable run for a reward you cannot use yet. |
| Can I complete it while playing normally? | Low-disruption Trials are better early. |
| Is a Boss or crisis coming soon? | Skip risky Trials before major checkpoints. |
When to chase Trials
Chase Trials when:
- you can survive early sectors consistently,
- the Trial overlaps with what you already planned to do,
- the reward improves future runs,
- your fleet has enough resources to absorb the risk,
- no major crisis or Boss checkpoint is about to punish the detour.
When to skip Trials
Skip Trials when:
- the fleet is already unstable,
- the Trial costs key resources,
- you are low on Tylium or supplies,
- a crisis is active,
- the next battle or Boss already looks dangerous,
- the objective forces you away from your best survival plan.
A Trial reward is not worth losing the run before you can benefit from it.
Extinction modifiers
Extinction modifiers are the long-term difficulty layer. They are not beginner goals.
Think of Extinction as the mode that asks:
Can your strategy still work when the game removes your safety margin?
What Extinction changes in practice
Exact modifiers can vary, but higher-difficulty layers usually punish weak fundamentals in these ways:
| Pressure type | Why it changes your strategy |
|---|---|
| Less room for damage | Hull mistakes and civilian ship damage matter more. |
| Tighter resources | Wasteful repairs, weak POIs, and greedy route choices become worse. |
| Harder combat checks | Nukes, boarders, snipers, and heavy waves punish slow reactions. |
| Less tolerance for bad crises | Bypassing the wrong crisis can end the run later. |
| Fleet-specific weaknesses matter more | You need to understand each fleet’s starting plan. |
When to try Extinction
Try Extinction after you can:
- win a normal run consistently,
- reach Boss fights with healthy ships,
- identify priority combat threats quickly,
- solve or bypass crises efficiently,
- protect civilian ships without overspending,
- use hero actions well,
- choose post-battle rewards correctly,
- understand at least one fleet deeply.
Extinction X goals
Extinction X is the major long-term benchmark. Achievement data confirms Extinction X goals tied to all four fleets, including The Wanderers, The Convoy, The Vanguard, and The Guerilla.
Do not rush Extinction X just because it exists. Build consistency first.
Demo progress carry-over
If you played the demo, your progress should carry over to the full game according to the official launch messaging.
Still, before deleting saves or starting over, check your own save state in-game. Demo carry-over can include meta progress and may affect your available unlocks, depending on what you completed.
Cylon investigation as meta knowledge
The Cylon infiltrator chain is mostly a crisis-management topic, not a Fate-spending topic. This page only covers its meta value.
The long-term lesson is:
each failed investigation teaches you when clues are too weak, when sabotage has gone too far, and when spending resources is justified.
For the full operational guide — Investigate, Interrogate, suspicious clues, Brig timing, and sabotage costs — read the Crisis and Fleet Management Guide.
Common meta progression mistakes and fixes
| Mistake | Why it hurts | Fix |
|---|---|---|
| Spending Fate on damage first | You still lose to crises, nukes, and resource collapse. | Buy safety or resources first. |
| Ignoring retry or recovery | One mistake keeps ending runs that could teach you more. | Prioritize forgiveness early if available. |
| Unlocking everything randomly | Future reward pools become harder to control. | Unlock tools that support your current plan. |
| Chasing Trials too early | You risk stable runs before understanding the basics. | Do Trials after early sectors are consistent. |
| Rushing Extinction | You add difficulty before mastering fundamentals. | Clear normal runs consistently first. |
| Switching fleets constantly | You never learn one fleet’s strengths. | Learn one forgiving fleet before branching out. |
| Treating failed runs as wasted | You miss the real learning value. | Review what killed the run and unlock around that. |
| Picking rewards automatically | You miss the reward that solves your next sector. | Choose based on the current fleet state. |
| Widening the unlock pool too early | You add variety before you know what you want. | Prioritize survival tools first. |
How meta progression connects to the other guides
| Guide | How it helps meta progression |
|---|---|
| Main guide | Gives the complete overview of the game loop. |
| First-run guide | Helps early runs survive long enough to earn better rewards. |
| Combat guide | Reduces run-ending battle mistakes. |
| Crisis and fleet management guide | Helps preserve resources and avoid collapse between battles. |
| Best early upgrades and squadrons guide | Helps choose upgrades that match your actual failure point. |
FAQ
What are Fate Points in Scattered Hopes?
Fate Points are a long-term progression resource used to improve future runs through Favors and other meta-progression systems.
What should I unlock first?
Prioritize retry or recovery effects if available, then starting resources, then fleet durability, then economy or squadron power.
Is retry battle worth it?
Yes. Retry-style progression is one of the strongest early picks because one tactical mistake can destroy an otherwise good run.
Should I unlock new fleets early?
Unlock them when you want new playstyles, but do not switch constantly while learning. One familiar fleet is usually better than several poorly understood fleets.
What are Trials?
Trials are optional challenge objectives that can unlock future tools or progression rewards. Do not prioritize them until your basic survival loop is stable.
When should I try Extinction modifiers?
Try Extinction after you can win or consistently reach deep sectors on normal difficulty. Extinction is a mastery layer, not a beginner goal.
Does demo progress carry over?
Yes, official launch messaging says demo progress carries over to the full game. Still check your own save before deleting or restarting.
Read next
Return to the Battlestar Galactica Scattered Hopes Guide for the full hub.
If you are still struggling to survive your first sectors, read How to Win Your First Run.
If your runs die in combat, read the Combat Guide.
If your fleet collapses between jumps, read the Crisis and Fleet Management Guide.
For upgrade choices, read the Best Early Upgrades and Squadrons Guide.
Continue Reading in the Battlestar Galactica Guide Cluster
This article is part of our Battlestar Galactica strategy cluster. Use these guides to keep learning the game's core systems and routes.
Complete combat guide for BSG: Scattered Hopes. Master FTL jumps, tactical pause, flak, nukes, and squadron tactics to defeat Cylon bosses like The Clerk.
Fleet ManagementCrisis & Fleet Management Guide: BSG Scattered HopesMaster crisis and fleet management in BSG: Scattered Hopes. Learn to handle resources, Cylon infiltrators, faction politics, morale, and civilian ships.
Build GuideBest Early Upgrades & Squadrons: BSG Scattered HopesGuide to the best early upgrades and squadrons in BSG: Scattered Hopes. Learn Viper Mk.2 vs Mk.7 tactics, Raptor builds, resource economy, and Boss prep.