Battlestar Galactica Guide
Best Early Upgrades & Squadrons: BSG Scattered Hopes
Guide to the best early upgrades and squadrons in BSG: Scattered Hopes. Learn Viper Mk.2 vs Mk.7 tactics, Raptor builds, resource economy, and Boss prep.
The best early upgrades in Battlestar Galactica: Scattered Hopes are not the biggest damage numbers. They are the upgrades that stop one bad sector from turning into a failed run.
Most early upgrade choices should be based on one question:
What almost killed your last sector?
Use the table below to turn that failure into your next upgrade choice.
So the early rule is:
upgrade reliability first, damage second.
This guide focuses on the choices you actually face during early runs: which squadron to level, when to pick speed over damage, when to repair instead of buying R&D, how to evaluate Viper Mk.2 vs Mk.7, how to use Raptor artillery and jammer variants, and what to prepare before the first Boss.
Best early upgrade recommendations
Use this table when you are deciding what to upgrade next.
| Problem in your last sector | Best upgrade or action |
|---|---|
| Nukes or missiles reached the fleet | Viper speed, Viper primary damage, burst active, manual targeting practice |
| Snipers survived too long | Viper Mk.2 interception, Raptor range, burst ability |
| Grouped raiders overwhelmed you | Offensive Flak, Raptor artillery coverage, area damage |
| Heavy raiders broke through | Focus fire, burst active, saved nuke, stronger single-target damage |
| Civilian ships took too much damage | Wolf taunt, hull repair, critical threshold protection |
| You lost too much Fleet Health | Fleet logistics, defensive auxiliary, crisis resolution |
| You ran out of scrap | Protect mining/resource ships, train efficient ships, take scrap POIs |
| You ran out of Tylium | Prioritize fuel POIs, use Travel Planner heroes, avoid weak detours |
| Heroes got injured or unavailable | Medbay, safer assignments, use heroes for high-value POIs only |
| Boss fight snowballed | Repair first, save nukes, assign heroes, bring fast interception |
For a first clear attempt, your safest core is:
Viper interceptor + Raptor coverage + Wolf or another tank/control option + Offensive Flak + one emergency nuke + enough repairs to keep ships above critical thresholds.
Best early squadrons
This is an early-run ranking, not a full endgame tier list.
| Tier | Squadron | Early role | Why it matters |
|---|---|---|---|
| S | Viper Mk.2 / Viper interceptor | Emergency interception | Best early answer to missiles, nukes, snipers, boarders, and fast raiders. |
| A | Viper Mk.7 | Safer ranged fighter | Better sustained pressure when you already have close interception covered. |
| A | Raptor artillery | Long-range coverage | Holds wide lanes and softens enemies before they reach the fleet. |
| A- | Wolf | Taunt tank | Protects civilian ships and redirects pressure away from fragile targets. |
| B+ | Raptor jammer / support variant | Close support and disruption | Useful when control matters more than raw damage. |
| B | Raven / specialist fighter | Ambush or setup plays | Strong with planning, weaker as your only emergency interceptor. |
| B | Mantis / other fighter variants | Depends on its roll | Treat as its own unit, not as a Viper Mk.7 nickname. Read the tooltip. |
Important naming note: Mantis is not the same thing as Viper Mk.7. If you see Mantis in your run, evaluate it by its actual tooltip, range, speed, abilities, and role. Do not treat it as a Mk.7 variant unless the game explicitly says so.
Viper Mk.2 vs Viper Mk.7
The practical difference is simple:
Viper Mk.2 is your close-range emergency responder. Viper Mk.7 is your safer ranged pressure fighter.
| Choice | Pick it when | Avoid relying on it when |
|---|---|---|
| Viper Mk.2 | Nukes, snipers, boarders, and fast threats are your main problem. | You already have interception and need safer sustained damage. |
| Viper Mk.7 | You want more range and less risky positioning. | You need a panic button to chase threats across the map. |
Viper Mk.2 upgrade priority
Pick upgrades in this order:
- speed or repositioning,
- primary damage,
- burst active,
- survivability,
- utility or control.
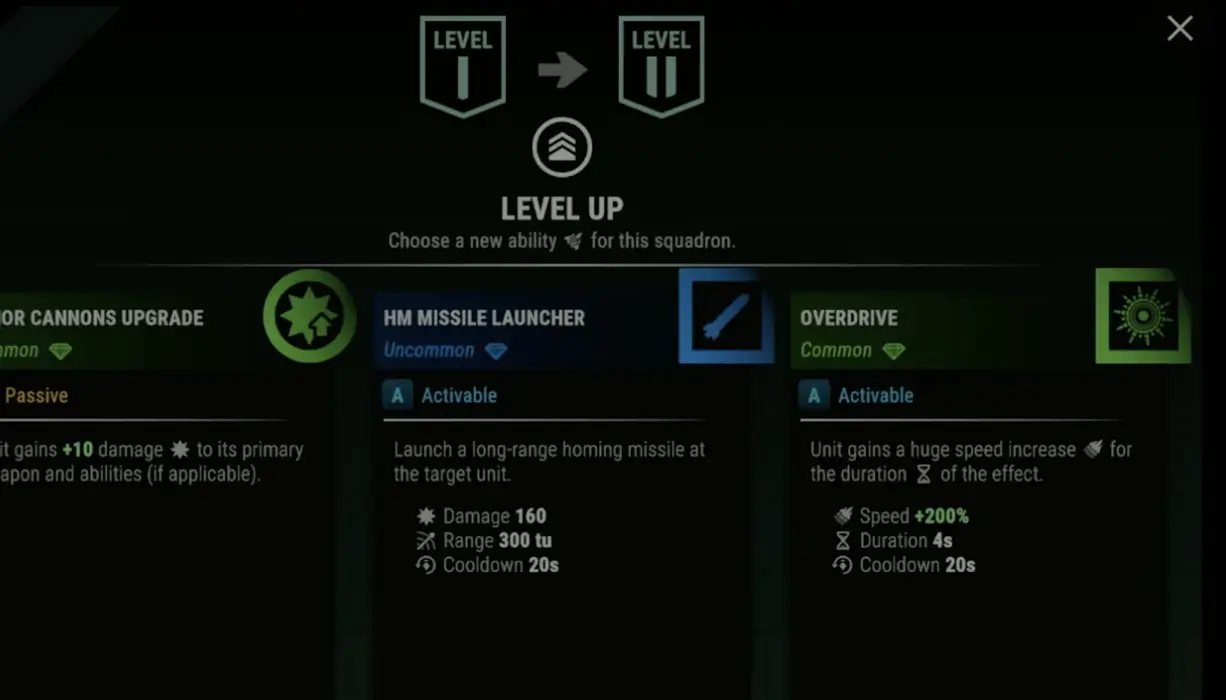
A confirmed early Viper speed active gives a huge temporary speed boost: +200% speed for 4 seconds with a 20-second cooldown. That is one of the clearest early answers to nukes and late repositioning.
Viper Mk.7 upgrade priority
Pick upgrades that improve:
- range,
- firing uptime,
- primary damage,
- safety,
- support synergy.
The Mk.7 is best when it can keep shooting without constantly diving into danger.
Viper upgrade trade-offs
Early upgrade choices are often not “best upgrade” questions. They are “what killed me last time?” questions.
| If offered… | Usually pick… | Why |
|---|---|---|
| +primary damage vs speed active | Damage if enemies barely survive; speed if nukes or distant snipers are killing you. | Damage improves every shot. Speed fixes bad map coverage. |
| Homing missile active vs passive damage | Homing missile if you need burst; passive damage if you forget actives. | Actives are stronger only if you pause and use them. |
| Fire-rate/reload vs burst active | Fire-rate for long waves; burst for heavy raiders, snipers, and Boss pressure. | Sustained DPS and emergency DPS solve different problems. |
| Survivability vs damage | Survivability if the Viper keeps getting wrecked; damage if it rarely gets hit. | A dead or wrecked Viper costs more than a slightly slower kill. |
| Friendly-fire protection vs damage | Friendly-fire protection if you use flak/nukes aggressively near your squadrons. | It opens safer positioning around your own area weapons. |
Hunter Instinct rule
Hunter Instinct is good for cleanup, not for decision-making.
Leave it on when the wave is mostly weak raiders.
Take manual control when:
- a nuke appears,
- a sniper appears,
- a boarder is headed for a civilian ship,
- the Viper chases too far,
- FTL is almost ready,
- the Viper needs to dock before the jump.
Raptor builds: artillery vs jammer
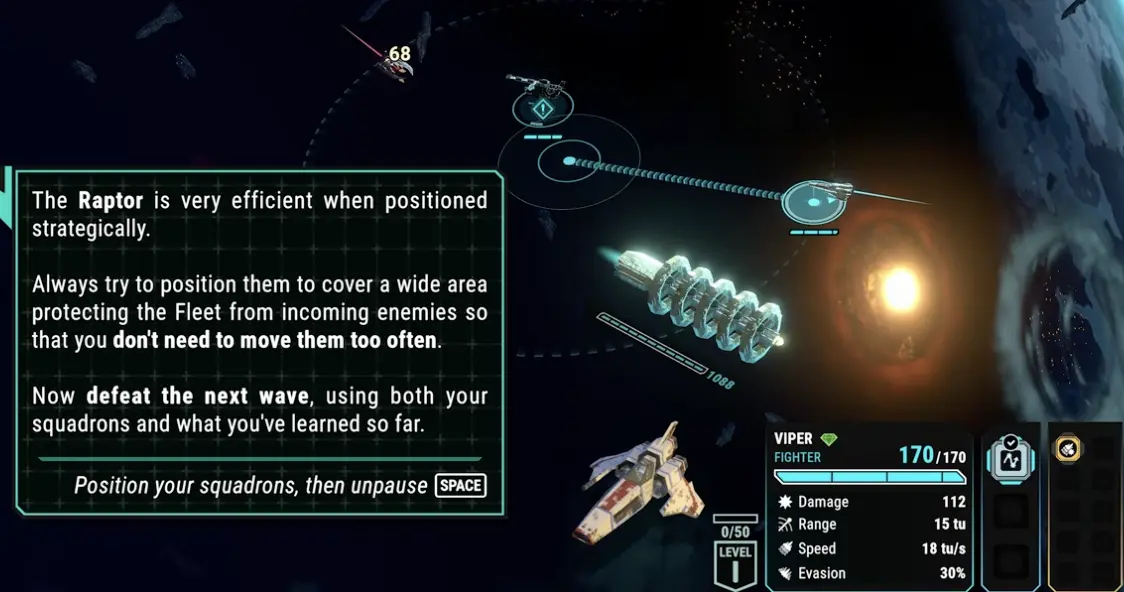
The Raptor is not one build. It can appear as long-range artillery or closer support/jamming depending on configuration and upgrades.
| Raptor type | What it solves | Best upgrades |
|---|---|---|
| Artillery Raptor | Wide lanes, scattered enemies, long-range pressure | Range, primary damage, firing uptime |
| Jammer / support Raptor | Disruption, slowing enemies, helping vs protected targets | Survivability, control duration, cooldown/reload |
| Tanky Raptor | Staying alive under pressure | Auto-repair, evasion, hull |
Artillery Raptor
Use artillery Raptor when enemies spawn from multiple angles or your Viper is overloaded.
Best picks:
- range,
- primary damage,
- reload/firing uptime,
- auto-repair if it takes chip damage.
Do not move artillery Raptors constantly. They need time to set up and fire. Place them early, cover a lane, and let them work.
Jammer / EMP Raptor
Pick a jammer or EMP-style Raptor over an artillery Raptor only when you need time and control more than damage.
Choose jammer Raptor when at least two of these are true:
| Condition | Why jammer is better |
|---|---|
| Heavy raiders reach the fleet before you can kill them | Control buys time for Vipers, flak, and nukes to finish them. |
| Shielded, supported, or high-value enemies are causing the problem | Disruption can be better than adding more weak damage. |
| Your current loadout already has enough damage | A Viper + flak setup often needs delay/control more than another damage unit. |
| Civilian ships are fragile this sector | Slowing or disabling enemies can prevent threshold damage. |
| You use tactical pause often | Jammer value depends on timing the ability before enemies break through. |
Choose artillery Raptor instead when:
| Condition | Why artillery is better |
|---|---|
| Enemies spawn from several angles | Range and coverage matter more than a short disable. |
| Weak enemies survive with low HP | Damage breakpoints are more valuable than control. |
| Your Viper is overloaded on both sides | Long-range fire helps cover the side your Viper cannot reach. |
| You do not consistently use active abilities | Passive damage and range are safer than mistimed control. |
Do not assume EMP or jamming works on every Boss or Basestar. Before choosing it as your Boss answer, check the tooltip and the actual debuff in battle. If the ability does not clearly disable, slow, interrupt, or reduce enemy output for long enough to change the fight, treat it as support — not as your main Boss solution.
Raptor upgrade trade-offs
| If offered… | Usually pick… | Why |
|---|---|---|
| +primary damage vs +range | Damage if enemies survive with low HP; range if enemies arrive from too many angles. | Damage fixes breakpoints; range fixes coverage. |
| 5% double damage chance vs evasion active | Crit if the Raptor is safe; evasion if it gets targeted. | Backline artillery wants damage; exposed support wants survival. |
| Auto-repair vs damage | Auto-repair if the Raptor often takes chip damage; damage if it rarely gets hit. | Repair value rises over 2-minute battles. |
| EMP/control vs damage | EMP/control if heavy or supported enemies are the problem. | Control buys time when DPS is not enough. |
Wolf taunt: when it is worth using
The Wolf is not a damage carry. It is a pressure redirect tool.
Use Wolf when:
- civilian ships keep taking hits,
- enemies ignore your Viper and go straight for the fleet,
- focused enemies need to be pulled off a target,
- your Gunstar is crossing thresholds,
- you need something durable in the danger zone.
Observed Wolf-style effects include taunt on damage and damage resistance that improves when enemies are nearby. That means the Wolf wants to be close enough to matter, but not so far forward that it gets isolated.
Wolf upgrade trade-offs
| If offered… | Usually pick… | Why |
|---|---|---|
| Taunt reliability vs damage | Taunt reliability | Wolf’s value is changing enemy targets, not topping DPS. |
| Hull vs damage resistance | Hull if it gets burst down; resistance if it survives but takes steady damage. | Match the defensive stat to the damage pattern. |
| Repair/sustain vs more damage | Repair/sustain | A living Wolf prevents more damage than a slightly stronger Wolf deals. |
Gunstar weapons
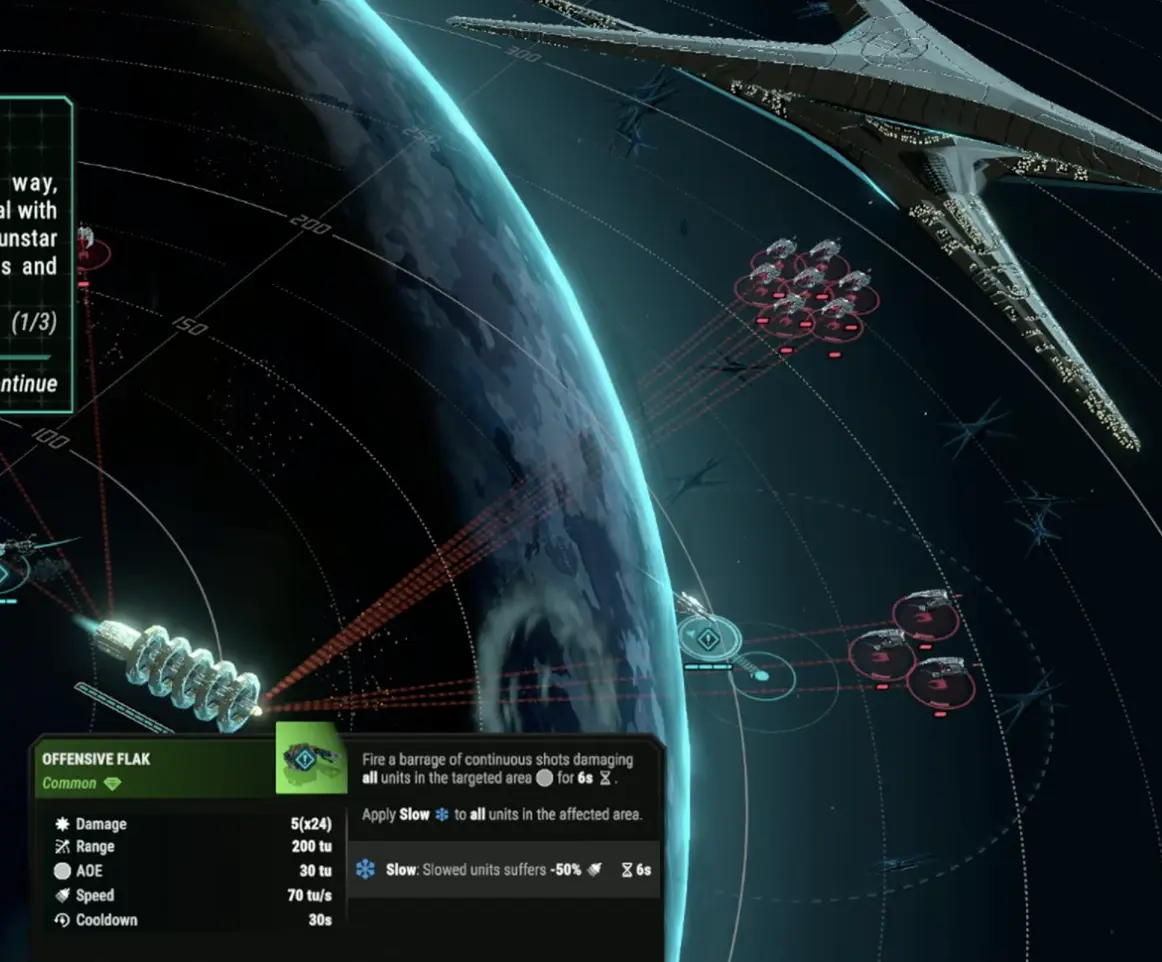
Gunstar weapons should cover your squadron weaknesses.
Offensive Flak
Offensive Flak is one of the best early weapons because it damages enemies in an area and clears grouped low-hull waves.
Use flak when:
- raiders spawn in clusters,
- your Viper is overloaded,
- enemies fly through a predictable lane,
- you need to reduce pressure before it reaches civilians.
Flak is weaker against single high-hull enemies, so do not use it as your only heavy-raider answer.
Nuke Launcher
The Nuke Launcher is an emergency tool.
Use nukes when:
- heavy raiders break through,
- a dense wave would cause critical damage,
- you need to survive the last seconds before FTL,
- a Boss wave is too large for normal tools.
Do not build your whole strategy around nukes. They are limited, and your squadrons can be caught in bad positions if you fire too late.
R&D: repair first or upgrade first?
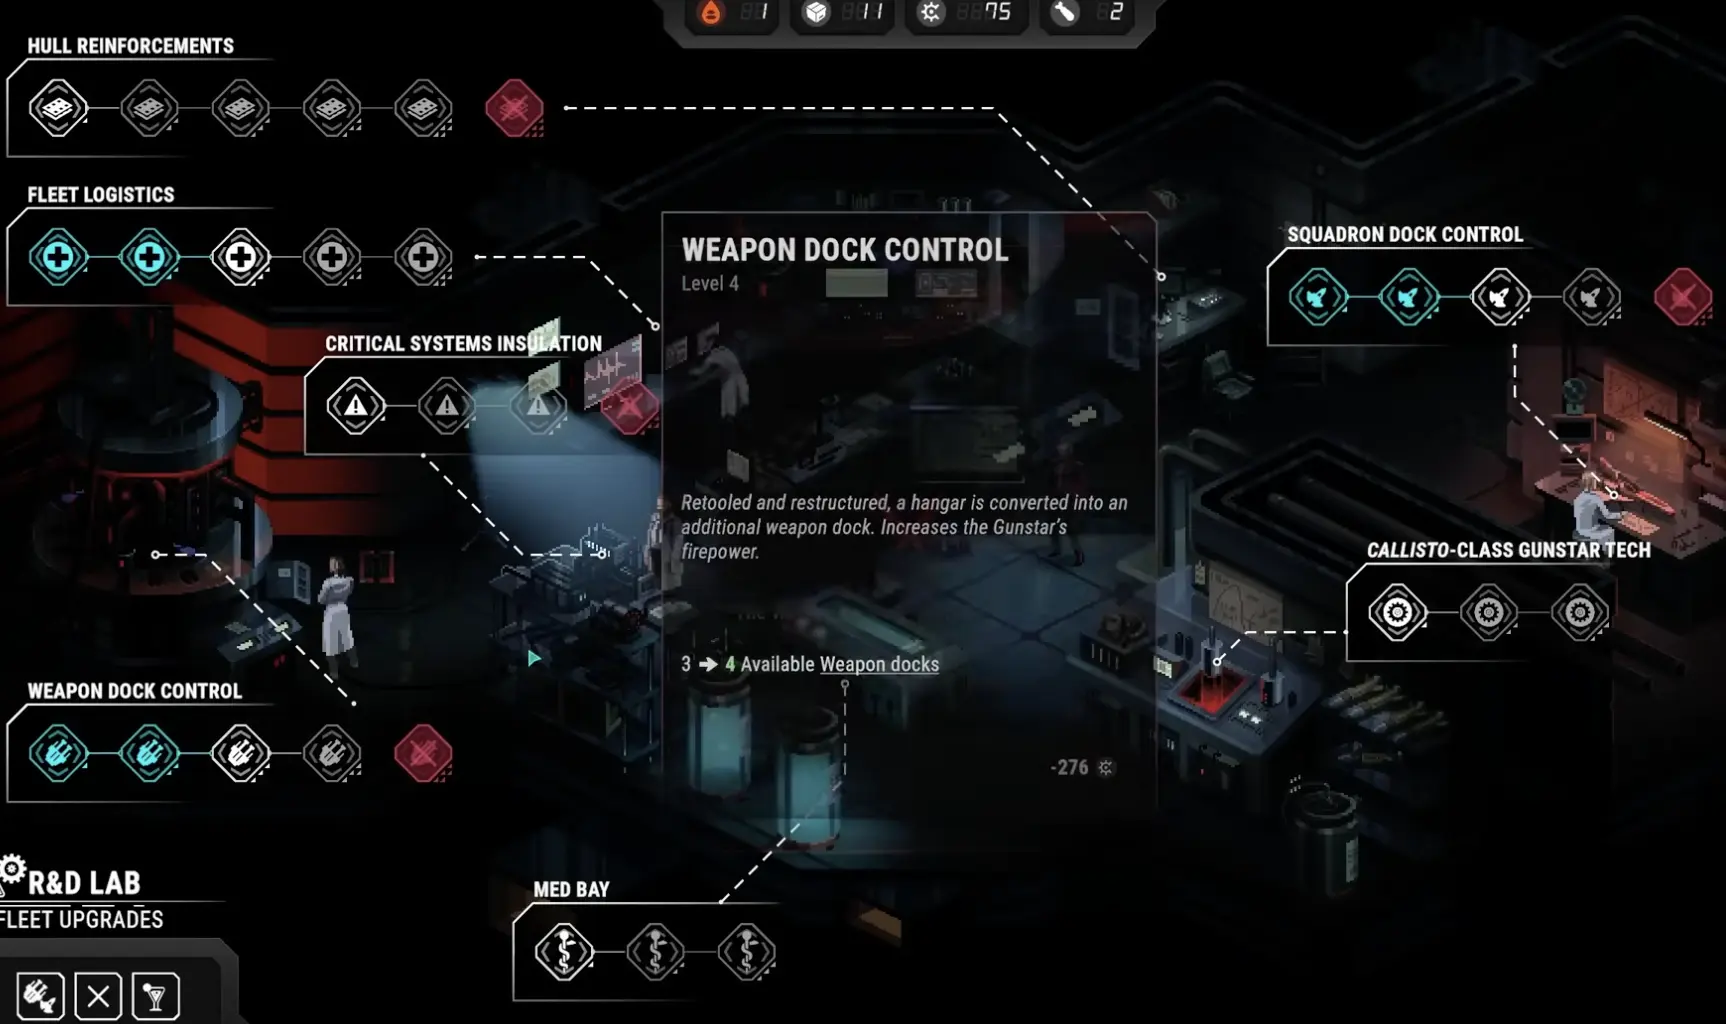
R&D wins stable runs. Repairs save unstable runs.
Buy R&D when the fleet is not about to collapse. Repair first when a ship is near a critical threshold.
| Situation | Better choice |
|---|---|
| Gunstar is near a threshold | Repair |
| Resource civilian ship is badly damaged | Repair |
| Boss sector is next | Repair, then upgrade only if safe |
| You have a strong unused squadron | Squadron dock can be worth it |
| You have only two useful squadrons | Upgrade existing tools first |
| Fleet Health losses are stacking | Fleet logistics / defensive auxiliary |
| You keep taking chip damage | Hull, evasion, threshold protection |
| You are already stable | Damage, extra dock, or advanced economy |
Best early R&D directions
| Priority | R&D direction | Buy when |
|---|---|---|
| 1 | Hull reinforcement | Gunstar or civilian ships keep taking damage. |
| 2 | Critical threshold protection | Damaged ships keep spawning negative situations. |
| 3 | Fleet logistics / Fleet Health | Population losses are stacking. |
| 4 | Squadron dock | You have a third strong squadron ready. |
| 5 | Weapon dock | You have multiple weapons worth rotating. |
| 6 | Medbay / hero support | Heroes are injured or morale is becoming a problem. |
| 7 | Evasion / advanced defense | You are stable and want lower incoming damage. |
| 8 | Pure offense | You already survive fights and want faster clears. |
Resource economy: numbers that matter
Economy is strong, but only if it pays back before the run collapses.
Resource rules of thumb
| Economy action | What to know |
|---|---|
| Crew training | Seen training gives civilian ships extra hull and improves efficiency. One early tutorial example gives +30 hull from training. |
| Resource ships | Some civilian ships produce resources every jump or sector. A mining ship can provide scrap income; a botanical cruiser can produce supplies. |
| Emergency production | Gunstar emergency production can create scrap, supplies, or Tylium, but takes 2 turns, making it less efficient than good POIs. |
| POIs | Often better than emergency production, especially if a hero adds bonus yield. |
| Travel Planner-style hero bonus | Very valuable on fuel POIs because +1 Tylium can change your next route. |
| Training before Boss | Risky unless the ship is already safe and the training adds needed hull. |
Observed economy examples
Use these as early reference points, not universal values for every ship:
| Example | Why it matters |
|---|---|
| Refinery-style POI giving around +4 Tylium, improved by a fuel hero | Fuel POIs can be run-saving when route options are tight. |
| Botanical Cruiser-style ship producing supplies per jump | Protecting supply ships can be better than taking one-time supply rewards. |
| Mining Ship reaching stronger scrap-per-jump scaling after training | Scrap income matters because scrap is used for repairs, trade, and R&D. |
| Emergency production taking 2 turns | Good when desperate, inefficient when good POIs are available. |
When to train a civilian ship
Train when:
- the ship produces a resource you need,
- the timeline is safe,
- the extra hull keeps it above a threshold,
- you expect several more sectors of payoff.
Do not train when:
- a Boss fight is next and the ship is damaged,
- a crisis needs resources now,
- you need immediate repairs,
- you are spending your last safe turn.
Fate and Favors: what to unlock first
Fate is the meta-progression currency earned from runs. It is spent on Favors that improve future attempts.
Do not look for an exact Favor named “battle retry” unless your game actually shows that name. Instead, evaluate Favors by effect category.
| Favor effect category | Priority | Why |
|---|---|---|
| Run forgiveness / recovery | 1 | Anything that prevents one mistake from ending the run is extremely valuable. |
| Starting resources | 2 | Extra scrap, supplies, or Tylium stabilizes the first sectors. |
| Starting durability | 3 | More hull or Fleet Health prevents early snowballing. |
| Squadron consistency | 4 | Helps stop nukes, missiles, and snipers more reliably. |
| Economy scaling | 5 | Strong once you survive long enough to benefit. |
| Pure damage | 6 | Good later, but not the first answer to early deaths. |
Recommended early Fate plan:
- take one forgiveness or recovery-style Favor if available,
- add starting resources,
- add hull or Fleet Health,
- then specialize into your preferred squadron or Gunstar style.
Starting Gunstar priorities
Do not choose upgrades by fleet name alone. Choose based on the starting kit you actually see: starting squadrons, Gunstar weapons, civilian ships, and resource pressure.
| Starting kit | Upgrade first | Why |
|---|---|---|
| Balanced starter fleet | Viper + Raptor + flak stability | A balanced start usually needs reliability before specialization. |
| Squadron-heavy start | Squadron survivability or an extra squadron dock | More squadrons only matter if they survive and can be deployed efficiently. |
| Weapon-heavy start | Weapon uptime, area control, and Gunstar hull | Strong weapons still need protection and time to fire. |
| Defensive start | Damage and interception | Too much defense without kill pressure lets enemy waves stack. |
| Economy-heavy start | Interception and civilian protection | Resource ships only pay off if they survive multiple jumps. |
| Low-resource start | Starting resources, fuel POIs, and repairs | Bad economy makes every mistake more expensive. |
Once you confirm the exact names and starting loadouts of all four fleets, replace this table with a fleet-by-fleet version. Until then, this kit-based table is safer and more useful than guessing names.
Sector plan
Sectors 1-4: stabilize
Your goal is not to build the strongest fleet. Your goal is to stop the run from bleeding out.
Prioritize:
- one fast interceptor,
- one coverage tool,
- flak or area control,
- repairs above thresholds,
- one useful resource ship,
- hero assignment before battle.
Avoid:
- extra docks with nothing good to deploy,
- expensive R&D while ships are damaged,
- training ships when a crisis or Boss is about to hit.
Before the first Boss
Before a Boss sector, check:
| Checklist | Why |
|---|---|
| Gunstar repaired above threshold | Prevents post-fight snowball damage. |
| Civilian defense ships repaired | They are likely to absorb pressure. |
| One fast interceptor ready | Nukes and snipers cannot be ignored. |
| Flak or area control ready | Boss waves can stack quickly. |
| One emergency burst option | Heavy raiders and dense waves need panic answers. |
| Heroes assigned correctly | Do not waste damage, defense, or POI bonuses. |
| Enough Tylium | Avoid being forced into bad routes after the fight. |
Sectors 5-8: specialize
Once your core is stable, specialize.
Good directions include:
- second fighter,
- stronger Raptor control,
- extra squadron dock,
- critical threshold protection,
- stronger economy,
- hero-driven weapon synergy.
This is where damage upgrades become better, because your fleet can already survive mistakes.
Common early deaths and fixes
| Death pattern | Why it happens | Fix |
|---|---|---|
| Nuke hits the fleet | Viper was chasing the wrong target | Manual target nukes immediately; use speed/burst upgrades. |
| Snipers shred ships | You engage too late | Pre-target Dradis previews or use Raptor range. |
| Heavy raiders break through | Flak cannot kill high-hull targets | Focus fire, burst active, or saved nuke. |
| Civilian ship creates negative situations | It crossed a critical threshold | Repair before luxury R&D. |
| You run out of scrap | Too many preventable repairs | Improve interception and protect mining/resource ships. |
| You run out of Tylium | Weak routing and over-exploration | Prioritize fuel POIs and fuel heroes. |
| Boss fight snowballs | You entered damaged or without burst | Repair first, save nukes, assign heroes, bring fast interception. |
| Extra dock feels useless | You bought slots before tools | Upgrade current squadrons first. |
| Active abilities feel bad | You forget to use them | Start with passives, add actives once you pause more often. |
Loadout templates
These are not fixed builds. They show what changes between styles.
| Build style | What changes | Use when |
|---|---|---|
| Safe beginner | Keeps one interceptor, one coverage unit, one tank/control option, flak, and emergency nuke. | You are learning sectors and losing to single mistakes. |
| Aggressive fighter | Replaces some defense with a second fighter or burst unit. | You are confident with pause, targeting, and docking before FTL. |
| Defensive fleet | Adds Wolf, hull, threshold protection, and resource-ship safety earlier. | Civilian ships or Gunstar damage are your main failure point. |
| Economy route | Protects resource ships and trains them when the timeline is safe. | You survive fights but run out of resources later. |
| Boss-prep route | Delays greed upgrades to repair, save nukes, and assign heroes properly. | A Basestar or hard sector is coming soon. |
FAQ
What is the best early squadron?
The safest early pick is a Viper-type interceptor, especially Viper Mk.2, because it answers the most run-ending threats.
Is Raptor worth upgrading?
Yes. Upgrade artillery Raptor for range and damage, or jammer Raptor for control and survivability.
Is Wolf worth using?
Yes if civilian ships or the Gunstar keep taking pressure. Wolf is a taunt tank, not a DPS carry.
Should I buy R&D or repair first?
Repair first if any important ship is near a critical threshold. Buy R&D when the fleet is stable.
What should I spend Fate on first?
Prioritize Favors that improve recovery, starting resources, or durability before pure damage.
Continue Reading in the Battlestar Galactica Guide Cluster
This article is part of our Battlestar Galactica strategy cluster. Use these guides to keep learning the game's core systems and routes.
Complete combat guide for BSG: Scattered Hopes. Master FTL jumps, tactical pause, flak, nukes, and squadron tactics to defeat Cylon bosses like The Clerk.
Fleet ManagementCrisis & Fleet Management Guide: BSG Scattered HopesMaster crisis and fleet management in BSG: Scattered Hopes. Learn to handle resources, Cylon infiltrators, faction politics, morale, and civilian ships.
Progression GuideMeta Progression & Favors Guide: BSG Scattered HopesMaster meta progression in BSG: Scattered Hopes. Learn how to earn Fate Points, unlock Favors and fleets, conquer Trials, and what to upgrade first.