Game Hub
Battlestar Galactica: Scattered Hopes — Beginner Guide
The ultimate guide hub for BSG: Scattered Hopes. Learn beginner tips, combat basics, crisis management, best upgrades, and meta progression to survive.
Battlestar Galactica: Scattered Hopes is not a normal RTS where you win by clearing the battlefield. It is a survival roguelite about keeping a damaged human fleet alive long enough to jump away, patch the damage, make hard resource choices, and repeat the process before the Cylons catch you again.
The first lesson is simple:
You are not here to destroy every enemy ship. You are here to protect the fleet, survive until FTL is ready, recall your squadrons, and jump before the battle collapses.
Use this page as the main guide hub. If you are brand new, start with the first-run guide. If you already know the basics, jump directly to combat, crisis management, upgrades, or meta progression.
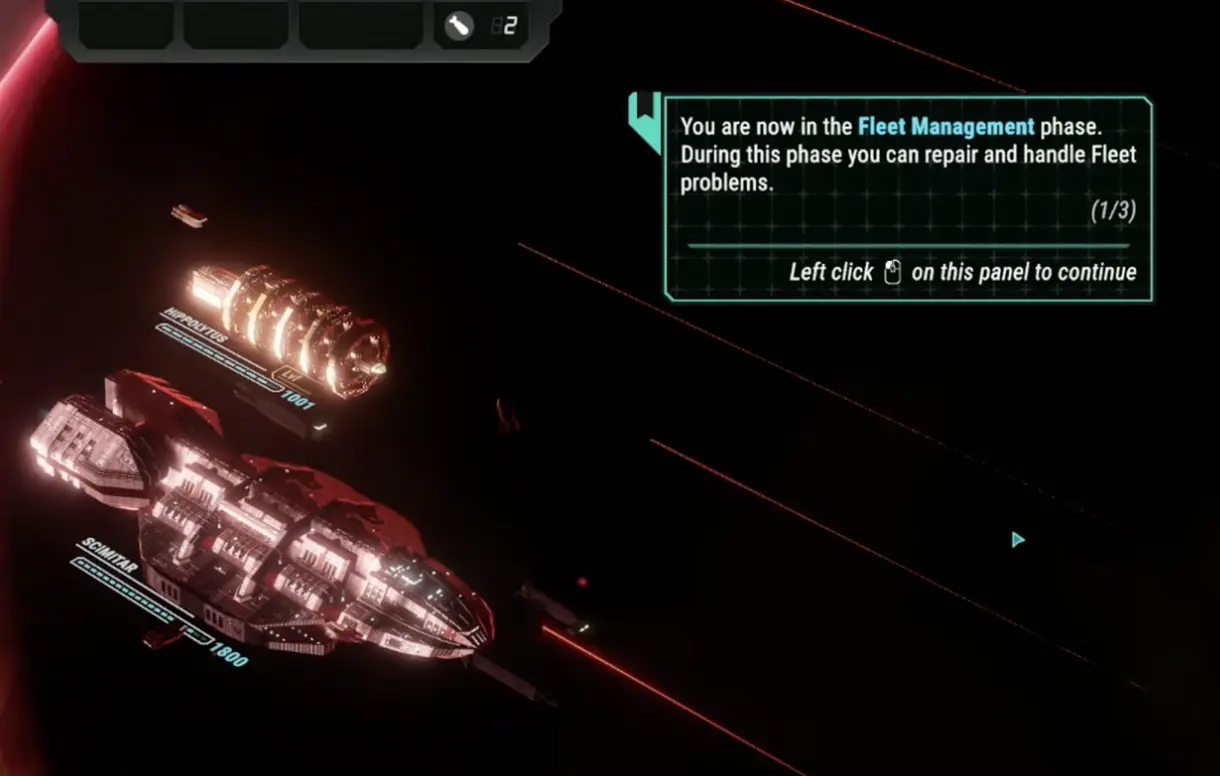
Complete guide series
| Guide | Best for | What it covers |
|---|---|---|
| How to Win Your First Run | New players after the tutorial | Run structure, first Boss preparation, sector priorities, and beginner mistakes. |
| Combat Guide | Players losing battles | Tactical pause, Dradis previews, nukes, boarders, FTL timing, Boss fights, and squadron recall. |
| Crisis and Fleet Management Guide | Players running out of resources | Situations, crises, Tylium, supplies, scrap, civilian ships, factions, and Cylon infiltrators. |
| Best Early Upgrades and Squadrons | Players unsure what to upgrade | Vipers, Raptors, Wolves, Gunstar weapons, R&D timing, and early build priorities. |
| Meta Progression Guide | Players planning future runs | Fate Points, Favors, fleet unlocks, Trials, Extinction modifiers, and long-term progression. |
Quick answer
To survive your first runs in Scattered Hopes, focus on five priorities:
- Protect Fleet Health and the Gunstar. If either collapses, the run ends.
- Do not solve every situation. Some penalties are cheaper than spending your last supplies.
- Use tactical pause constantly. Pause before missiles, nukes, boarders, split waves, and FTL exit.
- Fight to buy time, not to clear the map. Most battles are about surviving until FTL.
- Recall squadrons before jumping. Squadrons left outside during FTL can be wrecked and cost resources later.
The core loop is:
Fleet management → spend limited turns → resolve or ignore problems → prepare squadrons and weapons → survive the battle timer → FTL jump → repair and repeat
What kind of game is Scattered Hopes?
Scattered Hopes is best understood as a mix of:
- fleet survival, because your civilian ships, Gunstar, crew, and Fleet Health all matter;
- real-time-with-pause combat, because battles move in real time but should be played with frequent pausing;
- resource management, because every turn, repair, and supply decision creates a tradeoff;
- narrative roguelite progression, because failed runs still teach you and feed long-term unlocks;
- FTL-style route pressure, because you are always moving before the Cylon fleet catches you.
How a run works
After the tutorial, a full successful run follows a three-cycle structure:
| Run stage | What happens | Main pressure |
|---|---|---|
| Sectors 1–4 | Build your first stable fleet core. | Learn repairs, resources, FTL battles, and basic crises. |
| Boss 1: Nº5 The Clerk / Polyphemus | First major checkpoint. | Tests whether you prepared instead of playing greedily. |
| Sectors 5–8 | Events and combat become more demanding. | Your build needs to scale beyond basic survival. |
| Boss 2: Nº3 The Philosopher / Sphinx | Mid-run checkpoint. | Tests damage, control, support handling, and resource discipline. |
| Sectors 9–12 | Late-run pressure stacks. | Preserve Fleet Health, repair key ships, and avoid entering the final Boss damaged. |
| Boss 3: The Minister / Hyperion | Final survival check. | Spend saved resources, use your best tools, and keep the fleet alive. |
| Rejoin Galactica | Successful run completion. | The run is won by surviving the final Basestar cycle. |
Each normal sector usually includes fleet management, POI or crisis decisions, and a short FTL survival battle. A full run takes longer than the tutorial because each sector includes both management decisions and tactical combat, but the structure is always built around these three Boss cycles.
First-run priorities
Your first run is not about perfect play. It is about learning what must be protected and what can be safely ignored.
Before each battle, ask:
| Check | Why it matters |
|---|---|
| Gunstar hull | If the Gunstar dies, the run ends. Repair before dangerous thresholds. |
| Fleet Health | Repeated small losses can become a run-ending collapse. |
| Tylium | Needed for jumps and useful POIs. Do not spend it on weak rewards. |
| Supplies | Your main crisis buffer. Save enough for repairs, food, medical, and event costs. |
| Scrap | Needed for repairs and R&D. Do not upgrade while key ships are near thresholds. |
| Squadron status | Damaged or wrecked squadrons make the next FTL fight harder. |
| Hero actions | Save at least one if a crisis or expensive POI may appear. |
For the full first-run route and Boss 1 checklist, read How to Win Your First Run.
Combat basics: survive until FTL
Most early battles are escape battles. Your real objective is not to destroy every enemy. It is to survive until the FTL timer is ready, recall your squadrons, and jump.
Use this short priority list:
| Priority | Threat |
|---|---|
| 1 | Nukes |
| 2 | Boarders or special attackers |
| 3 | Missiles near key ships |
| 4 | Heavy raiders near the fleet |
| 5 | Snipers or artillery |
| 6 | Basic raider groups |
| 7 | Far enemies when FTL is ready |
Use tactical pause before the mistake happens. Pause when Dradis contacts appear, when missiles launch, when a nuke appears, when civilian ships are targeted, and during the final 20–30 seconds before FTL.
For the full two-minute combat rhythm, enemy ship modifiers, Emergency Jump costs, and Boss tactics, read the Combat Guide.
Crises and situations
Scattered Hopes constantly asks whether a problem is worth solving. The answer is not always yes.
Use this quick rule:
Fix problems that threaten the Gunstar, Fleet Health, critical thresholds, or long-term resource generation. Ignore small one-time penalties if the cost is worse.
| Problem type | Beginner response |
|---|---|
| Run-ending penalty | Fix immediately. |
| Multi-sector penalty | Usually solve if affordable. |
| Critical threshold damage | Repair if the ship matters. |
| Small one-time penalty | Consider ignoring. |
| Expensive crisis step | Use a hero action if it saves scarce resources. |
| Optional opportunity | Take only if the fleet is stable. |
For detailed crisis triage, resources, factions, civilian ships, hero morale, and Cylon infiltrator handling, read the Crisis and Fleet Management Guide.
Early upgrades and squadrons
Do not think of early upgrades as pure damage. Early upgrades should fix the thing that is actually killing your runs.
| If you are losing because… | Upgrade toward… |
|---|---|
| Missiles and nukes get through | Faster interceptors, burst damage, or better squadron control. |
| Groups overwhelm you | Flak, area damage, or Raptor coverage. |
| Civilian ships keep taking damage | Hull, repairs, Wolf-style defense, or better target priority. |
| You run out of resources | Civilian ship training, POI bonuses, or economy tools. |
| Ships create negative situations | Repairs, hull, or critical threshold protection. |
For Viper Mk.2 vs Mk.7, Raptor artillery vs jammer, Wolf taunt, Gunstar weapons, R&D priorities, and upgrade trade-offs, read the Best Early Upgrades and Squadrons Guide.
Meta progression basics
Scattered Hopes is a roguelite, so failure is not wasted. Failed runs still teach crisis outcomes, enemy priorities, reward choices, and long-term unlock planning.
The safest early meta priority is:
buy forgiveness first, then resources, then durability, then damage.
| Meta focus | Why it helps |
|---|---|
| Retry or recovery effects | One bad tactical mistake stops ending the whole run. |
| Starting resources | Early crises and repairs become less punishing. |
| Fleet durability | You get more room to learn before the run collapses. |
| Economy support | Strong once you survive long enough for it to pay off. |
| Squadron consistency | Useful if battles are your main failure point. |
For Fate Points, Favors, fleet unlocks, Trials, Extinction modifiers, and demo progress carry-over, read the Meta Progression Guide.
Scattered Hopes vs FTL
Scattered Hopes has the same kind of pressure that makes FTL stressful: limited resources, hard route decisions, and a stronger enemy force pushing you forward.
The main difference is tactical control. In FTL, much of the battle pressure comes from system targeting, crew movement, and ship management. In Scattered Hopes, the battlefield itself is more active. You are positioning squadrons, reading Dradis previews, intercepting nukes, using flak, and deciding when to recall before FTL.
If you like FTL because of hard choices and survival pressure, Scattered Hopes fits that space. If you dislike real-time positioning, its combat may feel more demanding.
Scattered Hopes vs Crying Suns
Scattered Hopes and Crying Suns share the same broad appeal: a doomed fleet, heavy atmosphere, roguelite structure, and decisions that force you to accept losses.
The difference is the combat focus. Crying Suns is more about expedition structure and tactical encounters. Scattered Hopes is more about defending a living fleet under constant pressure. It turns the Battlestar Galactica fantasy into a repeated question:
Can you keep enough people alive long enough to jump again?
If you liked the mood and long-run decisions of Crying Suns but wanted more active fleet-defense combat, Scattered Hopes is a natural next game.
Common beginner mistakes
| Mistake | Why it hurts | Fix |
|---|---|---|
| Trying to kill every enemy | You overextend and miss the FTL timing. | Fight only long enough to survive and jump. |
| Ignoring tactical pause | Battles become too chaotic. | Pause whenever a new wave, missile, or nuke appears. |
| Spending all Tylium | You lose POI and route flexibility. | Keep a fuel reserve before optional rewards. |
| Fixing every situation | You burn resources on problems you could survive. | Compare cost vs penalty first. |
| Ignoring civilian ships | You lose long-term income and fleet value. | Repair or train resource-producing ships. |
| Forgetting squadron recall | Squadrons get wrecked during FTL. | Pull them back before the timer reaches zero. |
| Over-upgrading damage | You still die to crises, thresholds, or Fleet Health loss. | Balance combat upgrades with repairs and economy. |
| Using all hero actions early | You cannot solve important crisis steps later. | Save one hero if a crisis may trigger. |
FAQ
Is Scattered Hopes hard?
Yes, but most early losses come from bad prioritization rather than impossible fights. You usually lose because you spent the wrong resource, entered battle unprepared, chased enemies too far, or ignored a crisis that snowballed.
How long is a run?
A full successful run is built around three cycles: Sectors 1–4 into Boss 1, Sectors 5–8 into Boss 2, and Sectors 9–12 into Boss 3. Each sector includes management decisions and usually a timed FTL battle.
Do I need to kill every enemy?
No. In most escape battles, your goal is to survive until FTL is ready. Kill what threatens the fleet, recall your squadrons, and jump.
Should I repair or upgrade first?
Repair first if the Gunstar, a resource ship, or a civilian defense ship is near a critical threshold. Upgrade first only when the fleet is stable and the upgrade solves a repeated problem.
What is the best early squadron?
There is no single best squadron for every fight. Vipers are strong interceptors, Raptors are good with early positioning, and Wolves help when you need tanking or taunt. Pick the squadron that solves your current failure point.
Read next
| Next guide | Use it when… |
|---|---|
| How to Win Your First Run | You want a step-by-step beginner roadmap. |
| Combat Guide | Battles, nukes, boarders, or Boss fights are killing your runs. |
| Crisis and Fleet Management Guide | Your fleet collapses between jumps. |
| Best Early Upgrades and Squadrons Guide | You do not know what to upgrade or deploy. |
| Meta Progression Guide | You want to understand Fate, Favors, Trials, fleets, and Extinction. |
Battlestar Galactica Guide Cluster
Explore the main Battlestar Galactica guides, from beginner strategy to builds, tiles, Gambits, bosses, and first-win routes.
Complete combat guide for BSG: Scattered Hopes. Master FTL jumps, tactical pause, flak, nukes, and squadron tactics to defeat Cylon bosses like The Clerk.
Fleet ManagementCrisis & Fleet Management Guide: BSG Scattered HopesMaster crisis and fleet management in BSG: Scattered Hopes. Learn to handle resources, Cylon infiltrators, faction politics, morale, and civilian ships.
Build GuideBest Early Upgrades & Squadrons: BSG Scattered HopesGuide to the best early upgrades and squadrons in BSG: Scattered Hopes. Learn Viper Mk.2 vs Mk.7 tactics, Raptor builds, resource economy, and Boss prep.
Progression GuideMeta Progression & Favors Guide: BSG Scattered HopesMaster meta progression in BSG: Scattered Hopes. Learn how to earn Fate Points, unlock Favors and fleets, conquer Trials, and what to upgrade first.