Terratech Legion Guide
Stop Dying Early in TerraTech Legion! The ULTIMATE Beginner Build Guide
Struggling in TerraTech Legion? Master early Tech builds, best weapons, block placement, and fix common mistakes to dominate your first runs!
A good TerraTech Legion build is not the biggest vehicle you can make.
A good build is a Tech that can keep moving, keep firing, and scale the weapons it actually uses. In the early game, most failed runs come from blocked weapon arcs, no rear coverage, mismatched damage boosts, too much weight, or picking parts that do not fit your character.
This guide explains how to build a stable early Tech, how corporations affect build direction, which weapon blocks fit each damage type, when to reroll, why normal blocks do not always solve health problems, and how to fix common build issues.
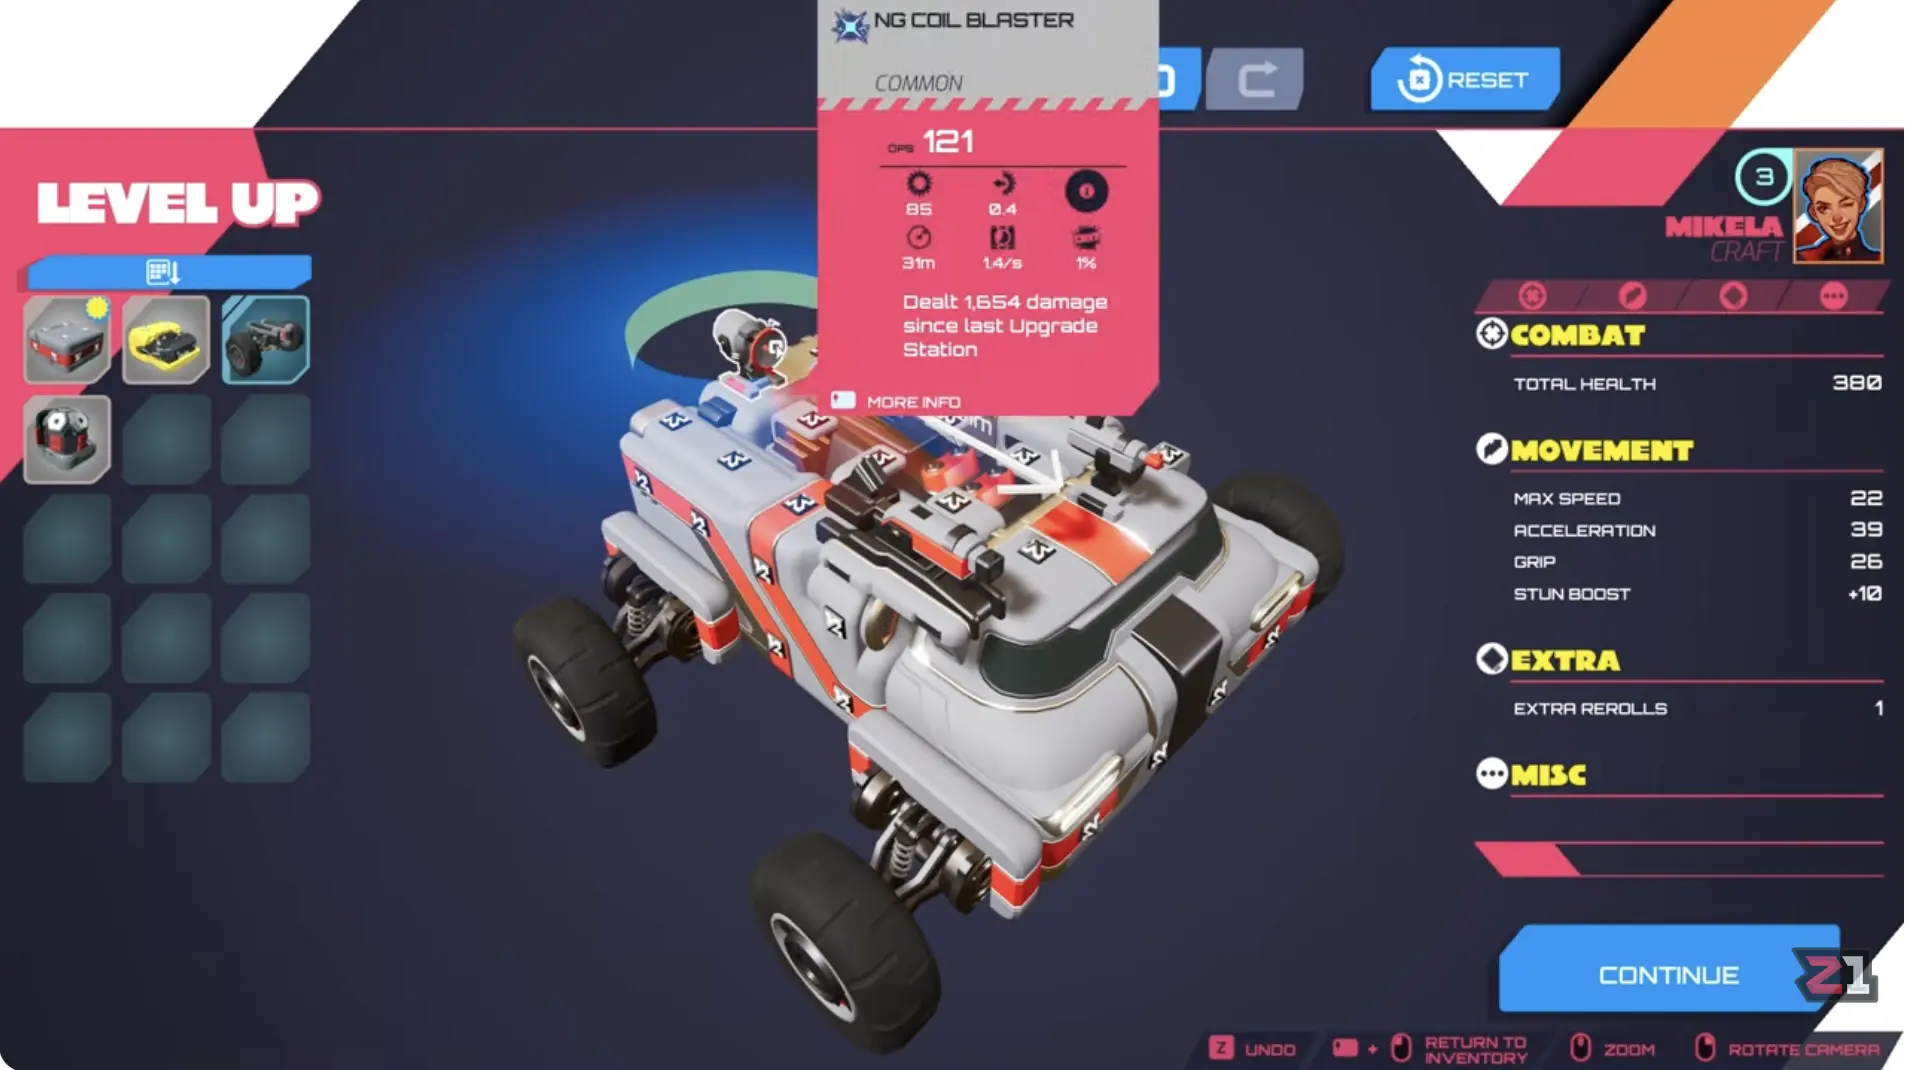
What this image shows: weapon placement is not cosmetic. The firing preview shows which directions a weapon can actually cover. If your own chassis blocks the arc, the weapon may look strong in the tooltip but perform badly in combat.
Fast Build Rules
Fast Build Rules
| If you need help with… | Short answer | Jump to |
|---|---|---|
| Choosing a corporation direction | GeoCorp = heavy/impact, Venture = speed, Hawkeye = precision, Better Future = advanced energy/control. | Corporations |
| Picking early upgrades | Take the part that fixes your current weakness, not the rarest item. | First Airdrop |
| Fixing weak damage | Match damage cores to the weapons actually carrying your run. | Damage Types and Cores |
| Fixing bad handling or blocked guns | Check weapon arcs, remove dead weight, and add wheels/grip before adding more size. | Common Build Fixes |
The Early Build Rule
Your first goal is not to create the perfect machine. Your first goal is to remove fatal weaknesses.
A stable early build needs five things:
| Need | What solves it |
|---|---|
| Damage | Weapons that actually fire and hit enemies. |
| Coverage | Front, side, rear, or 360-degree firing arcs. |
| Mobility | Wheels, grip, acceleration, boost, and turning. |
| Survival | Health, repair, armor, or damage reduction. |
| Scaling | Damage boosts that match your weapon types. |
If one of these is missing, your build can collapse even if the rest looks strong.
Corporations: Which Build Style Are You Actually Playing?
Corporations are one of the main ways TerraTech Legion pushes builds in different directions. You do not need a full corporation-only build early, but you should understand what each style is trying to do.
| Corporation / style | Early identity | Best for | Watch out for |
|---|---|---|---|
| GeoCorp | Heavy, bulky, impact-friendly, ram/tank direction. | Jean-Pierre, drills, plows, repair-heavy builds. | Slow builds need wheels, grip, and escape control. |
| Venture | Speed, mobility, control, faster repositioning. | Kiting, XP collection, fast objective routing. | Too much speed without grip can make you slide into danger. |
| Hawkeye | Advanced weapons, precision, ballistic and ranged damage. | Sam, marksman weapons, railguns, long-range boss damage. | Needs clean firing arcs and good driving to avoid pressure. |
| Better Future | Energy/plasma-style tools and advanced movement parts. | Cepheid, energy routes, control-focused builds. | Harder for beginners because handling and positioning matter more. |
Beginner corporation rule
Do not pick corporation parts only because the name sounds stronger. Pick them because they support your current character and build.
| If you are playing… | Look for… |
|---|---|
| Mikela | Balanced weapons, reroll-friendly picks, 360 coverage, explosive or ballistic scaling. |
| Jean-Pierre | GeoCorp-style health, repair, armor, drills, plows, impact damage. |
| Sam | Hawkeye-style precision, range, ballistic weapons, grip, armor, phase-friendly control. |
| Cepheid | Better Future / energy / plasma tools, control upgrades, pickup range, safe kiting support. |
Character and Build Synergy
A build is not good in isolation. It is good if it fits the character driving it.
| Character | Core mechanic | Build that fits | Build that feels bad |
|---|---|---|---|
| Mikela Craft | Stun boost and extra rerolls. | Balanced 360-degree or explosive builds that use rerolls to find clean upgrades. | Greedy narrow builds that leave her surrounded. |
| Jean-Pierre Grandier | Heavy ram/tank identity. | Impact, drills, plows, armor, repair, damage reduction. | Fragile ranged builds that do not use his close-range strength. |
| Sam Ashida | Phase boost through enemies, speed, precision direction. | Marksman, railgun, range, grip, armor, decoy-style utility. | Heavy builds that remove his ability to reposition. |
| Cepheid Swan | Advanced Better Future-style handling and energy/plasma direction. | Energy tools, control upgrades, pickup range, and safe kiting support. | Heavy, low-control builds that slide into swarms or cannot reposition. |
This is why copying one character’s build onto another can feel terrible. A Jean-Pierre ram build wants contact. A Sam build wants controlled passes and firing lanes. A Cepheid build wants enemies to chase through damage zones. A Mikela build can be more flexible because stun and rerolls cover more mistakes.
First Airdrop: What to Take and When to Reroll
Your first few airdrops decide whether the run becomes stable or messy.
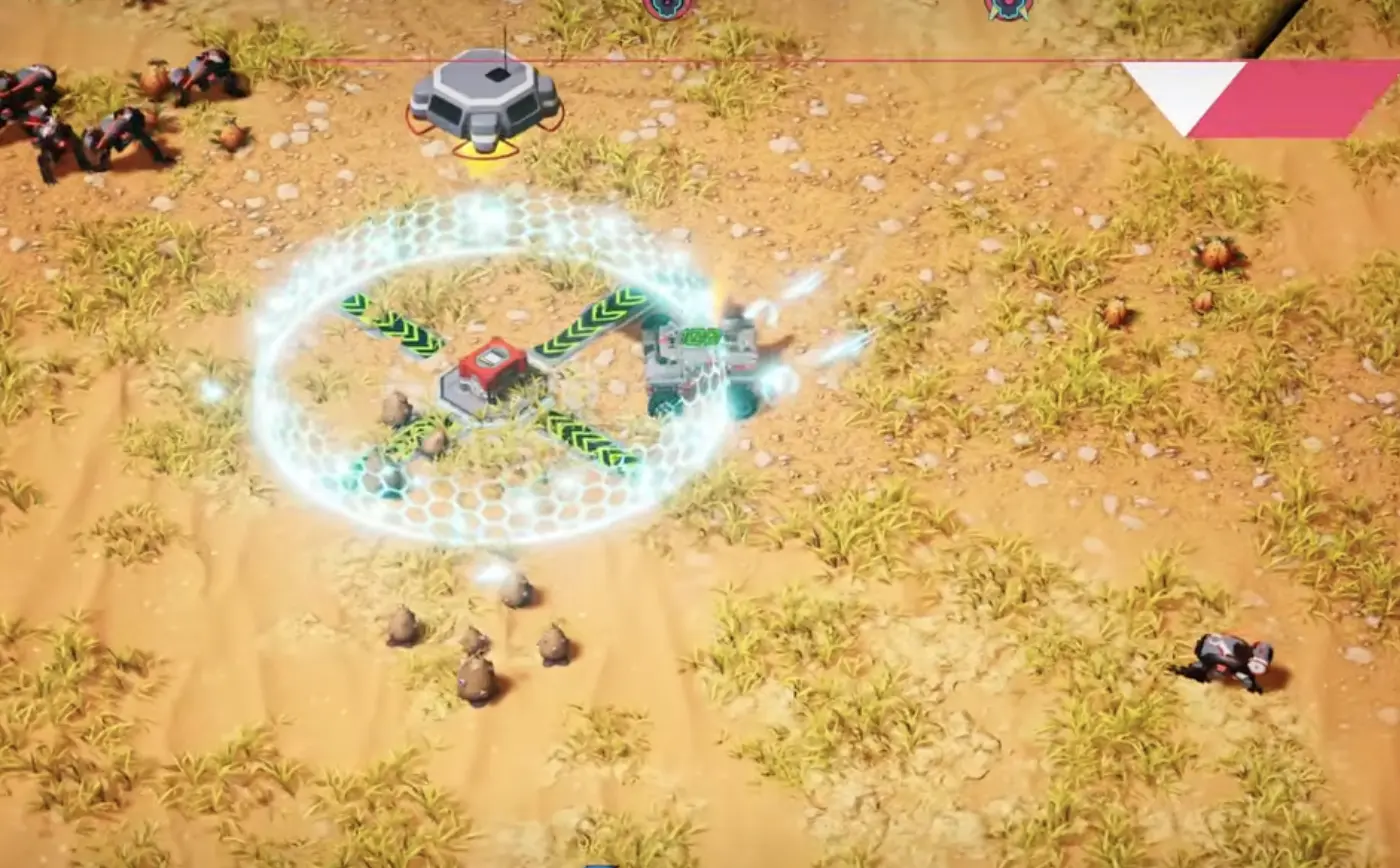
What this image shows: early choices are not just “take the rarest item.” You are choosing between movement, damage type, weapon shape, and utility. The correct pick depends on what your Tech is missing right now.
Use this take / skip table instead of blindly picking rarity.
| Choice type | Take when… | Skip or reroll when… |
|---|---|---|
| Reliable weapon | You do not have stable damage yet. | It has a firing arc you cannot use or mount cleanly. |
| Wheels / grip / acceleration | Your Tech feels slow, wide, heavy, or slippery. | You already move well and need damage badly. |
| Health / repair / damage reduction | You are taking chip damage or preparing for bases/bosses. | Your damage is too low to kill threats. |
| Pickup range / magnet | You are missing XP or taking risks to collect drops. | You already collect safely and need combat power. |
| Damage core | It boosts your main weapon type. | It boosts a type you do not currently use. |
| Huge weapon | You can mount it without blocking key weapons. | It tilts the vehicle, blocks arcs, or has no clean firing lane. |
| Extra blocks | They create useful mounting space or carry stats. | They only make the Tech bigger. |
When should you reroll?
Reroll when the screen does not solve your current build problem.
Good reroll reasons:
- None of the options match your current build direction, including weapon type, damage type, or movement needs.
- You cannot safely mount any offered weapon or block without ruining your firing arcs or balance.
- Your most urgent weakness, such as survival or mobility, is completely missing from the choices.
Bad reroll reasons:
- You are only chasing legendary rarity.
- You are skipping a boring but necessary wheel, health, repair, or grip pick.
- You already have a useful answer on the screen but want a perfect one.
Mikela is especially forgiving here because extra rerolls let her avoid dead upgrade screens more often than other characters.
Weapon Coverage: 360 vs Front-Facing
The most beginner-friendly weapons are the ones that keep working while you drive.
| Weapon style | Example blocks | Best use | Risk |
|---|---|---|---|
| 360-degree / wide-arc weapons | Coil Blaster, Utility Laser, Mining Laser, Rotary-style guns | General safety, swarms, learning the game. | Often lower focused damage than narrow weapons. |
| Front-facing burst weapons | Flak Gun, Demo Launcher, Megaton Cannon, some cannons | Bosses, turrets, structures, focused damage. | Bad if enemies reach your sides or rear. |
| Precision / long-range weapons | Rail Gun, Mass Driver, Marksman weapons | Boss damage, turret pressure, Sam-style builds. | Needs clean firing lanes and aim direction. |
| Explosive / artillery weapons | Mortar, Monster Mortar, Missile Battery, Salvo Missiles | Bases, clusters, structure clearing. | Can be awkward if mounted badly or if enemies are too close. |
| Rear tools / ground tools | Mine Layer, rear guns | Kiting, chase pressure, escape routes. | Requires enemies to follow your path or clear ground access. |
| Indirect weapons | Orbital Laser | Clusters, bases, chaotic fights. | Can be less precise against one moving target. |
| Impact tools | Plow, Roadblock Ram, Diamond Drill, Grinder, Spikes | Jean-Pierre, ram builds, close-range impact. | Dangerous if you cannot disengage. |
For beginners, the safest pattern is:
1 wide or 360-degree weapon
+ 1 focused front weapon
+ 1 rear or side coverage tool
+ enough wheels to keep moving
This is stronger than stacking three front weapons and dying to enemies behind you.
Weapon Placement and Firing Arcs
Weapon placement matters as much as weapon choice.
A weapon can have great DPS on the tooltip and still perform badly if your own vehicle blocks its firing arc.
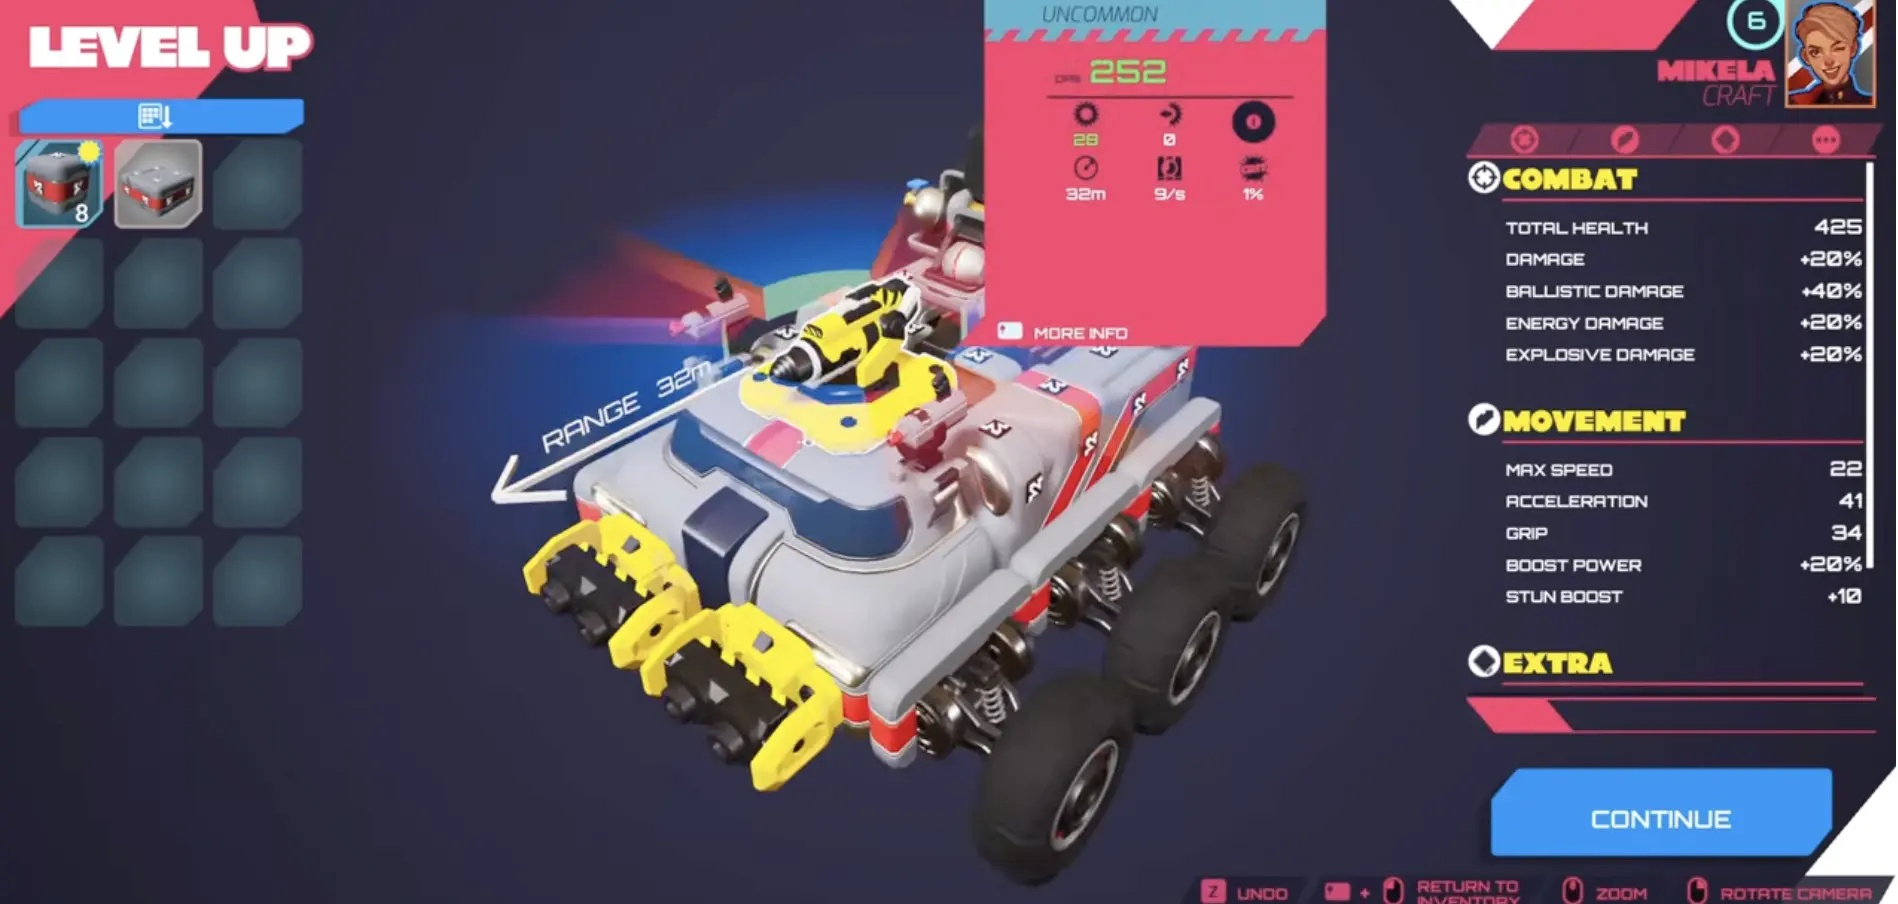
What this image shows: elevation and mounting direction can change how much of the battlefield a weapon can cover. If a laser, gun, or launcher is boxed in by your own blocks, move it higher or farther out before leaving the build screen.
Placement rules
| Rule | Why it matters |
|---|---|
| Raise 360-degree weapons when possible | Higher placement often gives them more usable arc. |
| Put front-only weapons where they can actually face forward | Do not hide them behind armor or other blocks. |
| Keep rear tools clear | Mines, rear guns, and tail weapons need their own space. |
| Do not let wheels or armor block weapons | A protected weapon that cannot fire is wasted. |
| Use side placement for wide weapons | Side weapons can cover flanks while front weapons focus bosses. |
| Check ground access for mine layers | Mine layers need a usable direction and ground access to do their job. |
Simple placement fixes
| Problem | Fix |
|---|---|
| Weapon blocked by body | Move it higher or outward. |
| Front weapon has no clear shot | Move it to the nose or remove the blocking block. |
| Side weapon cannot cover enough | Put it on a raised side mount. |
| Rear keeps getting swarmed | Add mines, a rear gun, or a 360-degree support weapon. |
| Huge weapon tilts the vehicle | Add wheels, rebalance weight, or move the weapon closer to center. |
Damage Types and Cores
TerraTech Legion rewards matching your damage boosts to your weapon types.
| Damage type | Example blocks | Best for | Core decision |
|---|---|---|---|
| Ballistic | Rail Gun, Mass Driver, Marksman weapons, cannons, some rifles | Focused shots, boss damage, long-range pressure. | Take ballistic boosts if one or more carry weapons use ballistic damage. |
| Explosive | Flak Gun, Demo Launcher, Mortar, Missile Battery, Salvo Missiles, Mine Layer | Bases, clustered enemies, structures, burst windows. | Take explosive boosts when your base clear or boss burst depends on explosive weapons. |
| Energy | Utility Laser, Mining Laser, Orbital Laser, Thunder Pop Cannon, plasma-style tools | Sustained damage, coverage, crowd control. | Take energy boosts when lasers or energy tools are doing real work. |
| Impact | Plow, Roadblock Ram, Diamond Drill, Grinder, Spikes | Jean-Pierre-style melee and collision builds. | Take impact boosts only if you are actually making contact safely. |
Before taking a damage core, ask:
How many of my important weapons benefit from this?
If three or more key weapons benefit, it is usually good. If only one weak weapon benefits, skip it. If no current weapon benefits, do not take it unless you are about to pivot immediately.
Health Blocks, Repair, and the “Normal Blocks Give No HP” Problem
A common mistake from demo players is assuming every block is a health upgrade.
In the full release, you should not treat normal blocks as automatic HP. If you want survivability, look for parts that actually provide health, repair rate, armor, damage reduction, or defensive utility.
| Survival source | What it does |
|---|---|
| Health blocks / cores | Add direct durability or health value. |
| Repair blocks | Help recover from chip damage over time. |
| Armor / damage reduction | Reduce incoming damage or improve contact survival. |
| Defensive shells / tank tools | Especially useful for Jean-Pierre-style builds. |
| Pickup range | Indirect survival because you collect XP without risky driving. |
| Decoys / utility tools | Create breathing room during bosses or swarms. |
How to tell if a block is worth adding
Ask these questions:
| Question | If yes… |
|---|---|
| Does it add health, repair, armor, or damage reduction? | It may be worth adding for survival. |
| Does it create clean weapon mounting space? | It may be worth adding for placement. |
| Does it block a major weapon arc? | Move it or skip it. |
| Does it make the Tech slower without adding value? | Skip it. |
| Is it only making the vehicle bigger? | Usually skip it. |
Bigger is not safer if the extra size does not add real stats or useful mounting space.
Mobility: Wheels, Grip, Boost, and Weight
A Tech that cannot move is not a tank. It is a target.
Early mobility matters because enemies surround you, bases trap you, and bosses punish bad steering.
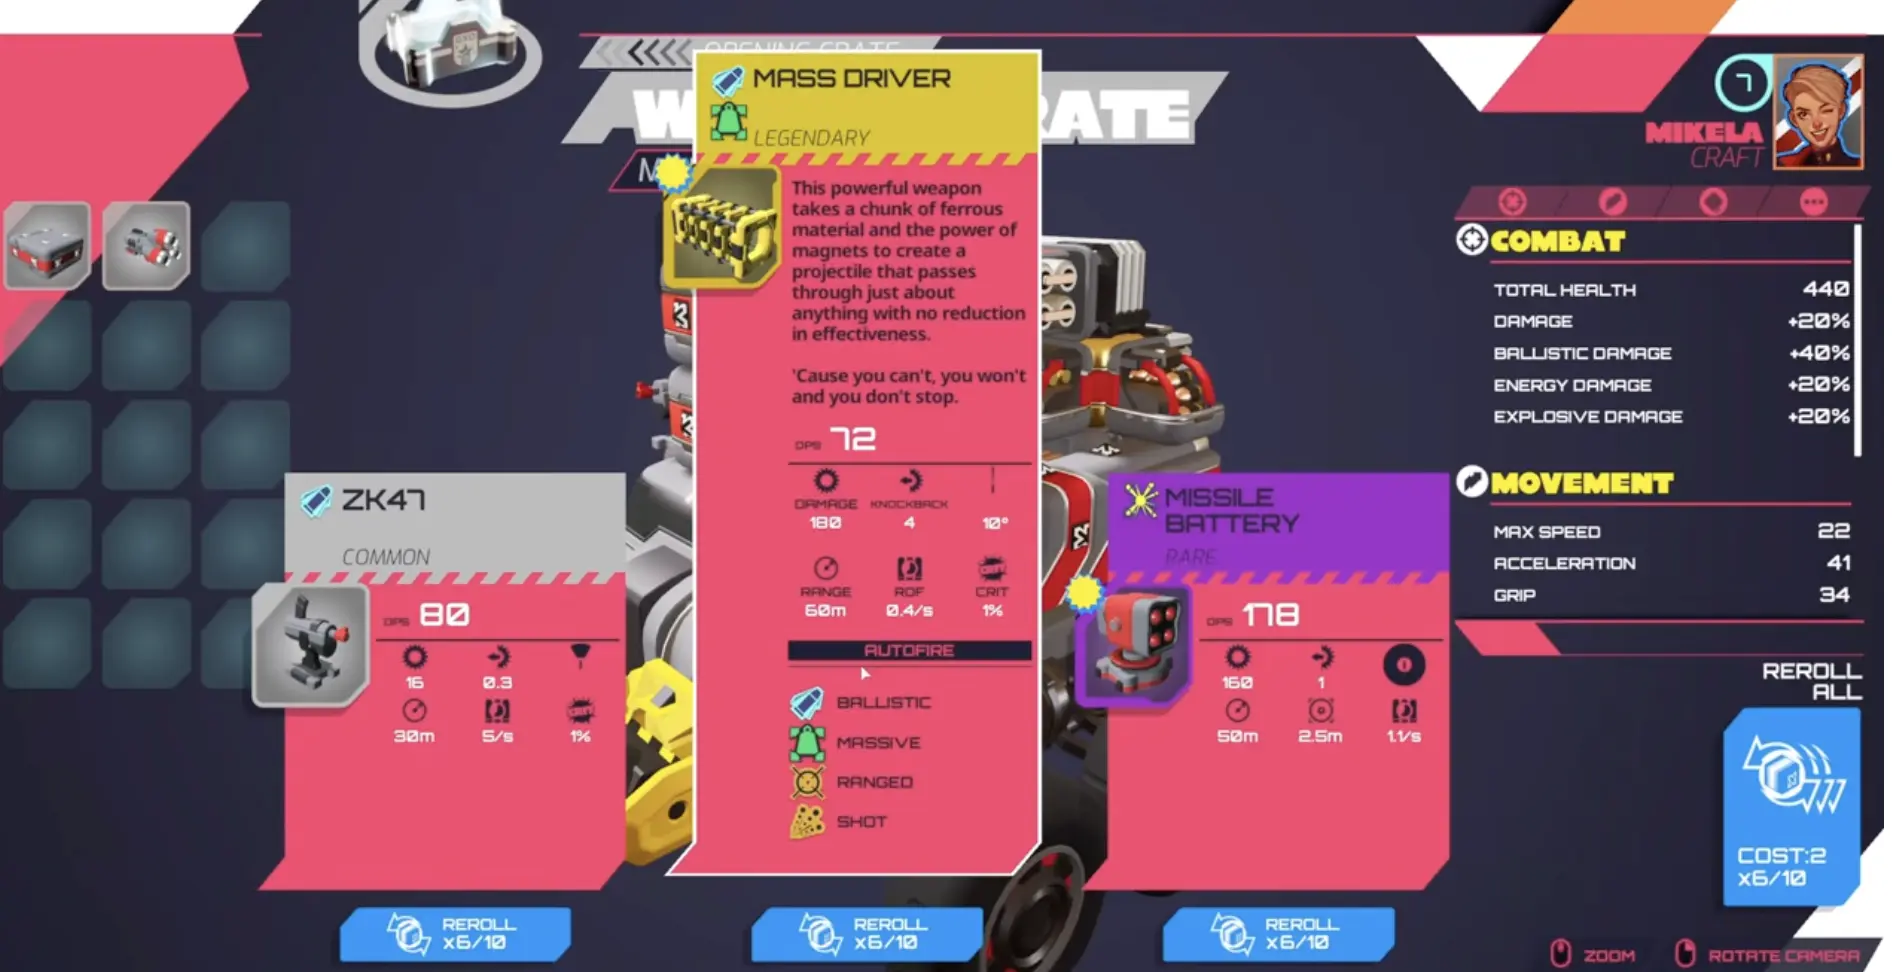
What this image shows: large weapons and wider chassis pieces create more mounting options, but they also change how the Tech handles. When a build gets wider or heavier, add wheels, grip, acceleration, or boost before the vehicle becomes impossible to control.
| Stat / part | What it helps with |
|---|---|
| Wheels | Stability, turning, vehicle support. |
| Grip | Control, especially on fast or wide builds. |
| Acceleration | Getting out of swarms and repositioning for bosses. |
| Boost power | Escaping danger or ramming when your build supports it. |
| Boost duration / recharge | More frequent safety windows. |
| Tracks / heavy wheels | Stability and tank style, often with speed tradeoffs. |
Vehicle too slow?
Fix it in this order:
- Remove blocks that do nothing.
- Add wheels or better wheels.
- Add grip or acceleration.
- Add boost power, recharge, or duration.
- Move heavy weapons closer to the center.
- Stop widening the vehicle until movement feels stable.
If your build feels strong but cannot reach crates, dodge bosses, or leave bases, it is not actually stable.
Pickup Range and Magnets
Pickup range is easy to undervalue.
In TerraTech Legion, XP and crates are often near danger. If you must drive directly through swarms to collect every drop, you will take unnecessary damage and lose time.
Pickup range helps with:
- reaching level targets
- collecting XP while kiting
- grabbing crates without entering bad terrain
- reducing risky turns
- scaling faster before the boss
For beginner runs, pickup range is not just convenience. It can be progression speed.
Example Early Build Plans
Safe beginner build
Best for: Mikela, first Dustbowl clears, learning enemy movement.
| Slot | Recommendation |
|---|---|
| Main weapon | Coil Blaster, Utility Laser, Rotary-style gun, or another wide/360 option. |
| Secondary weapon | Flak Gun, cannon, or another focused front weapon. |
| Utility | Pickup range or magnet. |
| Mobility | Wheels + grip + acceleration. |
| Survival | One health, repair, or damage reduction source. |
| Damage scaling | Match your strongest weapon type. |
Explosive base-clearing build
Best for: Dustbowl bases, outposts, structure objectives.
| Slot | Recommendation |
|---|---|
| Main weapon | Flak Gun, Demo Launcher, Missile Battery, Mortar, Mine Layer. |
| Support | 360-degree weapon to clear small enemies. |
| Mobility | Enough turning to enter and leave bases. |
| Survival | Health or repair before diving turrets. |
| Damage scaling | Explosive damage cores. |
Ballistic boss build
Best for: bosses, long-range enemies, turret pressure.
| Slot | Recommendation |
|---|---|
| Main weapon | Rail Gun, Mass Driver, Marksman weapon, cannon. |
| Support | Side or rear coverage so you can focus forward damage. |
| Mobility | Acceleration and turning for lining up shots. |
| Survival | Moderate health; avoid contact instead of tanking. |
| Damage scaling | Ballistic or precision-style boosts. |
Ram / impact build
Best for: Jean-Pierre and heavy close-range play.
| Slot | Recommendation |
|---|---|
| Main tool | Plow, Roadblock Ram, Diamond Drill, Grinder, Spikes. |
| Support | Repair, armor, health, damage reduction. |
| Mobility | Boost power and enough control to leave after contact. |
| Damage scaling | Impact damage. |
| Warning | Do not ram bases or bosses blindly if you cannot escape. |
Common Build Fixes
Use this section as the troubleshooting table.
| Problem | Likely cause | Fix |
|---|---|---|
| Build keeps tipping or steering badly | Too much weight, uneven placement, too few wheels, low grip. | Add wheels, improve grip, move heavy weapons closer to center, reduce width. |
| Vehicle is too slow | Too many blocks or weapons for the current chassis. | Upgrade wheels, add acceleration/boost, remove dead blocks. |
| Weapons are not firing | Your own body blocks the arc. | Raise the weapon, move it outward, or change the mount. |
| Dying from behind | Too much front-only damage. | Add rear coverage, mines, orbitals, wide-arc weapons, or 360 tools. |
| Damage boosts feel useless | Boosts do not match weapon types. | Check whether your carry damage is ballistic, explosive, energy, or impact. |
| Bases kill you instantly | You entered before your build had damage, repair, or an exit route. | Clear from the edge and leave before the swarm stacks up. |
| Boss takes too long | No focused damage or blocked carry weapon. | Add boss-facing damage and matching cores. |
Build Checklist Before the Boss
Before entering a boss fight, check this:
| Question | Good answer |
|---|---|
| Can my main weapon hit the boss consistently? | Yes. |
| Do I have enough mobility to reposition? | Yes. |
| Can I kill small enemies while aiming at the boss? | At least partially. |
| Are my damage cores helping my main weapons? | Yes. |
| Is my strongest weapon blocked? | No. |
| Can I survive one mistake? | Yes. |
| Do I have rear or side coverage? | Some. |
If the answer to several of these is no, take the next upgrade window to fix the build instead of chasing a flashy weapon.
FAQ
What is the best early game build in TerraTech Legion?
The safest early build is a balanced Tech with one 360-degree or wide-arc weapon, one focused damage tool, enough wheels and grip, some health or repair, and damage boosts that match your main weapon.
What is the best corporation for beginners?
Use balanced GSO-style parts and Mikela early. GeoCorp is better for tank/ram builds, Venture helps mobility, Hawkeye supports precision weapons, and Better Future is more advanced.
When should I reroll?
Reroll when all choices miss your current problem: wrong damage type, no usable weapon, no mobility, no survival, or a part you cannot mount cleanly.
Why do normal blocks not give me health?
Normal blocks are not reliable health upgrades in the full release. Look for actual health, repair, armor, or damage reduction parts if you need survivability.
Are 360-degree weapons better than front weapons?
For beginners, yes. 360-degree weapons are safer because they reduce blind spots. Front weapons can be stronger for bosses and structures once you can aim them consistently.
Why is my build so slow?
You probably added too much size or weight without enough wheels, grip, acceleration, or boost. Remove dead blocks and upgrade mobility before adding more weapons.
How can I tell if a weapon arc is blocked before leaving the build screen?
Check the firing preview around the weapon. If large parts of the arc are greyed out, blocked, or marked as poor coverage, move the weapon higher, farther outward, or onto a cleaner front/side mount before continuing.
What damage type should I build around?
Build around the damage type your strongest weapons already use: ballistic, explosive, energy, or impact. Do not take a damage core just because it is rare.
Continue Reading in the Terratech Legion Guide Cluster
This article is part of our Terratech Legion strategy cluster. Use these guides to keep learning the game's core systems and routes.
Learn how TerraTech Legion stars work, why you may be stuck after Dustbowl, how the 48-star grid is structured, and how to unlock more worlds and difficulties.
World GuideTerraTech Legion Dustbowl Guide: First World Route, Boss Tips, and Best Early BuildsLearn how to clear Dustbowl in TerraTech Legion, including the best early route, airdrop choices, base and outpost timing, first boss attack patterns, and beginner build mistakes to avoid.
Character GuideTerraTech Legion: Best Beginner Character GuideFind the best TerraTech Legion character for beginners. We cover Mikela, Jean-Pierre, Sam, and Cepheid unlocks, builds, and skill tree progression tips!
Character GuideBest Sam Ashida Sniper Build: TerraTech LegionWant to melt bosses instantly? Discover the most OP Sam Ashida build in TerraTech Legion. Master phase boost, precision weapons & crush the game!