Terratech Legion Guide
TerraTech Legion Dustbowl Guide: First World Route, Boss Tips, and Best Early Builds
Learn how to clear Dustbowl in TerraTech Legion, including the best early route, airdrop choices, base and outpost timing, first boss attack patterns, and beginner build mistakes to avoid.
Dustbowl is the first real test in TerraTech Legion.
It teaches the full loop: kill enemies, collect XP, trigger airdrops, rebuild your Tech, decide whether to attack bases, and prepare for the first boss. If you clear Dustbowl once and still feel stuck, that is normal. Dustbowl is also the first planet where you start filling the star grid with different characters.
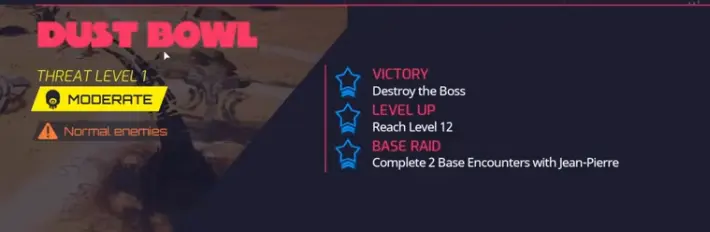
In the captured Mikela Dustbowl Easy run, the mission card asks you to destroy the boss and reach level 12. Always check your own mission card before launching, because character-specific challenges can change what you should prioritize.
Fast Answer
| Question | Answer |
|---|---|
| Best first character for Dustbowl | Mikela Craft. See Best Character for Dustbowl. |
| Best early weapon style | 360-degree or wide-arc coverage first, focused boss damage later. |
| When to attack bases | After 2–3 useful airdrops, once you have damage, mobility, and an exit route. |
| What usually kills beginners | Blocked weapon arcs, no rear coverage, and a vehicle that is too heavy to steer. |
| Boss danger | The boss can enter a spinning-top attack and the arena can pressure you with a shrinking danger zone. |
| Is Dustbowl done after one clear? | No. A clear is tied to character + planet + difficulty. Other characters can still earn Dustbowl stars. |
Dustbowl Clear Objective
Dustbowl is objective-based. Do not treat it like a pure endless survival map.
For the first Mikela clear shown in available footage, the Dustbowl Easy objective is:
| Objective | What it means |
|---|---|
| Destroy the boss | You need enough focused damage and enough control to survive the boss arena. |
| Reach level 12 | You need XP routing, crates, magnets, and enough enemy kills before the boss finish. |
The practical lesson is:
Do not spend the whole run farming randomly. Route toward XP, airdrops, POIs, and the boss objective.
If your own mission card shows a different challenge, follow that mission card. The route below still works as a beginner structure, but your priority may change.
Recommended Dustbowl Route
Use this route for a stable first clear.
| Run phase | What to do | What to avoid |
|---|---|---|
| Opening | Kill nearby enemy packs and grab easy crates. | Driving straight into bases before your first real weapon. |
| First airdrop | Take a weapon that works immediately. 360-degree or wide-arc weapons are safer than narrow weapons. | |
| Early build | Add wheels, grip, health, repair, or pickup range. | Adding size before your Tech can turn and escape. |
| First POI | Move toward a nearby question mark, outpost, silo, or upgrade marker. | Crossing the whole map for a vague reward. |
| Mid-run spike | Clear a base or outpost if your build is stable. | Entering a walled base with no exit route. |
| Pre-boss | Fix rear coverage and matching damage boosts. | Chasing distant crates if the boss or objective is near. |
| Boss | Keep distance, avoid the spin, and burst during safe windows. | Face-tanking the boss or driving outside the arena. |
First Airdrop Priorities
Airdrops are where Dustbowl runs are won or lost. Each level-up gives you a chance to pick parts and rebuild your vehicle.
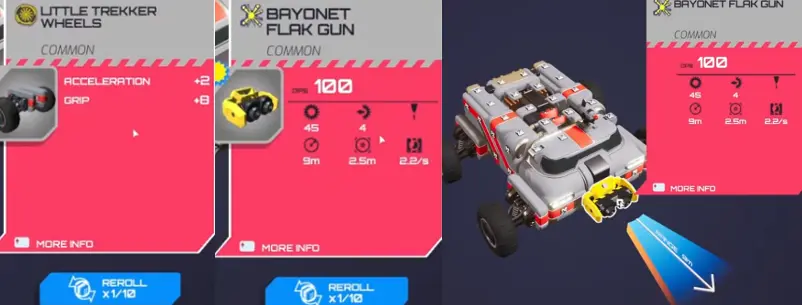
For the first few airdrops, prioritize reliability over rarity.
| Priority | Good early choices | Why |
|---|---|---|
| 1 | 360-degree weapons, wide-arc weapons, or simple front guns | You need damage that works immediately. |
| 2 | Wheels, grip, acceleration, boost | Dustbowl punishes vehicles that get surrounded. |
| 3 | Health, repair, damage reduction | Lets you survive early mistakes and base pressure. |
| 4 | Pickup range / magnets | Helps you reach level targets without risky driving. |
| 5 | Matching damage cores | Good only if they match your actual weapons. |
| 6 | Odd legendary parts | Take them only if you can mount and use them cleanly. |
Best early weapon logic
For a first Dustbowl clear, do not chase the highest tooltip DPS blindly.
| Weapon type | Dustbowl use |
|---|---|
| 360-degree weapons | Best beginner safety because they reduce blind spots. |
| Front-facing burst weapons | Strong for bosses and structures if you can aim them. |
| Explosive weapons | Good for bases, clustered enemies, and structure pressure. |
| Ballistic weapons | Good for long-range boss or turret damage. |
| Energy weapons | Good sustained coverage if you can support the damage type. |
| Mines / rear tools | Useful if enemies keep chasing or body-blocking you. |
A safe beginner pattern is:
One reliable 360-degree weapon + one focused front weapon + enough wheels to keep moving.
Bases and Outposts
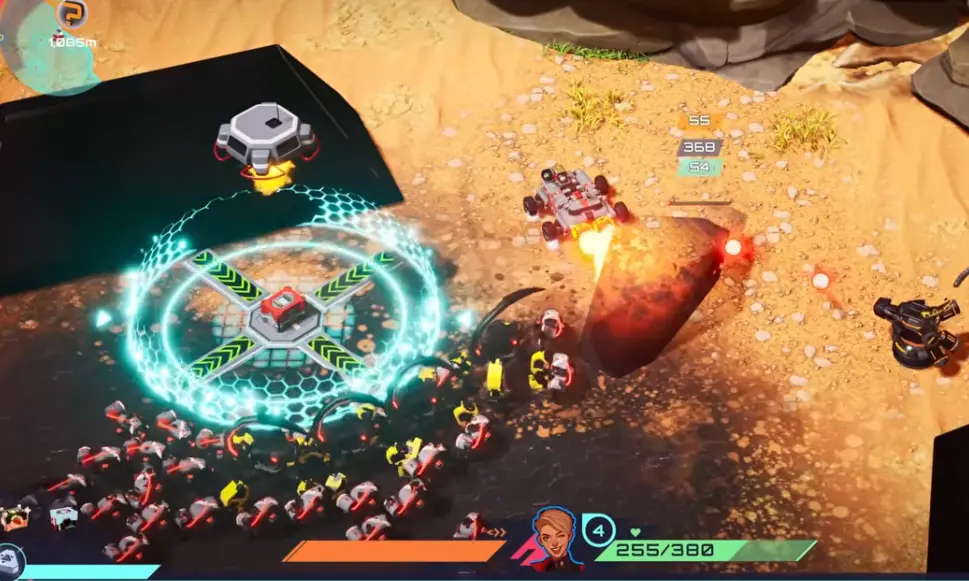
Dustbowl bases and outposts can be worth it because they can provide strong reward crates and build spikes. They are also where many beginner runs collapse.
Do not attack a base just because it appears on the minimap. Attack it when your Tech can actually survive the first 10 seconds inside.
Base attack checklist
Enter a base only if you have at least three of these:
| Requirement | Why it matters |
|---|---|
| A real damage source | Turrets, shield walls, and structures take time to remove. |
| Side or rear coverage | Enemies will still chase you while you hit base parts. |
| Escape mobility | You need to reverse, turn, or boost out if the base floods. |
| Health, repair, or damage reduction | Base fights usually cause chip damage. |
| A clear entry angle | Walled bases can trap you if you drive straight into the center. |
How to clear a base safely
The safest beginner method is edge clearing.
- Approach from the outside.
- Kill small enemies before they body-block you.
- Remove shield walls or exposed turrets first.
- Do not park in the middle of the base.
- Grab the reward crate or objective item.
- Leave before the swarm stacks up.
Explosive weapons, long-range ballistic weapons, and indirect tools are especially useful because they let you damage structures without committing your whole vehicle into the base.
Dustbowl POI Priority
Not every POI is equally important. If time is limited, prioritize the POI that fixes your current run.
| Priority | POI / marker | When to take it | Why |
|---|---|---|---|
| High | Airdrop / level-up upgrade | Always, unless the boss is already active and you cannot safely enter. | This is your main rebuild window. |
| High | Nearby base or outpost | Take after 2–3 useful upgrades. | High-risk, high-reward; can give major crates and build spikes. |
| High | Health pickup | Take when you are below safe health or about to enter boss/base pressure. | Healing opportunities are limited. |
| Medium | Question mark | Check when it is close to your route or before the boss timer gets tight. | Can lead to useful rewards, but value varies. |
| Medium | Resource silo / resource point | Take if it is nearby. | Helpful side value, but not worth ruining boss timing for. |
| Medium | Tactical Overcharge | Use before a fight, base, or boss window. | Temporary power is strongest when converted into damage or safety. |
| Low | Distant loose crate | Skip if boss pressure or objective timing is close. | A far crate can waste more time than it is worth. |
The simple rule is:
Do the closest useful thing that moves your run toward the objective.
Do not cross the entire Dustbowl map for a vague icon if you still need level progress, boss preparation, or a base reward nearby.
Best Build for Dustbowl Easy
You do not need a perfect build to clear Dustbowl. You need a build with no fatal weakness.
A strong beginner Dustbowl build usually has:
| Build part | Why it matters |
|---|---|
| Front damage | Helps with bosses, turrets, and structures. |
| 360-degree or side coverage | Prevents enemies from living in your blind spots. |
| Rear protection | Mines, rear guns, orbitals, or wide weapons stop chase pressure. |
| Enough wheels and grip | Lets the vehicle turn and escape. |
| One matching damage type | Damage cores matter more when they support your actual weapons. |
| Some health, repair, or reduction | Prevents one mistake from ending the run. |
Do not overbuild
Do not attach every block just because you have space.
In the full release, normal block stacking is not the same as simply adding free health forever. You need to build with intent: use stat blocks, wheels, weapons, and support parts because they solve a problem, not because they make the vehicle bigger.
A smaller Tech with clean firing arcs and matching damage boosts is often stronger than a huge Tech that cannot turn.
Dustbowl Boss Guide
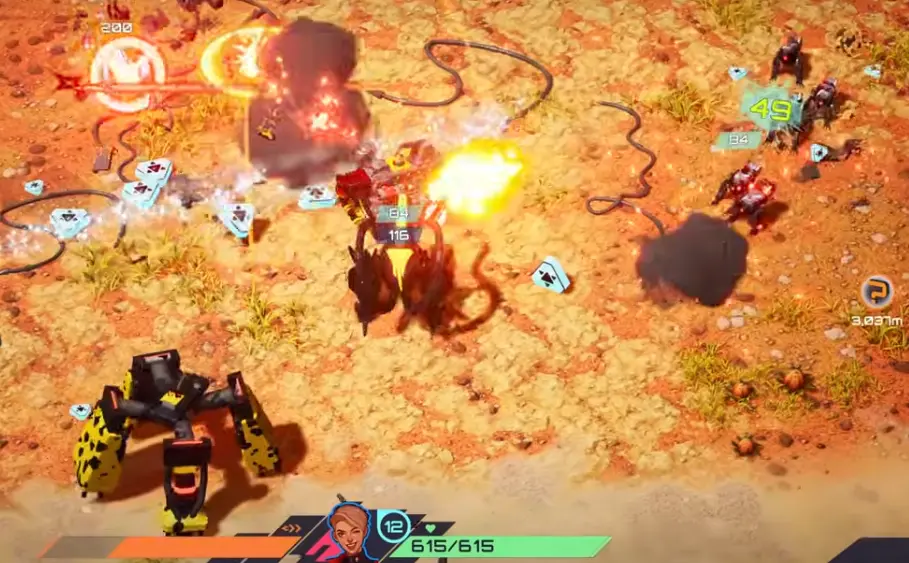
The Dustbowl boss is not just a DPS check. It tests whether your vehicle can aim damage, avoid contact, and stay inside the arena pressure.
Boss behavior to watch for
| Boss behavior | What it looks like | What to do |
|---|---|---|
| Direct chase / contact pressure | The boss stays close and tries to force collision or contact damage. | Keep it in weapon range but do not let it sit on top of you. |
| Spinning-top attack | The boss enters a spinning movement pattern and becomes dangerous to touch. | Stop trying to ram. Turn away, widen the gap, and let ranged/360 weapons work. |
| Arena pressure / danger circle | The fight area becomes less forgiving; going outside the safe zone can cause heavy damage or explosions around the edge. | Stay inside the circle and reverse/steer instead of panic-driving outward. |
| Low-health commit window | The boss is nearly dead and you can line up burst damage. | Commit only if you have health and a clean firing angle. Otherwise reposition first. |
The clearest danger signal is the spinning-top movement. When the boss starts spinning, treat it as a “do not touch” phase. You can still damage it, but do it with ranged, explosive, orbital, mine, or 360-degree coverage instead of face-tanking it.
How much damage do you need?
You do not need a perfect legendary build, but you do need at least one weapon plan that can actually hit the boss consistently.
Good boss damage tools:
| Tool | Why it helps |
|---|---|
| Front burst weapons | Strong when you can line up the boss. |
| Long-range ballistic weapons | Let you hit while keeping space. |
| Explosive launchers / mortars | Good if the boss and adds cluster together. |
| 360-degree support weapons | Keep dealing damage while you steer. |
| Mines / rear tools | Help when kiting or reversing away from the boss. |
| Matching damage cores | Turn a good weapon into a boss-killing weapon. |
If the boss takes too long, your problem is usually one of these:
- your main weapon arc is blocked
- your damage boost does not match your weapon type
- you are spending the whole fight running instead of firing
- your vehicle is too slow to create safe attack windows
- you have only swarm clear and no focused boss damage
When to abandon a boss attempt
Do not throw the run just because the boss spawned.
Back off and recover if:
| Situation | Better choice |
|---|---|
| Your health is low and there is a nearby health pickup | Grab the health first. |
| Your weapons are blocked or facing the wrong way | Reposition instead of ramming. |
| You are outside or near the edge of the danger circle | Re-enter the safe area before attacking. |
| You cannot turn fast enough to aim | Use 360-degree/rear tools and avoid contact until the boss gives you a better angle. |
| A crate or upgrade is right beside you and safe | Take it if it gives health, damage, or mobility before the final commit. |
Boss fight rules
Use these rules during the fight:
- Keep the boss at the edge of your strongest weapon range.
- Avoid contact during the spin.
- Stay inside the safe arena area.
- Use front burst only when the boss is lined up.
- Let 360-degree, mine, orbital, or rear tools handle smaller enemies.
- Do not chase distant crates once the boss is active unless you need health or XP immediately.
If the boss is almost dead, commit carefully. If your health is low and your weapon arcs are blocked, back off and reposition instead of panic-ramming.
Dustbowl on Medium and Hard
This page focuses on Dustbowl Easy because that is the first progression wall most players hit.
For Medium and Hard, the same core rules still apply, but the margin for mistakes is smaller:
| Difficulty | What changes in practice |
|---|---|
| Medium | You should enter with better star progression, stronger character upgrades, and cleaner build habits. Poor mobility and blocked weapons become much more punishing. |
| Hard | Treat bases and boss windows more carefully. You need a clearer damage plan, stronger survival tools, and less greed in routing. |
Until you have direct mission-card confirmation for your current version, check the displayed Dustbowl Medium or Hard objectives before launching. Do not assume the Easy route will carry you if the higher difficulty asks for different objectives or gives less room for mistakes.
Recommended Dustbowl Character Order
If your goal is to fill Dustbowl stars efficiently, use this order.
| Order | Character | Why |
|---|---|---|
| 1 | Mikela Craft | Safest first clear. Stun and rerolls make the run forgiving. |
| 2 | Jean-Pierre Grandier | Good second Dustbowl clear if you can handle ram/tank builds. |
| 3 | Sam Ashida | Strong once unlocked, but needs better control and phase timing. |
| 4 | Cepheid Swan | Save for later. Hover drift and plasma trail damage are harder to learn on Dustbowl. |
This order is not mandatory, but it gives most players the smoothest path: learn the planet with Mikela, fill more early stars with JP, then return with Sam and Cepheid once your build knowledge is better.
Common Dustbowl Mistakes
Mistake 1: Diving the first base too early
A base can give great rewards, but only if you survive. Wait until your build has enough damage and mobility.
Mistake 2: Taking damage boosts with no matching weapons
Explosive damage does not help if your carry weapons are energy or ballistic. Match the upgrade to the weapons doing the work.
Mistake 3: Ignoring level progress
If the mission requires a level target, you need XP. Pickup range, magnets, safe enemy routing, and POI choices all matter.
Mistake 4: Leaving the rear empty
Dustbowl swarms wrap around you. A front-only build can kill bosses and still die to normal enemies.
Mistake 5: Building too wide without enough wheels
A wide Tech gives more mounting space, but it also needs turning and speed. If you cannot steer, the build is not ready.
Dustbowl Clear Checklist
Before calling a Dustbowl run “ready,” check this:
| Question | Good answer |
|---|---|
| Do I know the mission objective? | Yes, I checked the mission card. |
| Do I have a reliable first weapon? | Yes. |
| Can I shoot behind or beside me? | At least partially. |
| Can I turn and escape when surrounded? | Yes. |
| Did I match damage boosts to my weapons? | Yes. |
| Can I clear a base from the edge? | Yes, or I will skip it. |
| Am I close to the level target? | Yes, or I know where to get XP. |
| Can I fight the boss without panic-driving outside the arena? | Yes. |
FAQ
What is the Dustbowl objective?
For the captured Mikela Dustbowl Easy run, the objective is to destroy the boss and reach level 12. Check your mission card before launching in case your character challenge or current version displays a different objective.
Who is the best character for Dustbowl?
Mikela Craft is the best first Dustbowl character. For star filling, use Mikela first, then JP, then Sam, then Cepheid.
When should I attack Dustbowl bases?
After 2–3 useful airdrops, once you have damage, mobility, and an escape route. Do not drive straight into a base at the start of the run.
What weapons are best for Dustbowl?
For beginners, 360-degree weapons and wide-arc weapons are safest. Explosive and long-range ballistic weapons are especially useful for bases, structures, and boss damage.
How do I beat the Dustbowl boss?
Avoid the spinning-top attack, stay inside the safe arena area, and use ranged or wide-arc damage instead of ramming during dangerous contact phases.
Why did I clear Dustbowl but not unlock everything?
Because stars are tied to character + planet + difficulty combinations. Clearing Dustbowl once only fills one part of the grid.
Should I farm enemies or rush objectives?
Do both, but with purpose. Farm enough XP to meet level requirements and strengthen your build, then route toward POIs, bases, and the boss objective.
What kills most first Dustbowl runs?
Overbuilding, poor turning, blocked weapons, no rear coverage, and entering bases before the vehicle is ready.
Continue Reading in the Terratech Legion Guide Cluster
This article is part of our Terratech Legion strategy cluster. Use these guides to keep learning the game's core systems and routes.
Learn how TerraTech Legion stars work, why you may be stuck after Dustbowl, how the 48-star grid is structured, and how to unlock more worlds and difficulties.
Build GuideStop Dying Early in TerraTech Legion! The ULTIMATE Beginner Build GuideStruggling in TerraTech Legion? Master early Tech builds, best weapons, block placement, and fix common mistakes to dominate your first runs!
Character GuideTerraTech Legion: Best Beginner Character GuideFind the best TerraTech Legion character for beginners. We cover Mikela, Jean-Pierre, Sam, and Cepheid unlocks, builds, and skill tree progression tips!
Character GuideBest Sam Ashida Sniper Build: TerraTech LegionWant to melt bosses instantly? Discover the most OP Sam Ashida build in TerraTech Legion. Master phase boost, precision weapons & crush the game!