Game Hub
Fast Progression Guide: TerraTech Legion
Unlock worlds faster and farm stars! Master TerraTech Legion with our beginner guide on early Tech builds, progression, and Corrupted Blocks.
TerraTech Legion is not just a survival arena where you drive in circles until the boss dies. It is a vehicle-building roguelite with a progression grid built around characters, planets, difficulties, and stars.
If you cleared Dustbowl Easy once and only got one or two stars, you are probably not stuck. You have only cleared one slice of the star grid.
The full star formula is:
- 4 planets × 3 difficulties × 4 characters = 48 stars
That means one clear with one character on one difficulty is only one part of the total progression map.
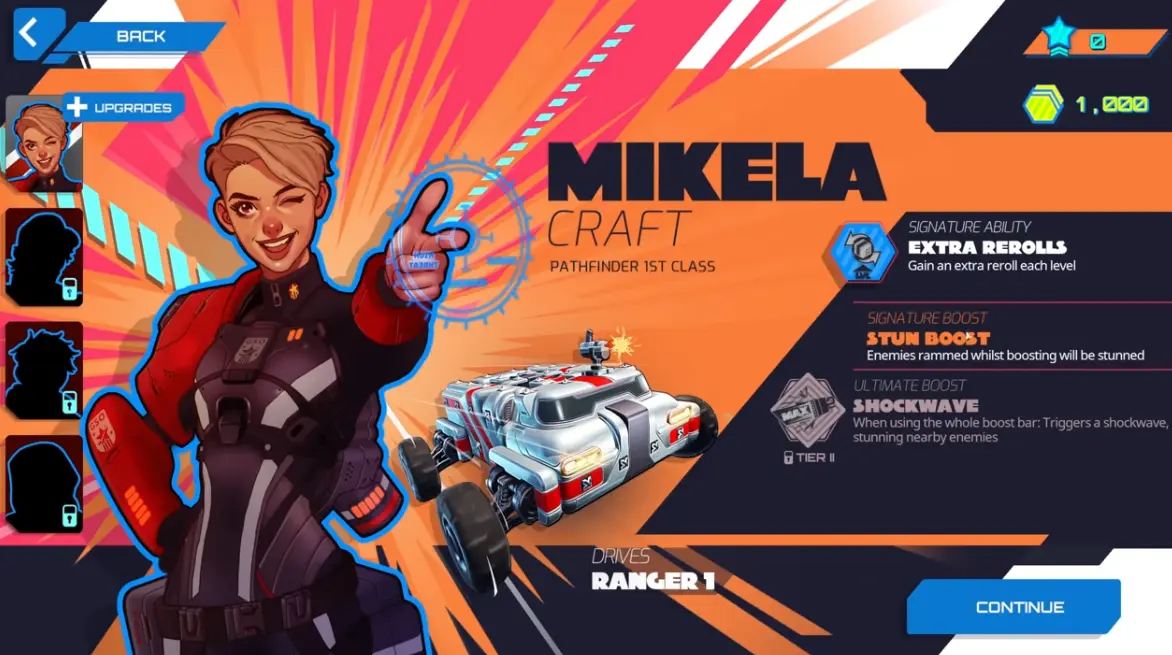
This guide focuses on what new players actually need first: how stars work, why worlds stay locked, which character to start with, when to attack bases, how to build a vehicle that does not collapse, when Corrupted Blocks are worth taking, and why some characters like Cepheid Swan feel much harder than the others.
Quick Progression Answers
Use this as a jump table if you already know what is blocking your run.
| Question | Short answer | Read more |
|---|---|---|
| Why did I only get one star? | Stars are tied to a specific character + planet + difficulty clear. | How Stars and World Unlocks Work |
| Who should I play first? | Start with Mikela Craft because stun and extra rerolls are forgiving. | Best Beginner Character |
| When should I attack bases? | Usually after 2–3 useful airdrops, once you have damage, turning, and an exit route. | Bases, Outposts, and POIs |
| Should I take Corrupted Blocks? | Only if the upside helps your current build and the curse does not hit your weakest stat. | Corrupted Blocks |
How Stars and World Unlocks Work
Stars are the most important early progression resource. They unlock new characters, worlds, and later difficulty access.
The key rule is simple:
Stars are not just tied to a planet. They are tied to the character, planet, and difficulty combination you cleared.
| Example clear | What it usually means |
|---|---|
| Mikela clears Dustbowl Easy | You get that Mikela + Dustbowl + Easy star. |
| Jean-Pierre clears Dustbowl Easy | You get a different star for the same planet and difficulty. |
| Sam clears Rotwater Basin Easy | You get a Sam-specific star for that world. |
| One character clears one world once | You do not automatically complete that world for all characters. |
This is why many players feel stuck after Dustbowl. They clear the first world, return to the map, and expect the next difficulty or world to open immediately. In reality, the game wants you to rotate through characters and planets.
Why you may be stuck after Dustbowl
| What you see | What is probably happening | What to do |
|---|---|---|
| Only one star after Dustbowl | You cleared it with one character. | Clear it with another character or move to another available Easy planet. |
| Next difficulty is locked | Higher threat levels are not opened by one clear. | Clear the early Easy planet path first. |
| Next world needs more stars | You need more character/world clears. | Rotate characters instead of repeating the same clear. |
| You completed the run but missed an objective | Some planet clears require specific run objectives. | Check the mission requirements before launching. |
For early progression, treat Easy as the onboarding layer. Do not try to brute force Medium or Hard from one Dustbowl clear. Your goal is to build enough stars across the available Easy planets first.
How a Run Works
A normal run has five phases.
| Phase | What to do | What matters |
|---|---|---|
| Opening | Kill loose enemy packs and collect early crates. | Get your first real weapon and mobility part. |
| First airdrops | Choose weapons, wheels, stat blocks, and utility parts. | Avoid dead upgrades that do not match your build. |
| Mid-run route | Move toward question marks, bases, silos, and mission targets. | Do not farm forever in one empty area. |
| Power spike | Clear a base or valuable POI once stable. | Reward crates can push your build ahead of the enemy curve. If you find a Tactical Overcharge pickup, use it when entering a base or boss phase, not while crossing empty terrain. |
| Boss / objective finish | Meet the planet objective and kill the boss. | Keep mobility and damage coverage until the end. |
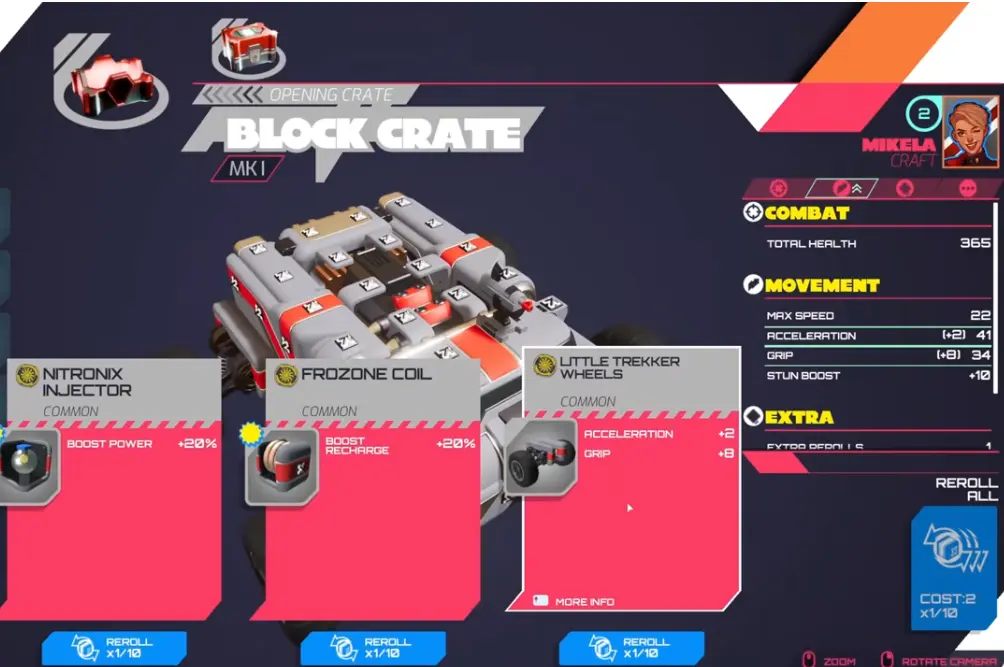
You do not rebuild freely at every second. Most meaningful rebuilding happens when you enter an airdrop, crate, or upgrade screen. That makes upgrade timing important.
A practical beginner rhythm is:
- First 1–2 airdrops: take a reliable weapon and one mobility or survivability tool.
- After 2–3 useful upgrades: start moving toward a base, outpost, or mission POI.
- Before the boss: stop greed-picking random parts and fix the obvious weakness: rear coverage, grip, health, repair, or damage type.
- During boss pressure: do not chase every XP drop. Stay alive, keep firing arcs open, and avoid terrain traps.
Dustbowl First-Clear Plan
Dustbowl teaches the basic loop: kill, level, rebuild, route to objectives, clear the boss.
The important Dustbowl lesson is that runs are objective-based, not just survival-based. Before launching, check the mission card and build toward what it asks for: boss kill, level target, base encounters, structure clears, or another displayed objective.
Do not assume that simply surviving longer will always give the star. If the planet asks you to reach a certain level, clear specific encounters, or destroy the boss, route your run around that requirement.
Best early route
| Timing | Recommended action |
|---|---|
| Start | Farm nearby enemies and grab easy crates. |
| First airdrop | Take a weapon that works immediately. 360-degree or wide-arc weapons are safer than narrow weapons. |
| Second airdrop | Add mobility, health, repair, or a matching damage boost. |
| Once stable | Head toward a question mark, outpost, base, or resource point. |
| Before boss | Fix blind spots and add enough movement to dodge or reposition. |
| Boss window | Stop greedy detours unless the reward is directly on your route. |
If you reach the boss with a giant vehicle that cannot turn, your build is not “strong.” It is just large.
Bases, Outposts, and POIs: When Are They Worth It?
Bases and outposts are worth clearing, but not at level one with a weak Tech.
The reason to clear them is that they can provide better reward crates, stronger weapons, and build-defining utility. A good base clear can give you the parts that let you outscale the run. A bad base dive can trap you between walls, turrets, and swarms.
When to attack a base
Attack a base when you have at least three of these:
| Requirement | Why it matters |
|---|---|
| One strong damage source | You need to kill turrets and structures quickly. |
| Some side or rear coverage | Enemies will keep spawning or chasing while you shoot structures. |
| Enough turning or boost | You need an exit if the base becomes crowded. |
| Health, repair, or damage reduction | You will probably take chip damage while clearing. |
| A clear route out | Do not drive into a walled base if you cannot reverse or turn out. |
Best tools for base clearing
| Tool type | Why it works |
|---|---|
| Explosive weapons | Great against clustered structures and turret groups. |
| Long-range ballistic weapons | Let you damage structures before driving too deep. |
| Orbital / indirect weapons | Useful when enemies and base parts cluster together. |
| 360-degree support weapons | Keep smaller bots off you while you focus the base. |
| Ram / drill builds | Strong only if your vehicle has enough health, repair, and escape control. |
Do not assume melee ramming is always the best base answer. It is powerful with Jean-Pierre-style tank builds, but fragile or slippery characters can get stuck inside bases and die.
Do bases respawn?
Based on available gameplay footage, cleared bases and outposts do not appear to respawn within the same run.
Treat each base as one-time value: clear it, take the reward, then move toward the next objective, POI, or boss requirement. If a later patch or direct test confirms a respawn mechanic, this section should be updated.
Best Beginner Character
Mikela Craft is the best first character because she solves the two most common beginner problems: bad upgrade rolls and getting surrounded.
| Character | Beginner rating | Practical verdict |
|---|---|---|
| Mikela Craft | Best first pick | Stun + extra rerolls make her the safest early progression character. |
| Jean-Pierre | Strong but specific | Excellent if you like ram/tank play, frustrating if you dislike slow vehicles. |
| Sam Ashida | Intermediate | Powerful phase tools, but speed-focused handling requires control. |
| Cepheid Swan | Advanced | Can win, but hover drift and plasma trail damage make her hard to learn first. |
Mikela Craft: safest early progression
Mikela is the best character for learning the game. Her boost can stun enemies, which gives you an emergency button when the swarm gets too close. Her extra rerolls also reduce the chance that a run dies because the upgrade screen offered nothing useful.
Best early plan:
- take wide-arc or 360-degree weapons
- use stun to escape, not just to ram for damage
- reroll for weapons that match your current damage cores
- build balanced coverage instead of one huge front cannon
Jean-Pierre: tank and ram specialist
Jean-Pierre starts closer to a GeoCorp-style tank identity. He wants to crash into problems with drills, spikes, plows, rams, armor, and repair.
He feels great when his build is online, but he is not automatically easy. A slow ram build with bad turning can get surrounded before it does anything useful.
Best early plan:
- stack impact tools on the front
- add repair and health early
- keep enough acceleration to disengage
- avoid pure melee if the planet has heavy ranged pressure or dangerous terrain
Sam Ashida: strong, fast, but not brainless
Sam is a high-speed marksman. His boost can phase through enemies without taking damage, but it does not phase through buildings, walls, or base structures. That single rule changes how you should drive him.
Sam’s starting Tech prioritizes speed and mobility over bulk, so he needs grip, turning, armor, and range to survive consistently.
Best early plan:
- prioritize grip and turning so the speed does not betray you
- use phase to pass through enemies, not to enter walled bases blindly
- take marksman, precision, range, and high-impact single-shot weapons
- use decoy-style tools during bosses to create breathing room
- avoid overdriving near water, walls, or base interiors
Sam can feel amazing in open areas and tight swarms, but he punishes panic steering.
Cepheid Swan: why she feels weak
Cepheid is the hardest beginner character because her damage asks you to drive differently.
Her hover tank movement has a drift feel. Her plasma trail rewards you for leading enemies through the damage path behind you rather than simply pointing guns forward and deleting targets. That creates three problems for new players:
| Problem | Why it feels bad |
|---|---|
| Hover drift | You can slide farther than intended and enter a swarm. |
| Trail-based damage | Enemies must follow your route; damage is less immediate than a gun. |
| Positioning pressure | You need to plan curves and escape lanes instead of reacting at the last second. |
Cepheid is not unwinnable. She just needs a minimum setup before she feels stable.
Minimum conditions to make Cepheid work:
- enough grip/control upgrades to stop over-sliding
- pickup range so you do not have to cut dangerous lines for XP
- a safe looping route that drags enemies through plasma trails
- at least one normal weapon or drone-style damage source to cover mistakes
- health, repair, or shield tools before diving into dense swarms
- no heavy greed picks that make movement even worse
If you play Cepheid like Mikela, she feels terrible. If you play her like a kiting character who paints damage zones behind the vehicle, she starts to make sense. Still, she is not the character to learn the game with.
Early Build Priorities
A good beginner Tech needs to do three things: keep moving, keep firing, and scale the damage type it actually uses.
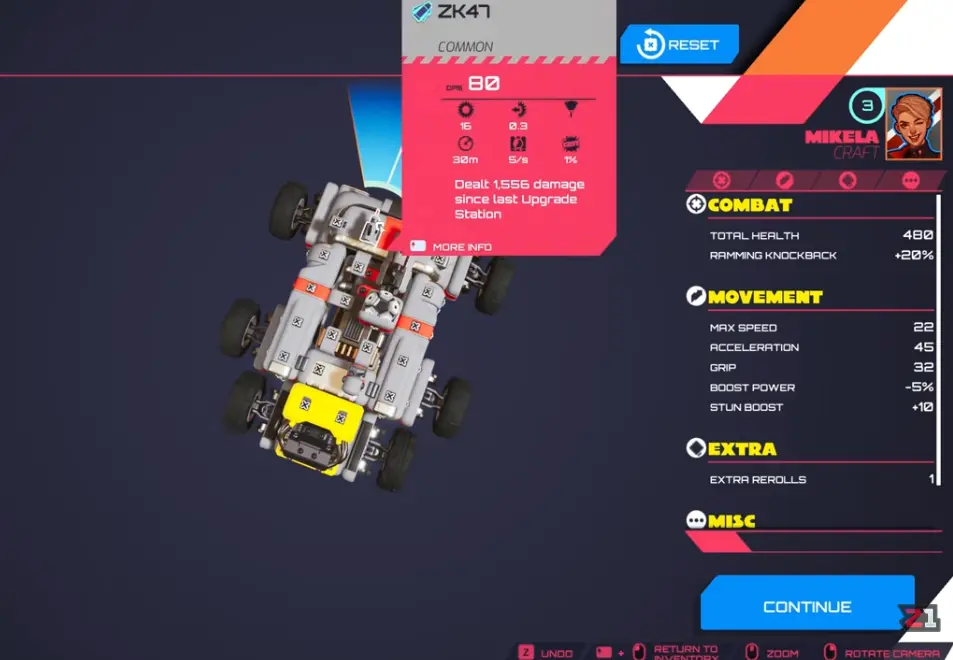
| Priority | What to take | Why |
|---|---|---|
| 1 | Reliable weapon coverage | You need damage in front, side, or rear before enemies surround you. |
| 2 | Mobility | Wheels, grip, acceleration, and boost keep large builds alive. |
| 3 | Matching damage boosts | Ballistic boosts should support ballistic weapons, not energy or explosive builds. |
| 4 | Health / repair / damage reduction | Survives mistakes, bosses, and base dives. |
| 5 | Pickup range | Lets you collect XP without driving into bad terrain or swarms. |
| 6 | Rare or strange parts | Take them only when they solve a current problem. |
Weapon coverage matters more than raw DPS
A front-only cannon can look impressive and still lose the run if enemies reach your sides and rear.
Use this quick rule:
| Your problem | Fix |
|---|---|
| Enemies reach your rear | Add a 360-degree weapon, mine layer, rear gun, or orbital. |
| Turrets outrange you | Add long-range ballistic, missiles, mortars, or indirect damage. |
| Swarms body-block you | Add wide explosive damage, stun, ram tools, or better turning. |
| Boss takes too long | Add focused front damage or matching damage cores. |
| Weapon is blocked | Raise it, move it outward, or remove the blocking block. |
Match the damage type
| Damage type | Build examples |
|---|---|
| Ballistic | Rifles, railguns, marksman weapons, precision cannons |
| Explosive | Flak guns, missiles, mortars, demo launchers, mines |
| Energy | Lasers, beams, chain lightning, plasma-style tools |
| Impact | Rams, drills, spikes, plows, collision builds |
The strongest early upgrade is often not the rarest one. It is the one that multiplies the weapons already carrying your run.Once you understand normal upgrade priorities, Corrupted Blocks are the next big decision point. They can accelerate a build, but only if the curse does not break the stats your Tech depends on.
Corrupted Blocks: Should You Take Them?
Corrupted Blocks are high-risk, high-reward choices. They can give a powerful upside, but they also come with a curse or drawback. That makes them different from normal upgrades: you are not just asking “is this strong?” You are asking “can my current build pay the cost?”
This page does not try to list every Corrupted Block by name. Instead, use this decision rule while you are still learning:
Take a Corrupted Block only when its upside improves your main win condition and its downside does not attack your weakest stat.
Common curse categories to watch for
The exact curse names and values should be checked in your current run, but most Corrupted Block decisions fall into these risk categories.
| Curse type | Why it is dangerous | Usually avoid if… |
|---|---|---|
| Mobility penalty | Less speed, turning, grip, boost, or acceleration can get you trapped. | Your vehicle is already heavy or slippery. |
| Survivability penalty | Less health, repair, armor, or more incoming damage reduces mistake tolerance. | You are about to clear a base or boss. |
| Economy / reward penalty | Fewer crate choices or worse upgrade flexibility can damage future scaling. | Your build is not online yet. |
| Handling / placement penalty | Awkward block shape or stat tradeoff can block weapons or unbalance the Tech. | You rely on clean firing arcs. |
| Damage-type lock-in | Big upside for one damage type can tempt you into a build you do not actually have. | Your weapons are mixed or underdeveloped. |
When a Corrupted Block is worth it
Take it when:
- your build already has enough mobility
- the upside boosts your main weapon type
- you have repair, armor, or health to absorb the downside
- you are behind on damage and need a spike before the boss
- the curse hits a stat you do not care about
- the block shape fits without blocking key weapons
When to skip it
Skip it when:
- you are already slow or hard to steer
- you are playing Sam or Cepheid and control is already fragile
- the curse reduces the exact stat keeping you alive
- you have not settled into a damage type yet
- you need consistency more than a high-roll spike
- the block forces you to rebuild around a worse shape
Beginner rule: if you cannot explain why the Corrupted Block helps your current build in one sentence, skip it.
Beginner Mistakes That Kill Runs
Mistake 1: Building too big too early
A huge Tech with bad wheels is a coffin. Add size only when you also add mobility.
Mistake 2: Blocking your own weapons
Weapons need firing arcs. If your own armor, wheels, or blocks cover the preview arc, the weapon may do far less than the tooltip suggests.
Mistake 3: Treating every rare part as good
A legendary weapon can still be bad for your current run if it is too heavy, the wrong damage type, or impossible to mount cleanly.
Mistake 4: Diving bases without an exit
The base reward is tempting, but walls and turrets punish bad driving. Enter from the edge and keep a way out.
Mistake 5: Repeating the same clear for progression
If you need more stars, rotate character + world + difficulty combinations. Do not repeat the exact same clear and expect the star grid to fill.
FAQ
How many stars are there in TerraTech Legion?
There are 48 main stars: 4 planets × 3 difficulties × 4 characters.
Why can I not unlock the next world?
You probably need more stars from other character, planet, or difficulty combinations. See How Stars and World Unlocks Work.
How do I unlock Medium and Hard?
Early on, focus on clearing the available planets on Easy. Higher threat levels are part of the broader progression path, not something you should expect after one Dustbowl clear.
Who should I play first?
Start with Mikela Craft. For the character breakdown, see Best Beginner Character.
Why does Cepheid Swan feel bad?
Because hover drift and plasma trail damage require planned movement instead of simple aiming. See Cepheid Swan: why she feels weak.
Should I take Corrupted Blocks?
Only if the upside helps your current build and the curse does not punish your weakest stat. See Corrupted Blocks.
When should I attack bases?
After you have damage, mobility, and an exit route. See Bases, Outposts, and POIs.
Are 360-degree weapons best for beginners?
They are usually safer because they reduce blind spots. You can still use front-facing weapons for bosses and bases, but do not leave your rear completely undefended.
What is the biggest beginner mistake?
Overbuilding: making a large Tech with blocked guns, poor turning, and no matching damage scaling.
Terratech Legion Guide Cluster
Explore the main Terratech Legion guides, from beginner strategy to builds, tiles, Gambits, bosses, and first-win routes.
Learn how TerraTech Legion stars work, why you may be stuck after Dustbowl, how the 48-star grid is structured, and how to unlock more worlds and difficulties.
World GuideTerraTech Legion Dustbowl Guide: First World Route, Boss Tips, and Best Early BuildsLearn how to clear Dustbowl in TerraTech Legion, including the best early route, airdrop choices, base and outpost timing, first boss attack patterns, and beginner build mistakes to avoid.
Build GuideStop Dying Early in TerraTech Legion! The ULTIMATE Beginner Build GuideStruggling in TerraTech Legion? Master early Tech builds, best weapons, block placement, and fix common mistakes to dominate your first runs!
Character GuideTerraTech Legion: Best Beginner Character GuideFind the best TerraTech Legion character for beginners. We cover Mikela, Jean-Pierre, Sam, and Cepheid unlocks, builds, and skill tree progression tips!
Character GuideBest Sam Ashida Sniper Build: TerraTech LegionWant to melt bosses instantly? Discover the most OP Sam Ashida build in TerraTech Legion. Master phase boost, precision weapons & crush the game!