Warhammer 40000 Guide
Mechanicus 2 Early Upgrades: Resources, Lords & Dominion
Prioritize early upgrades in Mechanicus 2 with concrete AdMech Requisition rules, Forge-Temple logic, Necron Lord routing, and Dominion thresholds.
Early upgrades in Warhammer 40,000: Mechanicus II are not one shared system. The Adeptus Mechanicus campaign asks you to manage Requisition, Forge-Temples, Archotech Fragments, and Shrine of Knowledge unlocks. The Necron campaign asks you to manage Lord availability, retinue recovery, side tasks, and Dominion scaling.
That is why the safest early rule is simple:
- AdMech: keep a Requisition buffer and unlock broader deployment options first.
- Necrons: keep your best combat Lord available and build upgrades around the retinue you actually use.
- Both: do not buy a narrow upgrade before you know which mission problem is killing your run.
The campaign-layer resource screen is where early upgrade mistakes begin: check your current economy, mission route, and long-term unlock path before spending.
Quick Start: What to Upgrade First
| If you are playing… | First priority | Safe early rule |
|---|---|---|
| Adeptus Mechanicus | Shrine technologies that improve unit access or recruitment quality | Keep roughly 20-30% of available Requisition unspent unless the mission is clearly dangerous. |
| Necrons | One primary Lord + that Lord’s retinue path | Do not send your main combat Lord on a side task before checking the next mission. |
| AdMech on higher difficulty | More bodies and safer deployment depth | Treat every extra Vigilance increase as a real cost, not a free reward. |
| Necrons on higher difficulty | Recovery and survivability before luxury damage | Reanimation helps later, but a dead unit still loses tempo now. |
This guide uses confirmed early numbers where the available material supports them. For values that can change with campaign state, difficulty, or later unlocks, use the rules as practical thresholds rather than fixed database values.
Adeptus Mechanicus: Early Resource Rules
The AdMech economy begins with Requisition. Requisition is generated by your forge holdings and spent when you recruit units for a mission. The early trap is spending like the current deployment is the whole campaign.
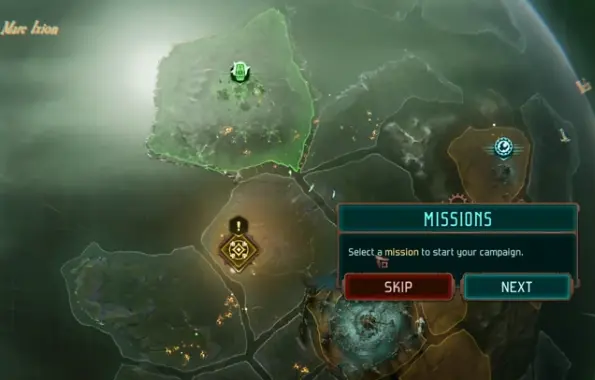
Use this screen to read your available Requisition before deployment. The number matters because every unit card you recruit pulls from the same campaign pool.
Requisition Buffer Rule
Because unit cards and mission pressure vary, there is no single universal “always keep exactly X Requisition” number. Use this practical rule instead:
| Situation | Requisition rule |
|---|---|
| Easy or standard mission | Keep roughly 20-30% unspent if possible. |
| Mission with retreat, defense, or multi-wave pressure | You can break the 20-30% buffer rule if the extra unit prevents failure or major losses. |
| You only have weak / cheap cards | Spend less and preserve the buffer. Do not force a bad roster. |
| You roll one expensive card that solves the mission | Buy it only if you still have enough bodies to protect the Leader. |
The goal is not to hoard forever. The goal is to avoid reaching the next deployment screen with no meaningful choice.
Unit Cards: The Two-Layer AdMech System
AdMech does not work like a normal fixed army list. You are managing two layers at once:
- Campaign layer: unlock better units and higher-rank options through the Shrine of Knowledge and forge progress.
- Mission layer: choose from the unit cards generated for that mission and pay their Requisition cost.
This means Shrine and Forge progression usually matter more than individual unit card luck. A stronger campaign layer improves the quality of future deployment choices, while a weak campaign layer makes even good card rolls harder to use efficiently.
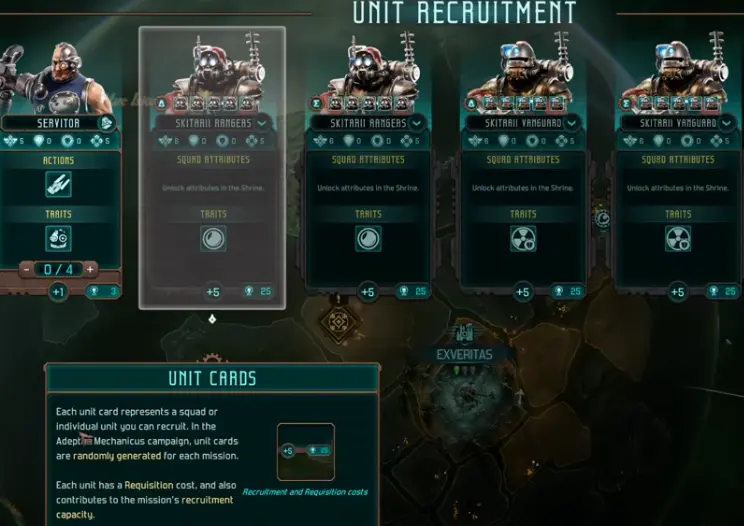
Read unit cards from top to bottom: role and stats first, then capacity pressure, then Requisition cost. A strong card is only good if the roster still has enough bodies around it.
Unit Card Decision Table
| Card situation | What to do |
|---|---|
| Cheap body, low damage | Take it if you need someone to screen for the Leader or hold space. |
| Expensive high-rank card | Take it only if it directly answers the mission objective. |
| Too many fragile ranged cards | Add a cheap screen or defensive body before buying more damage. |
| Good card but too much Requisition cost | Skip it if buying it would break your 20-30% buffer on a standard mission. |
| Bad card selection overall | Spend conservatively and win with positioning rather than forcing a perfect army. |
Shrine of Knowledge: What to Unlock First
The Shrine of Knowledge turns Archotech Fragments into campaign progress. Early Shrine choices should make future deployments more consistent.
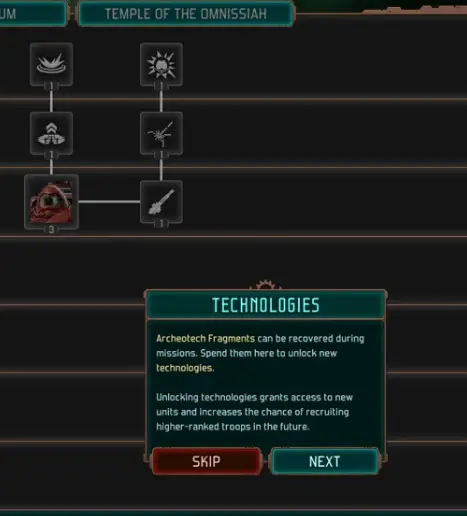
The Shrine screen shows technology nodes rather than single-mission purchases. Prioritize nodes that add unit access, improve recruitment quality, or unlock broader deployment options.
Shrine Priority Order
| Priority | Unlock type | Why it comes first |
|---|---|---|
| 1 | Unit access technologies | More unit types reduce bad card rolls and give more tactical answers. |
| 2 | Higher-rank troop access | Higher-rank cards make normal deployments stronger without relying only on Leaders. |
| 3 | Requisition efficiency or recruitment flexibility | These upgrades improve every future mission. |
| 4 | Broad defensive or support upgrades | Good if you are losing units before objectives are complete. |
| 5 | Narrow damage upgrades | Delay until you can reliably field the unit or Leader that uses them. |
If you cannot explain how an upgrade helps the next three missions, delay it.
Forge-Temples and Shrine Unlocks: How to Think About the Link
Forge-Temples and Shrine technologies should not be treated as separate goals. The practical relationship is:
Forge progress expands the campaign layer; Shrine technologies turn that expansion into better units and deployment quality.
The assignment panel shows whether a Forge-Temple is worth the tempo cost: look for technology access, Requisition income, or a clear campaign-layer reward.
Forge-Temple to Shrine Decision Table
The exact node names and unlock order can vary by campaign state, so use the reward panel rather than guessing from the map. The important thing is to read what the Forge-Temple changes before committing resources.
| Reward panel shows… | What it usually means for Shrine planning | Priority |
|---|---|---|
| New technology access or a higher technology limit | This can open a new Shrine path or let you buy stronger technologies. | Very high |
| Additional Requisition generation | This makes future deployments safer and supports more expensive unit cards. | High |
| Better unit availability or recruitment quality | This improves future card pools and reduces bad deployment rolls. | High |
| Only a local map or route benefit | Useful, but it may not improve the Shrine immediately. | Medium |
| No clear economy or technology payoff | Delay unless the mission route itself is necessary. | Low |
A common failure pattern is rushing a Forge-Temple while the army is still too thin. If the next mission forces you into a bad deployment because you spent too much to expand, the expansion did not actually speed you up.
Archotech Fragments: Spend Them on Repeatable Value
Archotech Fragments should be treated as technology progress, not bonus loot.
| Fragment use | Good early? | Why |
|---|---|---|
| Unlocks a new reliable unit type | Yes | Gives you more answers on future deployment screens. |
| Raises the quality of common troop cards | Yes | Improves ordinary missions. |
| Supports Requisition efficiency | Yes | Helps the whole campaign layer. |
| Boosts a rare or narrow unit | Later | Weak until that unit appears often enough to matter. |
| Enables a specialized build you have not tested | Later | Easy to overinvest before knowing the mission pressure. |
AdMech Failure Scenario: How Overspending Punishes You
Here is the real reason the buffer matters.
You enter an early mission with enough Requisition to build a comfortable roster. You buy the expensive card because it looks strong, then add extra bodies because the deployment screen allows it. The mission goes fine.
Then the next mission gives you awkward unit cards. You still need bodies, but your Requisition pool is low. Now your Leader has to stand forward, your Rangers cannot keep safe spacing, and your Cognition economy collapses because you are spending turns fixing bad positioning instead of executing a plan.
That is the AdMech resource spiral:
Overspend → weaker next deployment → exposed Leader → bad Cognition usage → more emergency spendingBreak the loop by keeping a buffer and upgrading broad deployment reliability first.
AdMech Leader Upgrades: Early Route Examples
Leader upgrades should reinforce the job that Leader already performs. Do not spread early upgrades across every branch just because the tree is available.
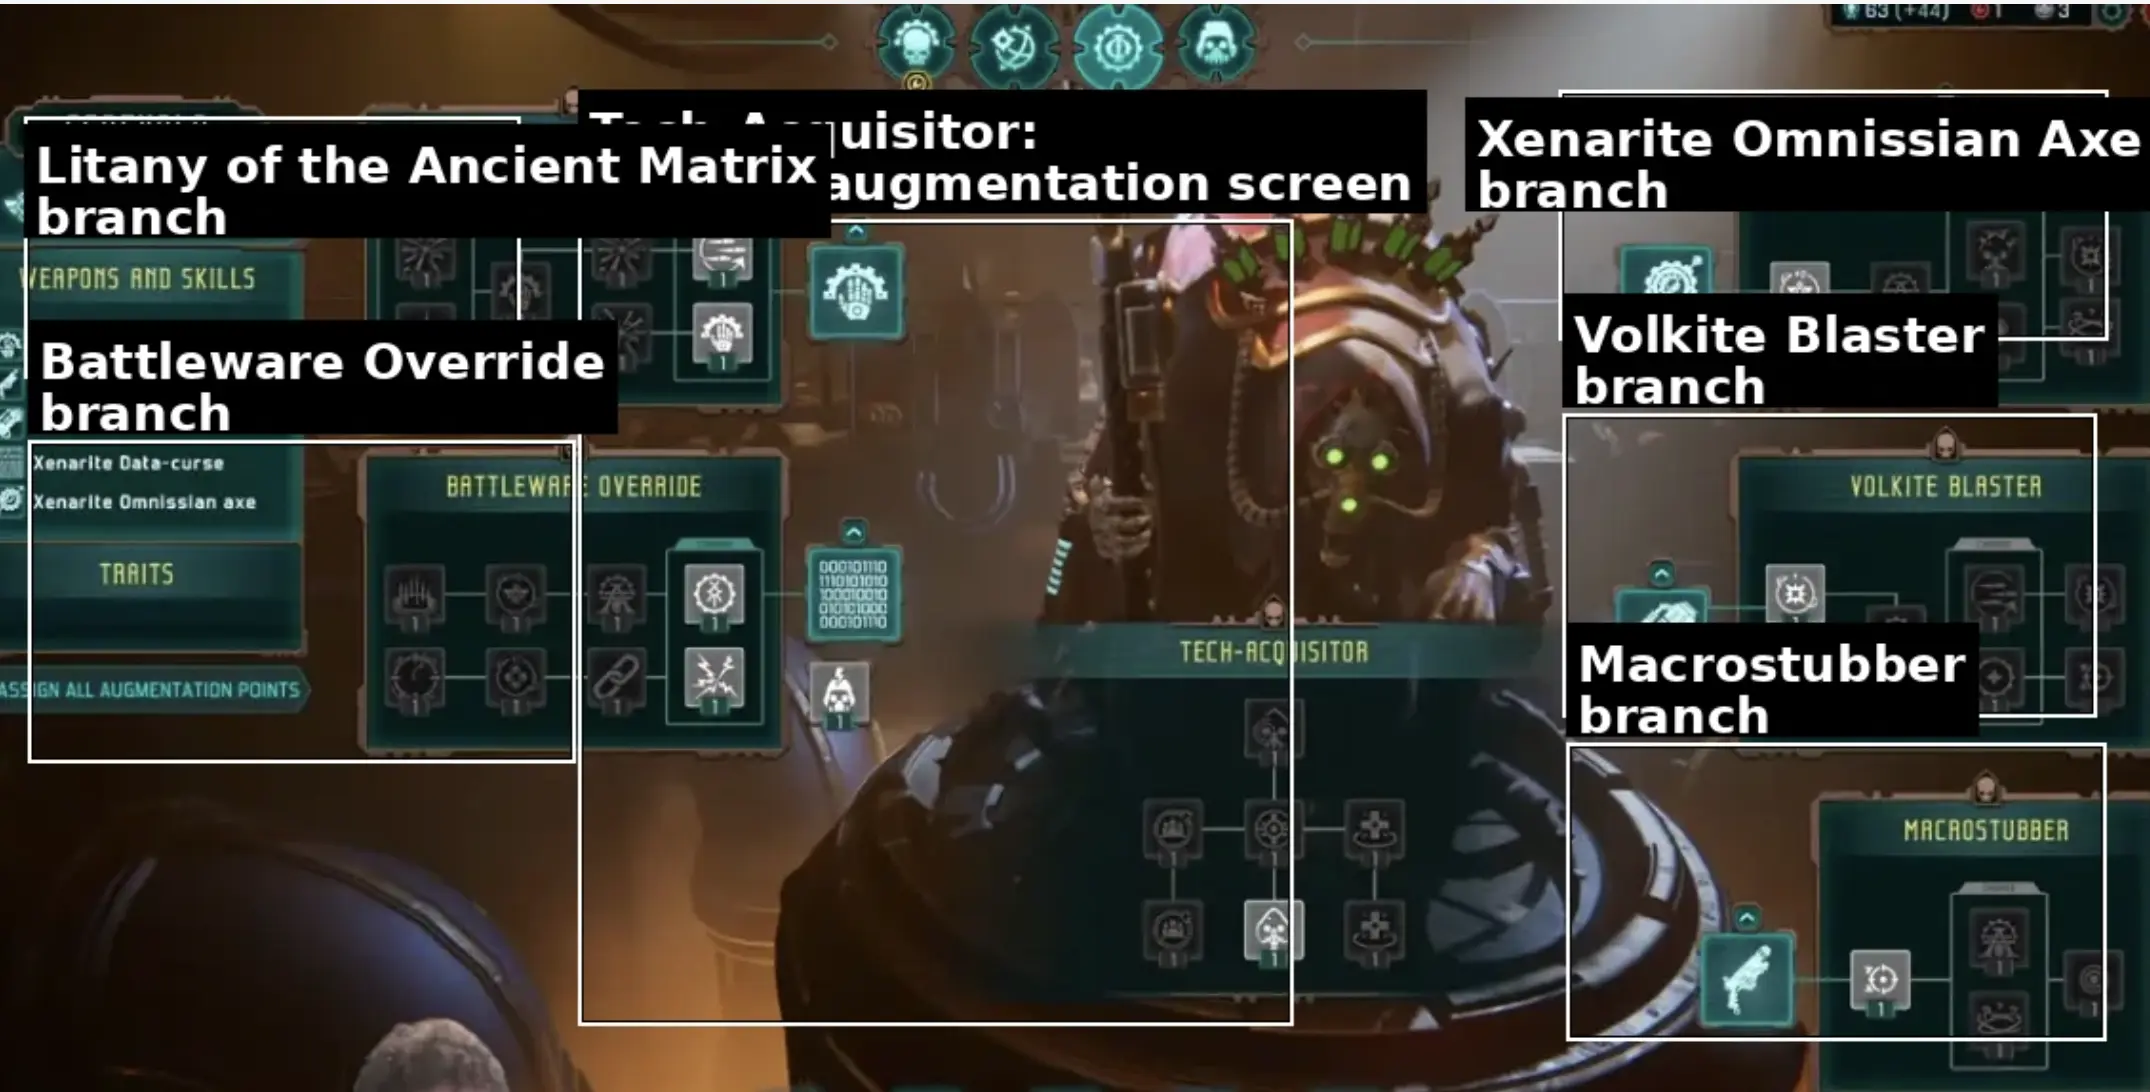
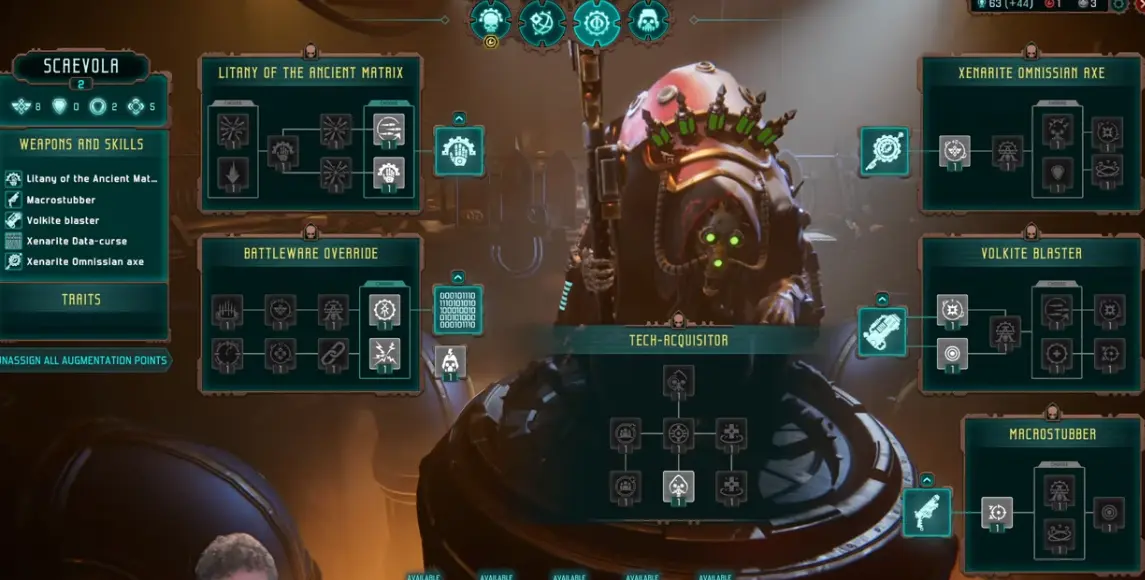
The Tech-Acquisitor screen shows multiple weapon and skill branches. Do not chase every branch early; pick the line that your Cognition economy can actually support.
In the screenshot, the center panel is the current Tech-Priest, while the left and right panels show separate augmentation branches. For SEO and usability, the important reading is not the character portrait; it is the fact that each branch competes for early upgrade attention.
Scaevola / Tech-Acquisitor Early Route
| Upgrade stage | What to prioritize | Why |
|---|---|---|
| First 1-2 upgrades | A reliable weapon or offensive branch you can actually fuel | Scaevola is weak if you cannot generate enough Cognition to spend. |
| Next 2-3 upgrades | Cognition payoff tools: damage, control, or skill enhancement | Her value rises when stored Cognition turns into stronger actions. |
| Later upgrades | More specialized Forbidden Knowledge / high-output tools | Better once the army can support riskier offensive play. |
Scaevola’s Forbidden Knowledge style is strongest when you can build and store Cognition safely. If your Rangers are not staying at safe range or your Servitors are dying too fast, delay aggressive Scaevola investment.
Videx / Lector-Dogmatis Early Route
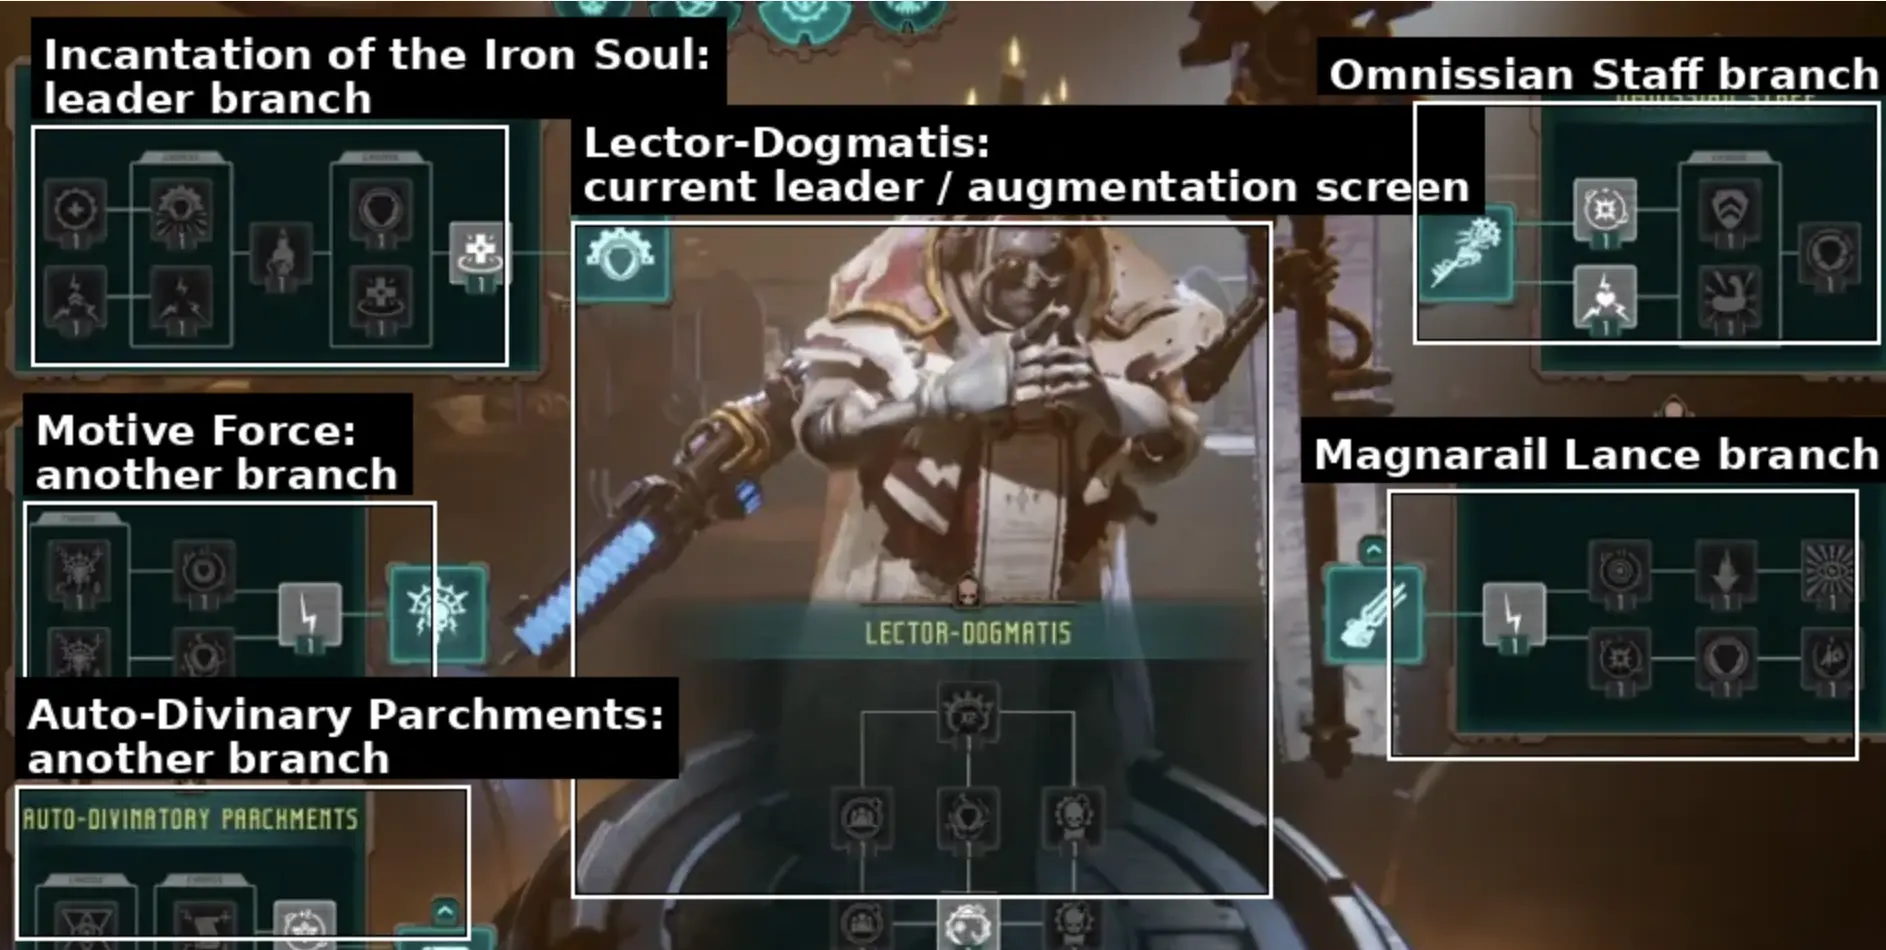
The Lector-Dogmatis screen is branch-based like other Tech-Priests. Use it to reinforce the job you need most: survival, control, support, or damage.
| Upgrade stage | What to prioritize | Why |
|---|---|---|
| First 1-2 upgrades | Survival, support, or stability tools | Helps on extraction, defense, and awkward objective missions. |
| Next 2-3 upgrades | Tools that protect unit positioning or improve mission control | Keeps Rangers and fragile units from being forced into bad trades. |
| Later upgrades | More specialized damage or branch commitment | Better after you know which mission types are causing trouble. |
Difficulty Differences: How Resource Rules Change
On lower difficulty, you can recover from waste. On higher difficulty, waste turns into mission pressure.
| Difficulty situation | How to adjust |
|---|---|
| Normal / first run | Use the 20-30% Requisition buffer rule and learn which unit cards actually solve objectives. |
| Harder tactical settings | Spend more on bodies and survival before damage. A narrow damage upgrade is worse than a stable roster. |
| High Vigilance starts or extra pressure | Take fewer Stratagems unless the reward directly solves the mission. |
| Custom settings with easier resource gain | You can test more leader branches earlier, but still avoid splitting upgrades across too many plans. |
| Custom settings with harsher recovery / economy | Prioritize broad deployment reliability and avoid expensive experiments. |
Necron Resource Management: Lords Before Currency
Necron resource management is about availability. A Lord on a side task is a Lord who cannot carry your next mission. A unit recovering is a unit that cannot support the retinue right now.
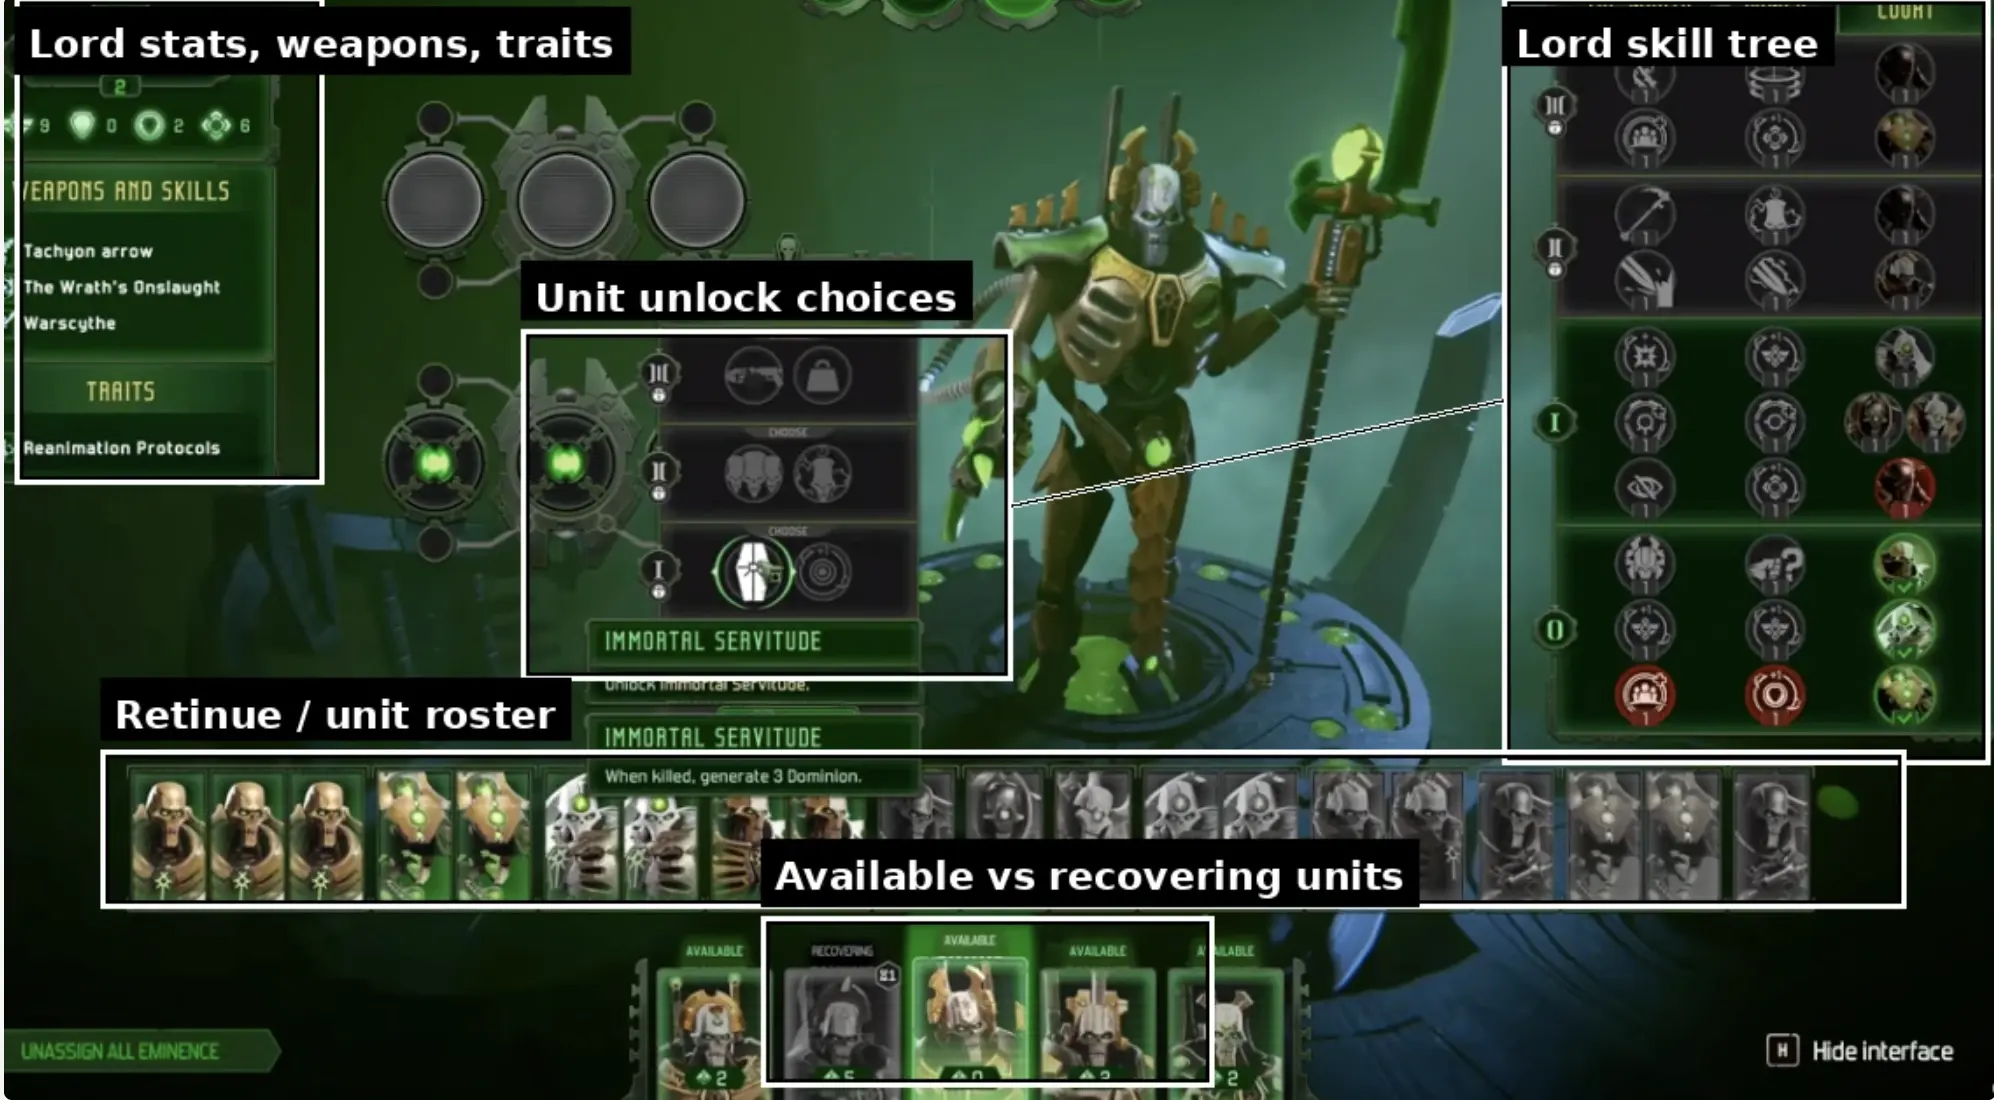
The Necron retinue screen combines several decisions at once: Lord stats on the left, unlock paths in the center, skill tree on the right, and available or recovering units along the bottom.
This is why Necron upgrades should be read as a roster problem. The same screen tells you whether the Lord is ready, what their retinue can unlock, and whether key units are available or still recovering.
Dominion Thresholds: The Numbers That Matter
Dominion is the Necron snowball system. The confirmed early rule is:
1 damage dealt = 1 Dominion point.
The early thresholds are:
| Dominion level | Points needed from previous level | Total damage needed from zero | What changes |
|---|---|---|---|
| Level 1 | 5 | 5 | First Dominion level gained; level-gated tools start mattering. |
| Level 2 | 5 more | 10 total | Early scaling tools become more reliable. |
| Level 3 | 10 more | 20 total | Mid-fight snowball begins to matter. |
| Level 7+ | Later-game scaling | Not an early target | Some unit abilities become much stronger at high Dominion. |
Dominion normally resets after a fight early on, but later upgrades can let you lock in Dominion levels between fights. This is why early Dominion investment can feel slow at first and powerful later.
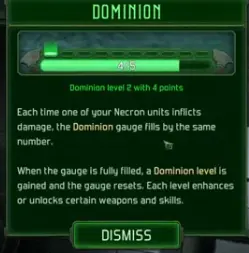
The Dominion UI shows progress toward the next level. Since damage feeds the gauge, high-damage turns also accelerate skill and weapon scaling.
When to Invest in Dominion Upgrades
| Invest if… | Delay if… |
|---|---|
| Your Lord and retinue reliably deal damage every fight. | Your fights end before reaching Level 2 or Level 3. |
| You are playing longer attrition missions. | You need immediate recovery or defensive stability. |
| You are building around Ominekh-style Dominion support. | Your key units are often recovering. |
| You have unlocked tools that preserve or exploit Dominion levels. | Dominion keeps resetting before you can use the payoff. |
Necron Lord Routing: Who Stays, Who Leaves
Your first Necron resource mistake is usually not a bad upgrade. It is sending away the wrong Lord.
| Lord | Early role to consider | Side task rule |
|---|---|---|
| Nefershah | Campaign anchor and early story presence | Keep available if the next mission depends on her retinue or leadership tools. |
| Ominekh | Dominion and sustain-centered plan | Keep available when you are trying to build around Dominion momentum. |
| Obasis | Defensive “Shield” style role | Keep available for holdout, attrition, or survival-heavy missions. |
| Amukah | Retinue-dependent specialist | Send only if your next mission does not need that retinue path. |
| Backup Lord | Lowest current mission value | Best candidate for side tasks and recovery support. |
Necron Side Task Rule
Before assigning any Lord, answer this:
If this Lord is gone, can I still win the next mission with a coherent retinue?
If the answer is no, do not send them.
Necron Early Route Example
| Stage | Decision | Why |
|---|---|---|
| First mission block | Choose one primary combat Lord | Your upgrades should support the army you actually field. |
| First retinue upgrades | Improve the units that appear in that Lord’s real roster | Avoid spending on units that are not carrying fights. |
| First side tasks | Use backup Lords, not your main Lord | Side task rewards are not worth losing your battle plan. |
| First Dominion investment | Invest after you can reach Level 2 or Level 3 consistently | Dominion payoffs need damage and fight duration. |
| First recovery decision | Recover key retinue units before hard missions | A powerful unit in recovery is not part of your next army. |
Necron Failure Scenario: The Side Task Trap
You finish a mission, check the map, and assume the next fight will be simple. A side task appears with a useful reward, so you send your strongest Lord away because you think the backup Lord can handle one routine mission.
Then the next mission turns out to be a longer or more awkward objective than expected. Your best retinue is unavailable, your backup Lord has weaker synergy, and your Dominion plan starts too slowly. You still have Necron durability, but the fight takes longer, more units enter recovery, and the next side task decision becomes even worse.
That is the Necron resource spiral:
Send main Lord away → weaker next roster → slower Dominion → more recovery pressure → fewer safe side task choicesBreak the loop by keeping one primary combat Lord active and using backup Lords for side tasks.
AdMech vs Necron: Which Resource System Is Harder?
| Question | AdMech answer | Necron answer |
|---|---|---|
| Which is harder early? | AdMech, because bad Requisition spending can weaken the next deployment. | Necrons are more forgiving, but Lord scheduling mistakes can snowball. |
| Which has clearer upgrade direction? | Shrine and Forge progress are visible, but card randomness adds uncertainty. | Lord-retinue paths are clearer once you know your main Lord. |
| Which punishes experiments more? | AdMech punishes expensive deployments and narrow Shrine choices. | Necrons punish sending away the wrong Lord or investing before Dominion is reliable. |
| Which is easier for a first campaign? | Harder if you dislike resource budgeting. | Easier if you pick one Lord plan and stick to it. |
Note on Leagues of Votann Events
If a Leagues of Votann-related event appears early, treat it as mission context first, not as a reason to rewrite your whole upgrade plan. Spend for the objective on the screen. If the event adds enemy pressure, favor safer deployment, recovery, and Requisition buffer decisions. If it is only story context, continue your main AdMech or Necron resource plan.
Common Early Resource Mistakes and Fixes
| Mistake | What it looks like in play | Fix |
|---|---|---|
| Spending too much Requisition | Next deployment has bad cards and you cannot afford enough bodies | Keep 20-30% unspent on standard missions. |
| Buying a strong card without enough support | Your expensive unit performs well, but the Leader gets exposed | Buy at least one screen or support body before luxury damage. |
| Rushing Forge expansion too early | You gain a node but lose tempo because the army is still thin | Take Forge-Temples when they unlock tech, income, or safer mission access. |
| Unlocking narrow Shrine tech first | You cannot field the unit often enough to benefit | Start with unit access, higher-rank troops, and broad deployment upgrades. |
| Upgrading Scaevola before Cognition is stable | You have powerful options but cannot fuel them | Build Rangers / Servitor Cognition habits before aggressive Scaevola investment. |
| Sending away the main Necron Lord | The next mission loses your best retinue plan | Use backup Lords for side tasks unless the reward is essential. |
| Investing in Dominion too early | You rarely reach Level 2 or Level 3 before the fight ends | Wait until your retinue reliably deals enough damage to build Dominion. |
| Treating Reanimation as free immortality | Units return later, but the current fight loses tempo | Protect key units and recover them before difficult missions. |
Focused FAQ
How much Requisition should I save early?
On standard missions, try to keep roughly 20-30% of your available Requisition unspent. Break that rule only for dangerous objectives like retreat, defense, or heavy multi-wave pressure.
Dominion resets after every fight — should I still invest early?
Yes, but only if your current Lord and retinue can reliably reach Dominion Level 2 during ordinary missions.
If your fights usually end before Dominion Level 2, early Dominion upgrades are often weaker than recovery, survivability, or retinue stability upgrades.
Dominion investment becomes much stronger once your army can:
- build Dominion consistently;
- keep units alive long enough to benefit from scaling;
- preserve or carry Dominion between fights through later upgrades.
Should I upgrade Scaevola early?
Yes if your army can generate Cognition reliably. If your Rangers cannot keep safe range or your Servitors are dying too fast, upgrade deployment reliability before committing to aggressive Scaevola tools.
Should I send Ominekh on side tasks?
Not if Ominekh is your current Dominion or sustain engine. Send a backup Lord instead unless the reward is important enough to weaken the next mission.
Should I rush Forge-Temples?
Rush only the Forge-Temples that unlock technology access, improve income, or create safer campaign routes. Do not spend your army into weakness just to grab a node.
Continue Reading in the Warhammer 40000 Guide Cluster
This article is part of our Warhammer 40000 strategy cluster. Use these guides to keep learning the game's core systems and routes.
Choose your first Mechanicus 2 campaign with a clear Necrons vs Adeptus Mechanicus breakdown for difficulty, story perspective, combat, and resources.
Returning Player GuideMechanicus 2 vs Mechanicus 1: What ChangedSee what changed in Mechanicus 2 for returning players, including factions, cover, terrain destruction, Cognition, Dominion, turn order, and campaign scale.
Faction GuideMechanicus 2 AdMech Guide: Cognition & UnitsDominate AdMech missions in Mechanicus 2. Learn to generate Cognition, manage Vigilance, deploy the best units, and utilize powerful Stratagems.
Faction GuideMechanicus 2 Necron Guide: Dominion & ReanimationLearn the Mechanicus 2 Necron campaign with practical tips for Dominion party-wide buffs, Reanimation, Lords, terrain destruction, units, and early mistakes.