Mixtape Guide
Mixtape: Front to Back Trophy & Bedroom Items Guide
Complete Mixtape Front to Back trophy guide. Find all bedroom items, trigger unique conversations, use chapter select for cleanup, and fix unlock bugs.
Front to Back is the most important checklist trophy in Mixtape.
The requirement sounds simple: find everything in the bedrooms and all unique conversations. In practice, it is easy to miss one room item, one repeated conversation, or one late-room interaction after a memory chapter.
This page is only for Front to Back. For the full platinum route, use the Mixtape Trophy & Achievement Guide. For chapter order and general routing, use the Mixtape Guide Hub.
Fast Answer
| Question | Answer |
|---|---|
| What does Front to Back require? | All bedroom items and all unique conversations. |
| Does chapter select track Front to Back? | Yes, progress can carry through chapter select, but visual item markers reset. |
| Should I rely on chapter select? | Use it for cleanup, but do your first run carefully. |
| When does it unlock? | If everything counted, it should unlock in Slater’s room after the final required bedroom interactions, before Starlight Video. |
| Most common missed items | Cassandra’s curtains, Cassandra hallway door, Debbie dresser photo, Slater wall art, Rockford hallway/bathroom items. |
How Front to Back Works
In bedroom sections, Mixtape uses interaction markers:
| Marker / object type | What it means |
|---|---|
| White-dot item | Optional interaction you should inspect before progressing. |
| Character prompt | Unique conversation that may count toward Front to Back. |
| Yellow story item | Usually advances to the next memory or chapter. Touch this last. |
| Faded / hollow marker | You have already interacted with it during that room state. |
The safe loop is:
Talk to everyone → inspect every white-dot item → wait for dialogue to finish → touch the yellow story item last.
Do not rush from one object to the next while a line is still playing. If you are using chapter select, the game may visually reset the white-dot markers, even if your previous interaction progress is still counted. That means the best cleanup method is to replay a whole room state and re-check every item in that section, not just the one thing you think you missed.
Important Chapter Select Rule
Chapter select can help with Front to Back, but it is confusing.
The game appears to keep Front to Back progress across chapter select. However, the visual collected state can reset when you jump back. In other words, a white-dot item may look uncollected even if the game has already counted it.
Use chapter select like this:
| Situation | What to do |
|---|---|
| You know exactly what you missed | Replay that chapter and interact with that object or conversation. |
| You are not sure what you missed | Replay the whole room state and clear every interaction again. |
| Markers look reset | Do not panic. Re-check the full section to be safe. |
| Front to Back still does not unlock | Use the replay priority list near the bottom of this guide. |
The best strategy is still to complete every room carefully during your first full playthrough.
Rockford’s House Checklist
Rockford’s house is the longest Front to Back section because you return to the same bedroom several times after memory chapters.
Chapter 2: First time in Rockford’s House
Before touching the glowing cassette on the desk, clear these. The exact order is not mandatory; the list below is organized for checklist use. If you are following another walkthrough with a different order, that is fine as long as every item and conversation is completed before the yellow story item.
| Check | Interaction |
|---|---|
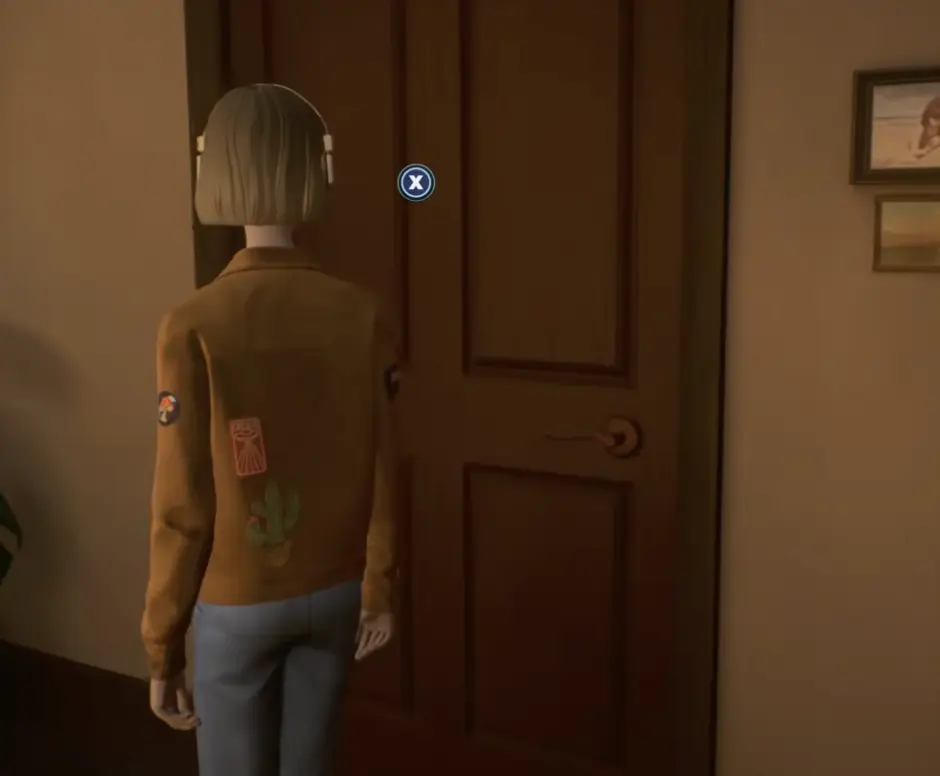
| [ ] | Hallway door to the left of the bedroom. |
| [ ] | Hallway painting near the door. |
| [ ] | Hallway radio / stereo. |
| [ ] | Hallway picture opposite the bedroom door. |
| [ ] | Second hallway painting. |
| [ ] | Bathroom counter / cloth. |
| [ ] | CD on the shelf inside Rockford’s room. |
| [ ] | Talk to Cassandra. |
| [ ] | Record player / turntable. |
| [ ] | Skateboard. |
| [ ] | Keyboard pencil case / keyboard item on the bed. |
| [ ] | Talk to Slater on the bed. |
| [ ] | VHS tapes by the TV. |
| [ ] | Cassette player on the shelf. |
| [ ] | CDs on the shelf near the cassette player. |
| [ ] | Yellow story item: glowing cassette on the desk. |

After Chapter 3: The Kiss
After returning from The Kiss, clear these before the VCR:
| Check | Interaction |
|---|---|
| [ ] | Talk to Cassandra again. |
| [ ] | Talk to Slater again. |
| [ ] | Photos on the closet / closet door. |
| [ ] | Yellow story item: VCR on the TV. |
After Chapter 4: Headbanging
After returning from Headbanging, you need to rebuild the wall photo set. First interact with the three loose Polaroids around the room, then interact with the wall photo string again to hang them up and complete this room state.
| Check | Interaction |
|---|---|
| [ ] | Talk to Cassandra again. |
| [ ] | Talk to Slater again. |
| [ ] | Wall photo string / Polaroid display. |
| [ ] | Loose Polaroid below the wall photo string. |
| [ ] | Loose Polaroid in the book near Cassandra. |
| [ ] | Loose Polaroid on or near the closet door. |
| [ ] | Wall photo string again after collecting all three loose Polaroids. |
After Chapter 5: Shopping Cart Bomb
After returning from Shopping Cart Bomb, clear these:
| Check | Interaction |
|---|---|
| [ ] | Talk to Slater. |
| [ ] | Poster / item inside the closet. |
| [ ] | Talk to Cassandra. |
| [ ] | Yellow story item: box on the chair. |
After Chapter 6: Rockford’s Headphones
After returning from Rockford’s Headphones, clear these:
| Check | Interaction |
|---|---|
| [ ] | Talk to Cassandra. |
| [ ] | Talk to Slater. |
| [ ] | Board on the wall. |
| [ ] | Every pinned item on the board. |
| [ ] | Road trip stops. |
| [ ] | Possible catchphrases. |
| [ ] | Motel / trip planning item. |
| [ ] | Road trip music ideas. |
| [ ] | Welcome to California item. |
| [ ] | Los Angeles venue guide. |
| [ ] | The Vinyl Countdown item. |
| [ ] | Orientation week item. |
| [ ] | Road trip objectives. |
When this arc ends, you should later unlock Goodbye, Stacey’s Room as part of story progress.
Debbie’s Bedroom Checklist
Debbie’s room is shorter, but it has two easy-to-miss items: the dresser photo and the shell after Photo Booth.
Chapter 7: First time in Debbie’s Bedroom
Before progressing through the wardrobe/cabinet sequence, clear these:
| Check | Interaction |
|---|---|
| [ ] | Talk to Slater. |
| [ ] | Trophies on the shelf. |
| [ ] | Talk to Cassandra. |
| [ ] | Box to Cassandra’s right. |
| [ ] | Yellow story item: cabinet / wardrobe. |
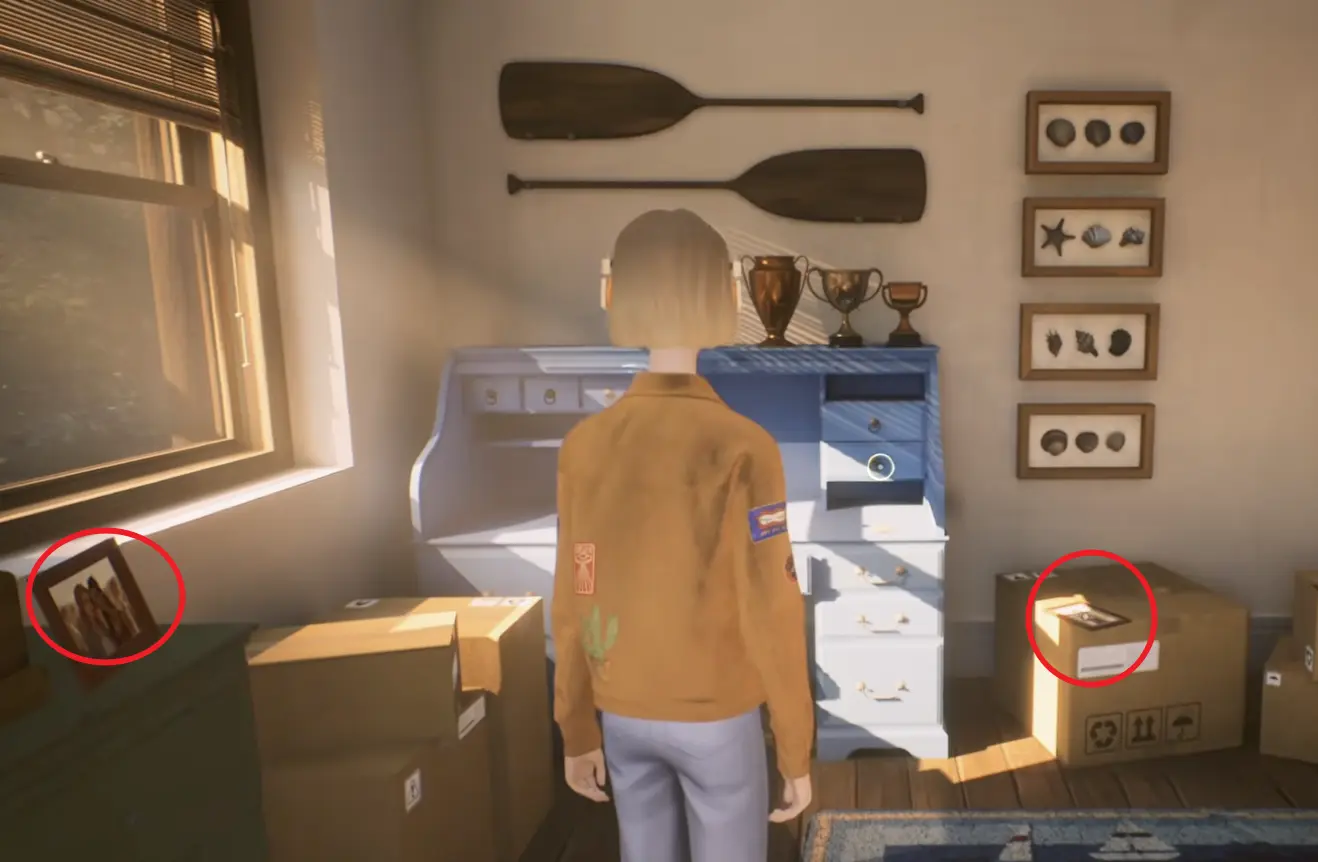
| [ ] | Photo on the green dresser. |
After Chapter 8: Ultimate Slushy
After the slushy scene, clear these:
| Check | Interaction |
|---|---|
| [ ] | Talk to Slater. |
| [ ] | Talk to Cassandra. |
| [ ] | Dresser drawer. |
| [ ] | Move items in the drawer. |
| [ ] | Pick up the ticket halves / ticket item. |
After Chapter 9: Photo Booth
After returning from Photo Booth, clear these:
| Check | Interaction |
|---|---|
| [ ] | Talk to Slater. |
| [ ] | Talk to Cassandra. |
| [ ] | Picture sitting on the boxes where Cassandra was earlier. |
| [ ] | Small shell on the blue dresser. |
| [ ] | Talk to Cassandra again until no new dialogue remains. |
| [ ] | Talk to Slater again until no new dialogue remains. |
| [ ] | Wardrobe with key / exit progression item. |
When you leave this arc, the Rockford/Stacey room section should be complete.
Cassandra’s House Checklist
Cassandra’s house is where many Front to Back misses happen. Pay special attention to the bathroom wall note / bill, the curtains above the window, and the closed hallway door.
Chapter 13: First time in Cassandra’s House
Before using the trophy cabinet / softball progression item, clear these:
| Check | Interaction |
|---|---|
| [ ] | Hallway door. |
| [ ] | Hallway portrait. |
| [ ] | Book in Cassandra’s room. |
| [ ] | Board / pinboard on the wall. |
| [ ] | Cassette tape left of the bed. |
| [ ] | Talk to Cassandra. |
| [ ] | Flower painting. |
| [ ] | Talk to Slater. |
| [ ] | Picture on the right wall. |
| [ ] | Yellow story item: trophy in the cabinet. |
After Chapter 14: Softball
After returning from Softball, clear these:
| Check | Interaction |
|---|---|
| [ ] | Cassandra’s bed. |
| [ ] | Talk to Cassandra. |
| [ ] | Talk to Slater. |
| [ ] | Bathroom paper / bill / note on the wall. |
This bathroom wall note is easy to describe differently depending on the guide. If you see a paper or note near the bathroom wall/mirror, interact with it.
After Chapter 15: Toilet Paper Attack
After returning from Toilet Paper Attack, clear these:
| Check | Interaction |
|---|---|
| [ ] | Talk to Slater. |
| [ ] | Spot on the wall left of Cassandra. |
| [ ] | Talk to Cassandra. |
| [ ] | Picture on the table beside the bathroom. |
After Chapter 16: Floating on Sadness
After returning from Floating on Sadness, clear these:
| Check | Interaction |
|---|---|
| [ ] | Door of the trophy cabinet. |
| [ ] | Talk to Slater sitting on the bed. |
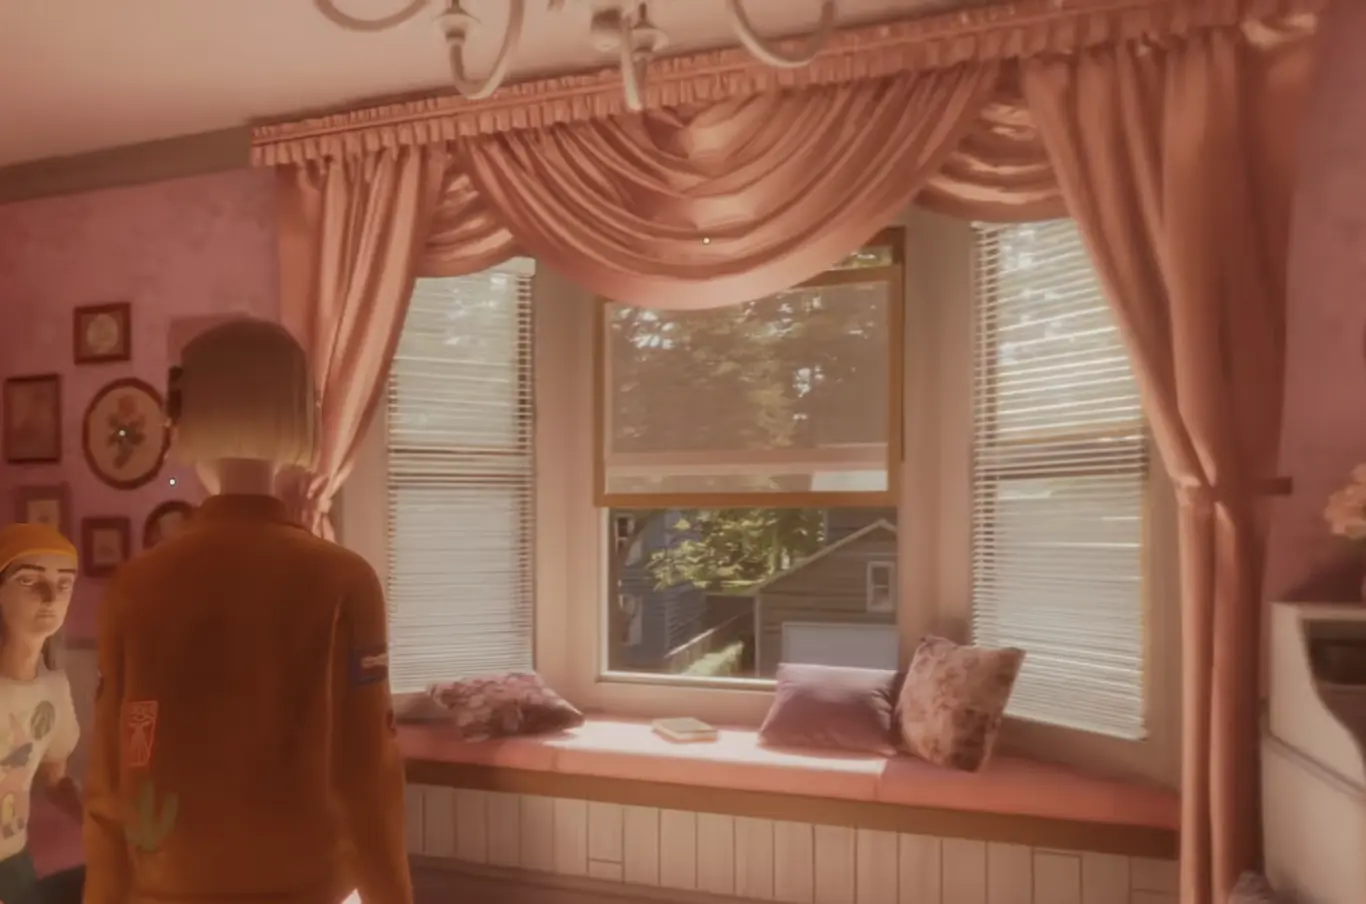
| [ ] | Curtains above the window. |
| [ ] | Paper / contract behind Slater. |
| [ ] | After Slater moves from the bed area to the other side of the room, talk to him again. |
| [ ] | Talk to Cassandra twice if she has banked dialogue. |
| [ ] | Open window behind Slater. |
Chapter 17: Cassandra’s Rooftop return
Before taking the Minimaster from Slater, clear these:
| Check | Interaction |
|---|---|
| [ ] | Talk to Cassandra twice first if she has multiple prompts. |
| [ ] | Talk to Slater to continue. |
After this arc, Matching the Drapes unlocks through story progress.
The Shitty Ritz Checklist
The Shitty Ritz is not a normal bedroom, so guides may treat it differently. For Front to Back safety, do not ignore it.
The safest approach is:
Treat every white-dot interaction and Slater conversation here as required unless you have already unlocked Front to Back.
Chapter 20: The Shitty Ritz
Before starting the mini-games, clear these:
| Check | Interaction |
|---|---|
| [ ] | Yellow fridge. |
| [ ] | Poster on the table. |
| [ ] | Empty bottles on the boxes. |
| [ ] | Open window. |
| [ ] | Whipped cream dispenser / canister to the right of the house. |
| [ ] | Radio / boom box. |
| [ ] | Talk to Slater. |
Between Ritz mini-games
After each mini-game, talk to Slater again if he has a prompt.
| Check | Interaction |
|---|---|
| [ ] | After Door Painting, talk to Slater before the couch. |
| [ ] | After Couch Moving, talk to Slater before the leaf sweeping spot. |
| [ ] | After Leaf Sweeping, talk to Slater again before the slingshot. |
| [ ] | Before leaving, do one last sweep for white-dot items around the area. |
This section is also important because it contains several other trophies: Paint it, Black, If You Want, Sofa King Fast, Leaves That Are Green, and From the Hip.
Slater’s House Checklist
Slater’s house is the final major Front to Back section. If everything counted, Front to Back should unlock here before Starlight Video.
Chapter 25: First time in Slater’s House
Clear the stair-side items first:
| Check | Interaction |
|---|---|
| [ ] | Red robot. |
| [ ] | Plasma orb. |
| [ ] | Photos on the guitar amp. |
| [ ] | Green book. |
| [ ] | Guitar on the couch. |
Then clear the opposite side of the room:
| Check | Interaction |
|---|---|
| [ ] | Picture on the left side of the room. |
| [ ] | Talk to Slater. |
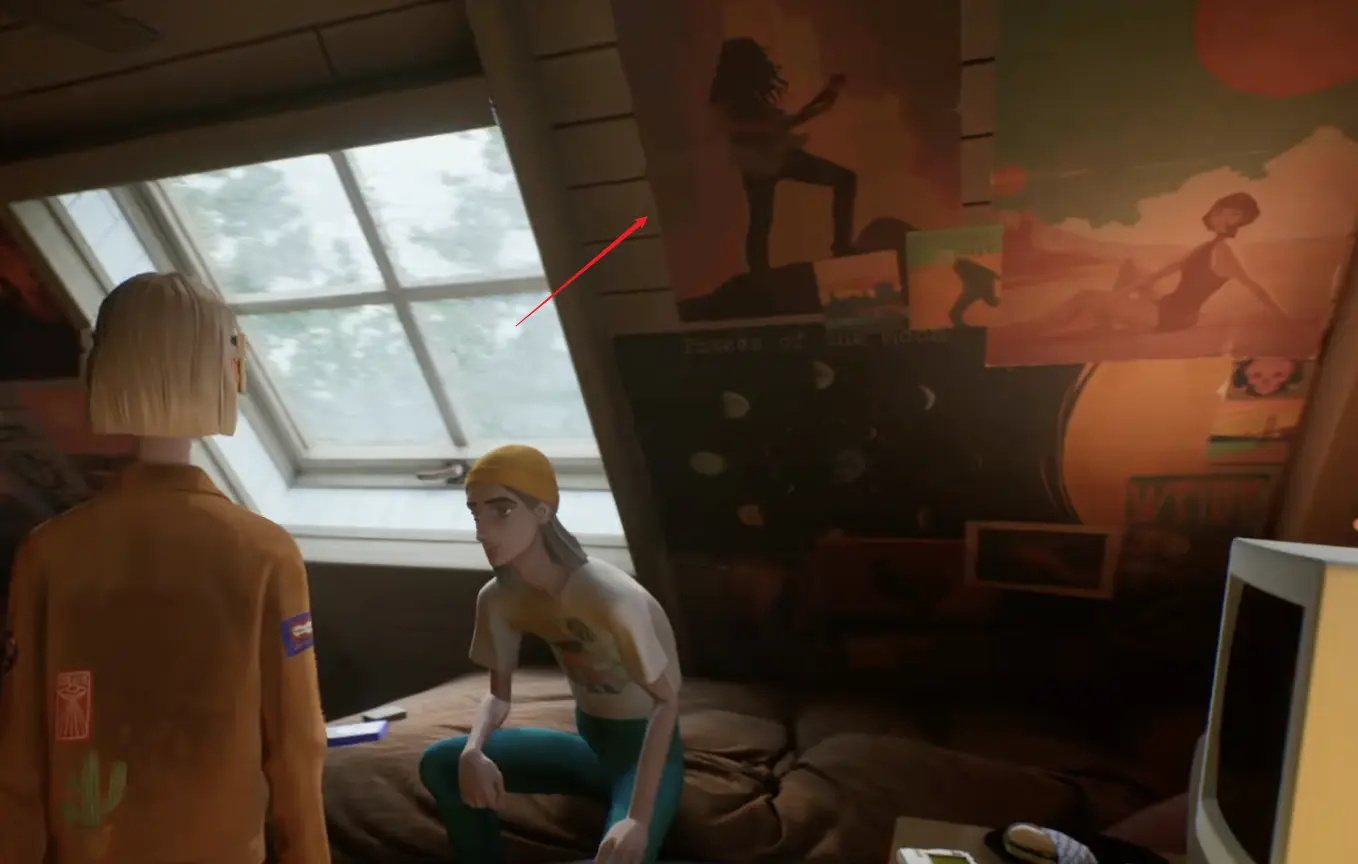
| [ ] | Wall art / wall behind Slater. |
| [ ] | Fish tank. |
| [ ] | Record player. |
| [ ] | Lava lamp near the tape player. |
| [ ] | Yellow story item: tape player. |
After the short Slater scene
After interacting with the tape player and returning to the room state, clear these:
| Check | Interaction |
|---|---|
| [ ] | Talk to Slater again. |
| [ ] | Keep talking if he has a “should we leave” or similar final dialogue. |
| [ ] | Minimaster on the desk. |
| [ ] | Tape on the bed. |
If you did everything correctly, Front to Back should unlock after interacting with the tape on the bed, before the Starlight Video chapter begins.
Best Replay Targets If Front to Back Does Not Unlock
Do not replay random chapters first. Start with the sections that players most often miss.
| Priority | Chapter / section | Why to replay it |
|---|---|---|
| 1 | Chapter 16: Cassandra room after Floating on Sadness | Curtains above the window and the hallway/room items are easy to miss. |
| 2 | Chapter 9: Photo Booth return | Debbie’s shell and dresser/photo items are easy to overlook. |
| 3 | Chapter 25: Slater’s House | Final room; wall art, lava lamp, Minimaster, and final Slater dialogue are common misses. |
| 4 | Chapter 2: Rockford’s House | Early hallway/bathroom interactions can be missed before players understand the rule. |
| 5 | Chapter 20–24: The Shitty Ritz | Borderline hub area; clear all white-dot items and Slater dialogue to be safe. |
| 6 | Chapter 13–17: Cassandra’s House full arc | If you are unsure, replay the entire Cassandra room sequence and clear every prompt. |
When using chapter select, visual markers may look uncollected even if the game already counted them. Clear the entire room state again anyway so you do not have to guess.
Common Reasons Front to Back Does Not Unlock
| Problem | Fix |
|---|---|
| You touched yellow story items too early. | Replay that room state and clear all white dots before the yellow item. |
| You skipped dialogue before it finished. | Wait for every line to finish before starting the next item. |
| You missed repeated character dialogue. | Talk to Cassandra and Slater every time you return to a room. |
| You missed high/low camera items. | Look up for curtains, look down for floor photos, and check shelves/desk corners. |
| You trusted visual markers after chapter select. | Re-clear the full room state because markers can reset visually. |
| You ignored The Shitty Ritz. | Clear its white-dot items and Slater dialogue as a safety pass. |
FAQ
Does chapter select work for Front to Back?
Yes, it can work. The important detail is that chapter select can reset the visual collected markers, even while the game keeps the underlying interaction progress. If you use chapter select, re-check every item and conversation in that room state instead of relying on faded/solid marker status.
Do I need a full new playthrough if Front to Back does not unlock?
Not necessarily. Start with chapter select cleanup first. Prioritize Cassandra’s curtains, Debbie’s post-Photo Booth items, Slater’s final room, and Rockford’s earliest hallway/bathroom items. Some players have unlocked it through chapter select after finding one missed object.
When does Front to Back unlock?
If every required interaction counted, it should unlock in Slater’s room after the final required interaction, specifically around the final tape-on-bed progression before Starlight Video. It is not a trophy that normally waits until the credits.
What are the most commonly missed items?
The most common misses are Cassandra’s curtains above the window, the bathroom wall note/bill in Cassandra’s room, Debbie’s dresser photo or post-Photo Booth shell, the early Rockford hallway/bathroom items, and the wall art behind Slater.
Does The Shitty Ritz count for Front to Back?
It is not a bedroom in the same way Rockford’s, Debbie’s, Cassandra’s, and Slater’s rooms are. However, because it has multiple white-dot interactions and repeated Slater dialogue, the safest route is to clear it completely. Treat it as required until you have already unlocked Front to Back.
Do I need to interact with items again if I use chapter select?
If you are cleaning up Front to Back, yes. Even if the game counted some items before, the visual markers may reset. Re-interact with everything in the section so you can confirm nothing obvious is missing.
Can I skip dialogue?
Do not skip through bedroom dialogue while going for Front to Back. Let the line finish before moving to the next object or conversation. This makes tracking cleaner and reduces the risk of an interaction not counting.
What should I read next?
Use the Trophy & Achievement Guide for the full one-playthrough route, or return to the Mixtape Guide Hub for chapter order and general 100% planning.
Continue Reading in the Mixtape Guide Cluster
This article is part of our Mixtape strategy cluster. Use these guides to keep learning the game's core systems and routes.
Complete Mixtape trophy and achievement guide. Get 100% with our chronological 1-playthrough checklist, chapter select tips, and Front to Back warnings.
Trophy GuideMixtape: Well, Take A Look At You Trophy GuideUnlock the Well, Take A Look At You trophy in Mixtape. Clear The Run without missing a single jump or slide, including tricky bus and HVAC checkpoints.