Alabaster Dawn Guide
Alabaster Dawn Trial of Aether Guide: A5, B5, B9, Dirty Quill, Rana Lingua Magna, and Stuck Fixes
Solve Trial of Aether in Alabaster Dawn, including Aether panels, A5 block chains, B5 Chakram ball routing, B9 element orbs, Dirty Quill, Power of Aether, and Rana Lingua Magna.
Trial of Aether is where Alabaster Dawn stops asking only “can you fight?” and starts asking “do you understand the room?”
Most rooms are not hard because the idea is complicated. They are hard because one small detail is easy to miss: standing on the Aether panel, shooting from the right angle, moving a block into a lightning chain, catching a ball with Chakram, or switching elements before the projectile lands.
This guide is not a full room-by-room transcript. It focuses on the Trial of Aether sections that most often stop players:
- Aether panels and purple orbs
- A1 switch platform logic
- A5 purple orb and block-chain puzzles
- Dirty Quill location and effect
- B5 ball and Chakram routing
- B9 wind / Aether / any-element orb puzzle
- Rana Lingua Magna quick boss answer
- Power of Aether controls and what changes after unlocking it
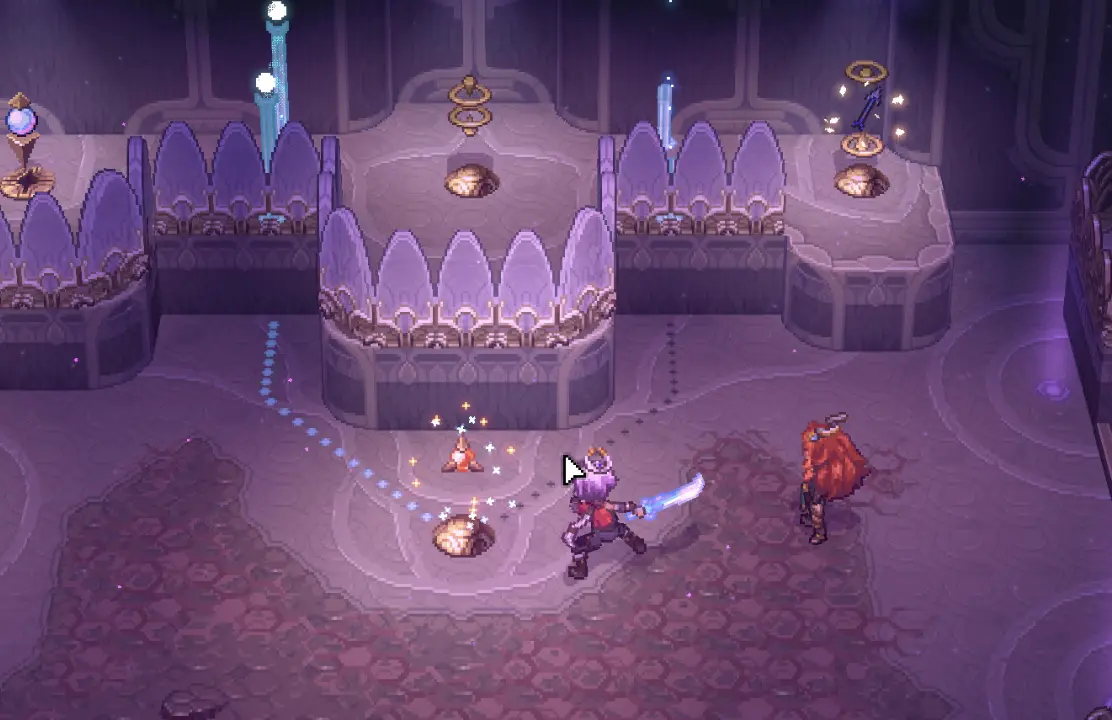
Before You Start Trial of Aether
Before treating Trial of Aether like a normal dungeon, understand what each tool is for.
| Tool / mechanic | What it does here |
|---|---|
| Filia | Helps weave puzzle objects. She is not your main combat damage source. |
| Chakram | Catches, redirects, or controls puzzle objects such as balls and orb routes. |
| Aether panels | Charge your projectiles with Aether so purple targets respond. |
| Divine Arts | Stronger special attacks that use DC; ranged Divine Arts require aiming first, then holding the Divine Art input. |
| Hammer | Breaks specific obstacles and helps against heavy or shell-like checks. |
The key mistake is trying to solve every room with normal shots. Trial of Aether wants you to combine panel charge, ring redirection, Filia weaving, and Chakram object control.
Quick Route Overview
Trial of Aether is easier to follow if you know where the major puzzle checkpoints sit in the route.
| Route point | What matters |
|---|---|
| A1 | Switch platform puzzle. Shoot switches from the correct platform angle. |
| A2 | Crystal path hub. Unlock side paths one at a time. |
| A3 | Block marker room. Use floor markings to place blocks. |
| A4 | Floating ring projectile room. Redirect shots through rings. |
| A5, first half | Aether panel and four purple orbs. |
| A5, second half | Block-chain puzzle using the pedestal rock, movable blocks, pillar, and orb. |
| B1 / B2 | Aether combat rooms with lightning-weak enemies and a reflectable turtle projectile. |
| Power of Aether | Unlocks freer use of Aether after the early panel-based rooms. |
| Outside Hall of Trials | Dirty Quill hidden chest and outside lightning puzzles. |
| B3 | Moving platform puzzle controlled by crystals. |
| B5 | Ball and Chakram puzzle. Catch and redirect the ball. |
| B9 | Multi-element orb puzzle using wind, Aether, and any-element targets. |
| B10 / top | Enemy waves lead toward Rana Lingua Magna. See the quick boss answer near the end of this guide, or use the full Boss Guide for the complete fight. |
This page expands the high-friction puzzle rooms. Simpler combat and traversal rooms are summarized later so you can keep your route straight without reading a full dungeon transcript.
Quick Stuck Fixes
| Stuck on… | Check this first |
|---|---|
| Purple orb | Is your shot Aether-charged? |
| A1 barrier | Did you shoot the switch from the platform angle? |
| A5 chain | Are the blocks lined up between the pedestal rock and the pillar? |
| Dirty Quill | Start from the left-side ring outside the Hall of Trials. |
| B5 ball | Use Chakram to catch and redirect it. |
| B9 elements | Match the projectile element to the orb element. |
| Rana Lingua Magna | Break first, clear pillar protection with Chakram if needed, then punish the tongue. |
| Power of Aether | Attune to Aether, then use the correct ranged or puzzle action. |
How Aether Panels and Purple Orbs Work
The main Trial of Aether rule is simple:
Aether panels give your projectiles the Aether element. Use Aether-charged shots to activate purple orbs, purple rocks, and lightning puzzle targets.
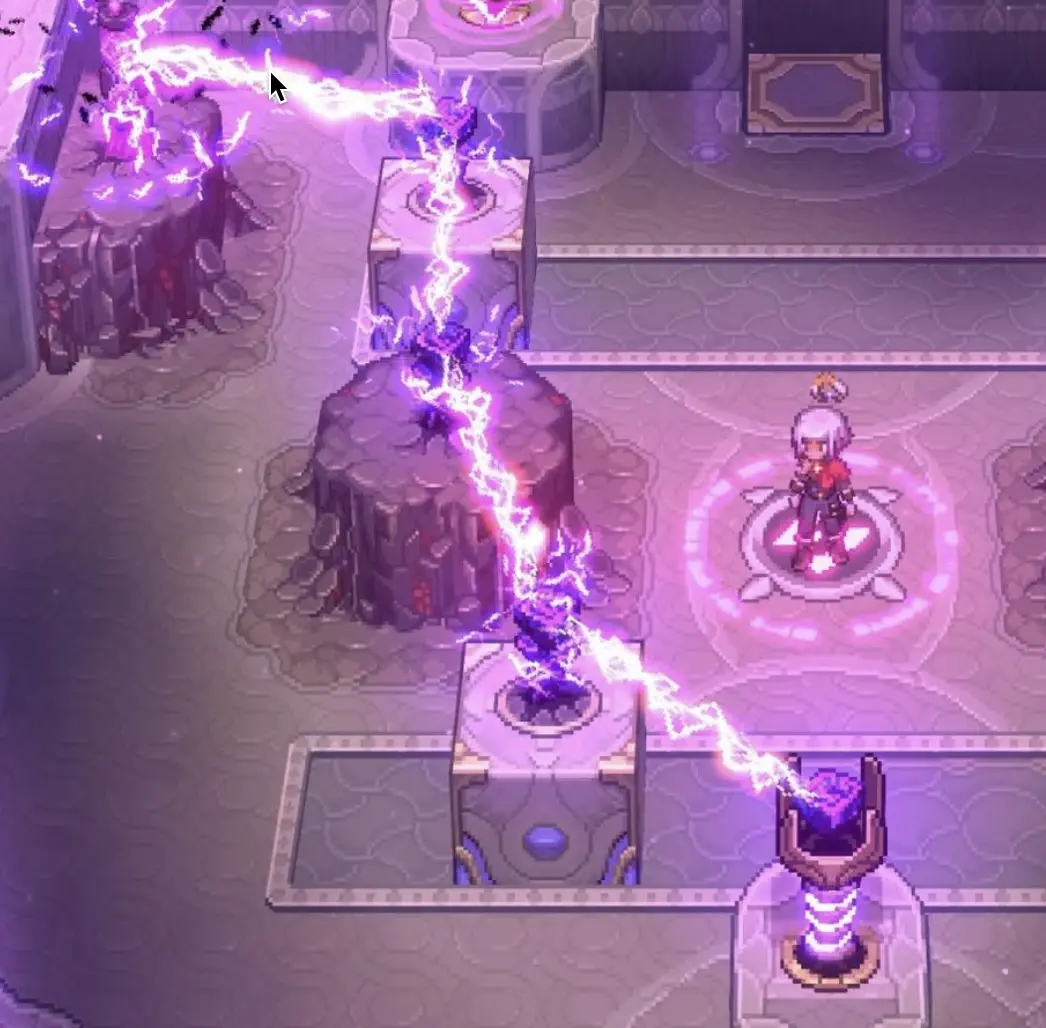
If a purple orb does not respond, check these in order:
- Are you standing on the Aether panel?
- Did you step off the panel before firing?
- Are you shooting the correct orb, crystal, or purple rock?
- Are you firing from the angle the room expects?
- Does the room require a ring, block, or platform step first?
This one checklist solves most early Trial confusion.
A1 Switch Platform Puzzle
A1 teaches the basic switch-platform rule: some switches only matter when you shoot them from the correct platform position.
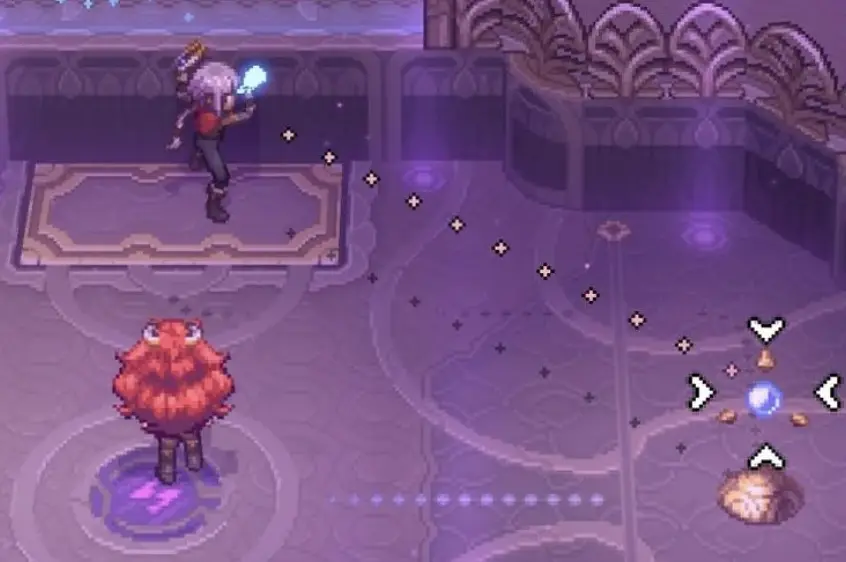
Solution
- Shoot the left switch first.
- Step onto the platform.
- While standing on the platform, shoot the right switch.
- Move forward after the path changes.
- Shoot the next switch to lower the first barrier.
- After moving forward, shoot that switch again to lower the second barrier.
If you are stuck
If the second barrier stays up, you probably shot the correct switch from the wrong position. Return to the platform angle, then shoot again after the platform has moved you forward.
Optional chest
Near the door platform, you can jump right and follow the side platforms around for an optional chest containing Whisper of the Gods x3.
A5 Purple Orb Puzzle
A5 is the first room where the dungeon makes Aether panels obvious.
After clearing the enemy waves, a purple Aether panel appears on the floor. Standing on it gives your projectile the Aether element, letting you activate the purple orbs.
Solution
- Clear the enemy waves.
- Wait for the Aether panel to appear.
- Stand on the panel.
- Shoot the four purple orbs on both sides.
- Move forward after all four orbs are active.
- Continue to the next Aether panel.
If you are stuck
If one orb does not activate, you likely fired a normal projectile. Return to the Aether panel, wait until the shot is charged, and shoot again from a cleaner angle.
A5 Block Chain Puzzle
A5 has a second important puzzle after the first purple-orb section. This one looks like a block puzzle at first, but it is really a lightning-chain puzzle.
The room uses two movable blocks. Your goal is to line them up so Aether lightning can travel from the purple pedestal rock, through the blocks, toward the pillar and final orb.
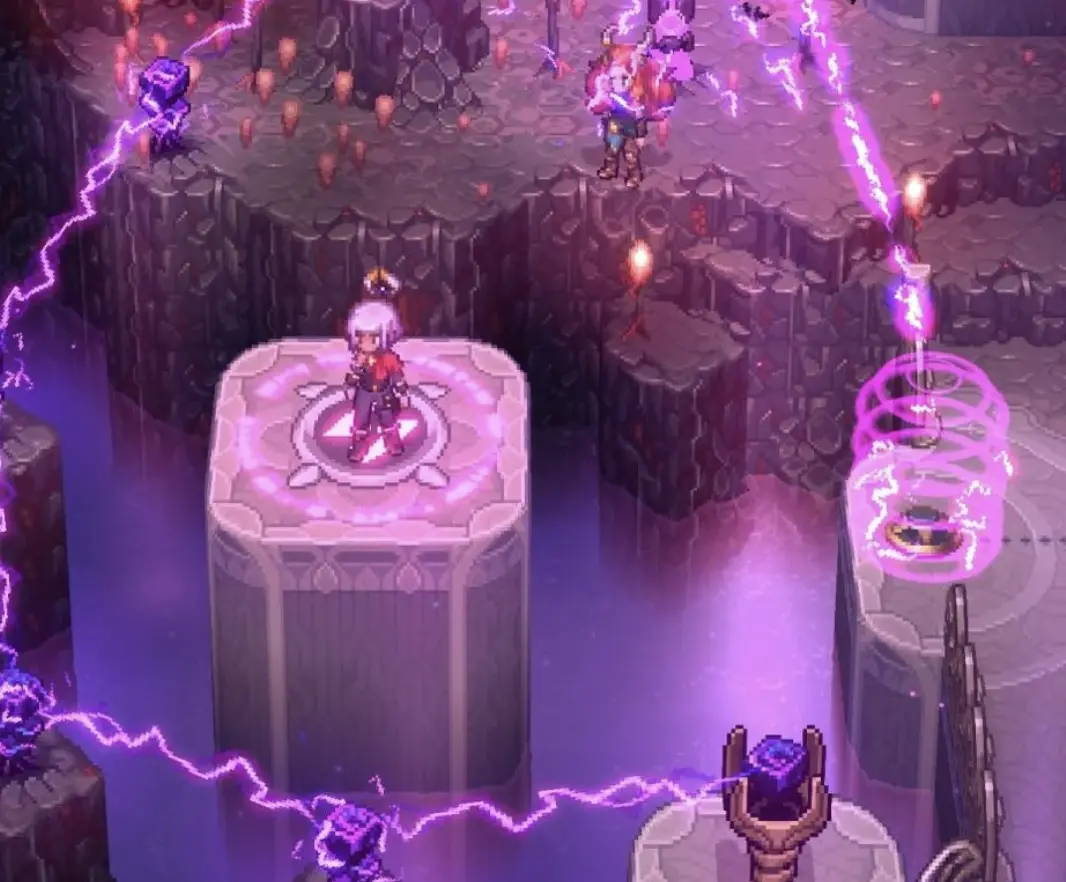
Solution
- Return to the main part of A5 after the first four-orb section.
- Find the two movable blocks in the room.
- Move the lower block so it sits between the purple pedestal rock and the pillar shielding the other rock.
- Stand on the Aether panel.
- Shoot the pedestal rock to start the lightning chain.
- Reposition both blocks so they form a clean line from the pedestal rock toward the second pillar.
- Shoot the pedestal rock again.
- When the orb shield drops, shoot the orb to open the way forward.
If you are stuck
If the lightning chain stops early, one of the blocks is not aligned. The blocks are not just platforms here; they act like conductors for the Aether chain.
If the orb is still shielded, stop shooting the orb. Fix the block alignment first, trigger the chain again, then shoot the orb after the shield disappears.
A5 detours worth grabbing
Before leaving A5, there are two useful detours:
| Detour | Reward |
|---|---|
| West platform route | Libra’s Blessing Construct |
| Right platform / hammer route into A4 | Verse of the Gods x2 |
If you only want to progress, finish the block chain and move on. If you are building resources, grab both detours before leaving.
Power of Aether: What Changes After You Unlock It
After B1 / B2, you unlock the Power of Aether. This is the point where Trial of Aether stops relying only on floor panels.
Your controls menu includes Attune Aether Element, and keyboard controls may show it bound separately from other element attunements. Use your current bindings if you changed controls.
What changes
| Before Power of Aether | After Power of Aether |
|---|---|
| You mostly rely on floor panels to charge projectiles. | You can use Aether more directly after attuning to it. |
| Purple orbs usually require panel positioning. | Later rooms expect you to switch or use Aether actively. |
| Aether is a room gimmick. | Aether becomes part of combat and puzzle routing. |
If you are stuck after unlocking it
If a later purple target does not respond:
- Check that you are attuned to Aether.
- Check that your projectile is actually Aether-based.
- Check whether the target needs a ring, block, or platform step before it can be hit.
The unlock does not mean every Aether target becomes automatic. It means the dungeon now expects you to manage Aether yourself.
Outside Hall of Trials: Dirty Quill Location and Effect
After leaving the Hall of Trials, jump to the platform on the left. This starts the hidden Dirty Quill route.
Dirty Quill location
- Exit the Hall of Trials.
- Jump to the left platform.
- Shoot the left-side rings.
- More rings and an orb appear.
- Complete the revealed ring / orb sequence.
- Open the chest.
Dirty Quill effect
Dirty Quill gives +20% ranged attack and +35% Blight resistance.
That makes it one of the best early gems for players who use Bogha Solas, Aether-charged projectiles, or safe ranged pressure during Trial of Aether.
Why it matters
Dirty Quill is not just a completion reward. It directly supports the way Trial of Aether wants you to play: ranged shots, element-charged projectiles, and safer positioning.
If you are stuck
If the chest does not appear, you are probably standing where the reward spawns instead of where the puzzle begins. The puzzle starts from the left-side ring, not from the chest location.
B5 Ball and Chakram Puzzle
B5 is the biggest Trial of Aether wall for many players.
The room is not asking you to shoot the ball normally. It is asking you to move the ball, catch it with Chakram, and redirect it into the tentacles.
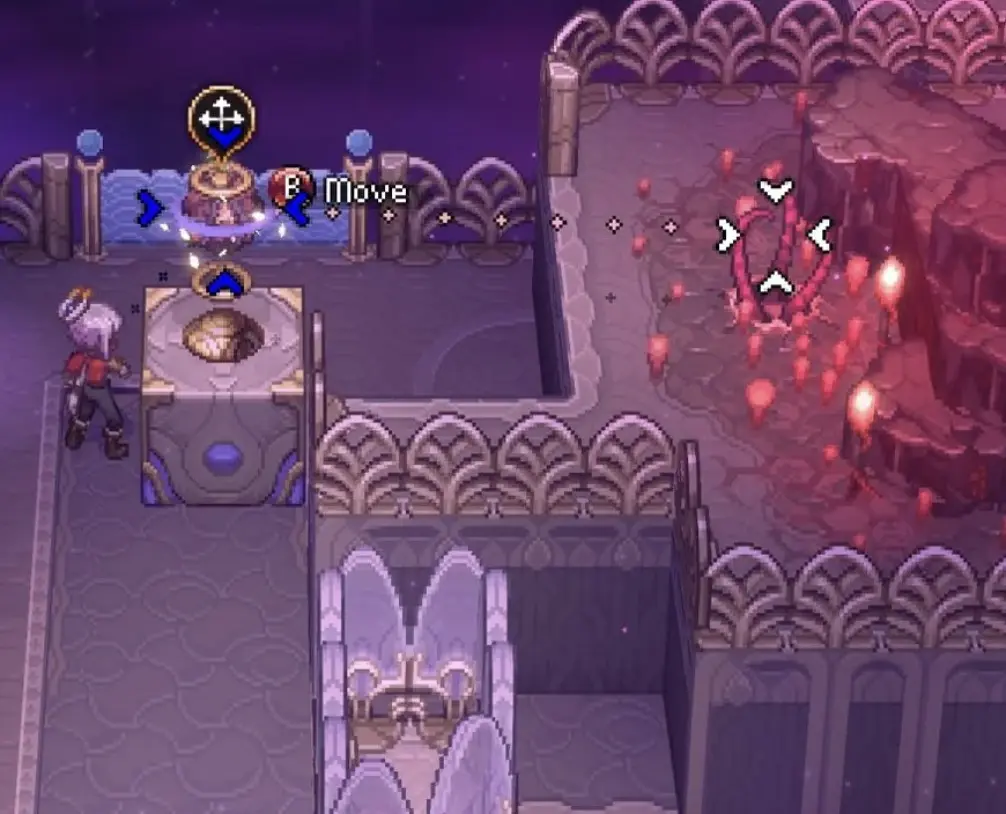
What this room wants
| Object | Role |
|---|---|
| Ball | The object you must move into the tentacles. |
| Block | Used to position the ball and ring target. |
| Ring | Receives the ball after Chakram redirection. |
| Tentacles | Final destination for the ball. |
| Chakram | The tool that catches and redirects the ball. |
Left side setup
- Go left first.
- Interact with the rings to spawn a block.
- Move the block down and to the right.
- Return to the ball.
- Hit the ball twice so it lands on the lower platform.
Chakram section
- Equip Chakram.
- Use Chakram to catch the ball.
- Fire the ball onto the ring on the block.
- After it is caught, move the block left and up.
- Fire the ball into the tentacles.
If you are stuck
If the ball keeps missing the ring, the issue is usually block position, not aim.
If you are only shooting the ball and never catching it, you are skipping the room’s main mechanic. Treat Chakram like an object-control tool, not a damage weapon.
Can you reset B5?
If the ball or block ends up in a bad position, use the safest reset method available in your build: leave and re-enter the room or reload from the last checkpoint if the room state does not reset naturally.
Do not keep forcing a bad ball position. Reset the setup, redo the left-side block placement, then solve the Chakram section cleanly.
B9 Element Orb Puzzle
B9 is the Trial of Aether room that checks whether you understand element switching.
The important new idea is this:
B9 teaches that you can have projectiles of different elements active in the room at the same time.
That means you may fire an Aether projectile, switch to wind while that projectile is still moving, then fire or redirect a wind projectile before the first one finishes its path.
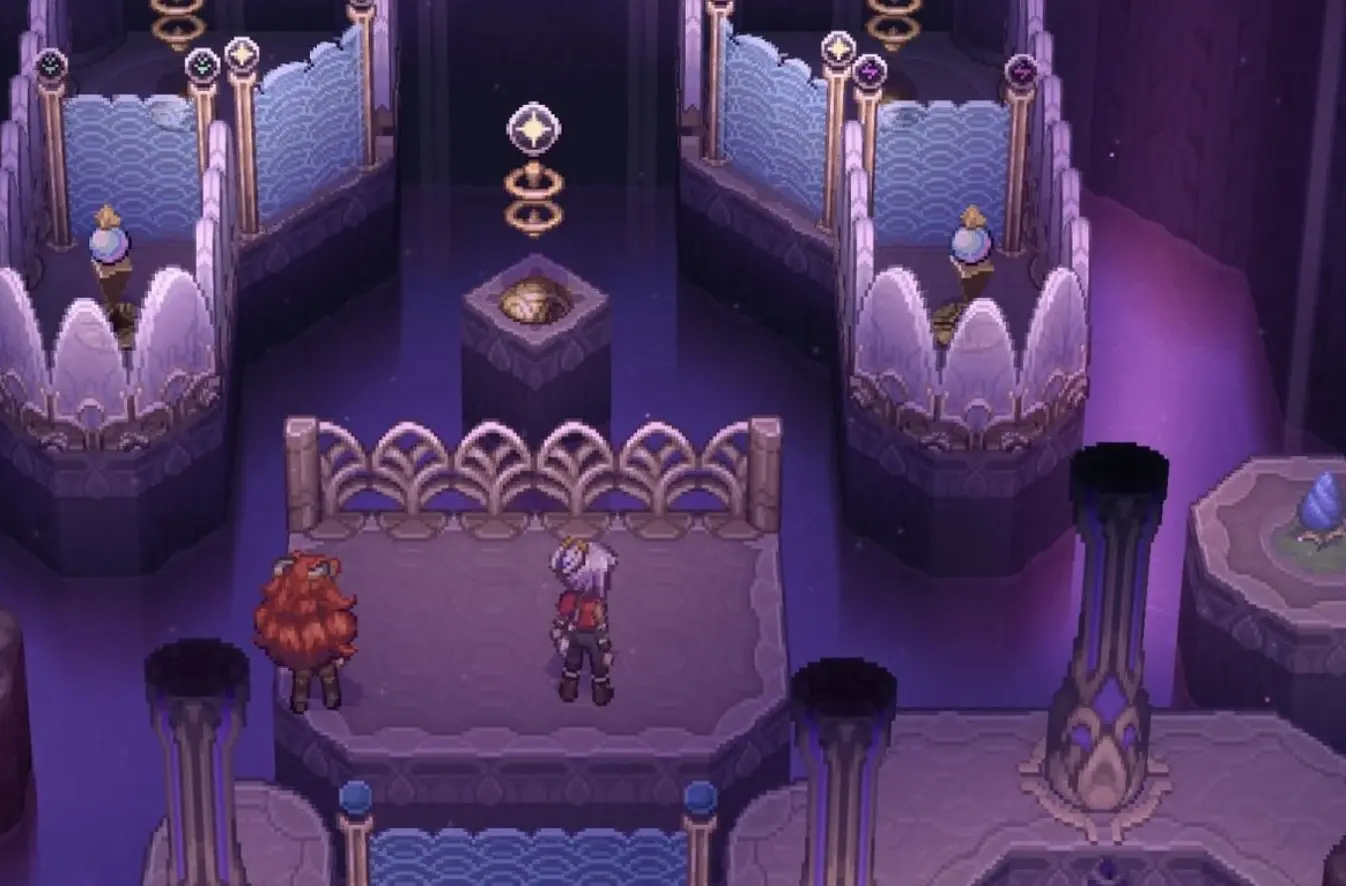
First B9 lesson: match the projectile element
| Orb | Required projectile |
|---|---|
| Left orb | Wind |
| Right orb | Aether / lightning |
| Center orb | Any projectile element |
The trick is that your projectile must match the orb’s element. It is not enough to shoot the orb with any ranged weapon.
Multi-projectile sequence
Before reading the full B9 sequence, remember the rule: this room is not about aim. It is about keeping more than one elemental projectile active while switching between Wind and Aether.
This section is not solved one orb at a time in a simple order. You are expected to switch elements while projectiles are still active.
- Fire an Aether / lightning projectile into the rings.
- Send that projectile toward the lightning orb.
- Before the whole sequence is finished, switch to wind.
- Fire a wind projectile into the first set of rings.
- Move the wind projectile down into the lower rings.
- Switch back to Aether / lightning.
- Redirect the lightning projectile down and right to hit its orb.
- Switch back to wind and hit the wind orb.
If you are stuck
If only one barrier drops, you probably solved only one element side. B9 often requires two different elemental projectiles to be active or redirected in the same overall sequence.
If a projectile reaches the orb but nothing happens, check the element first. Wrong element is more likely than wrong aim.
If you keep losing track of the projectiles, slow down and solve the room as a sequence of element checks:
- Which orb needs Aether?
- Which orb needs wind?
- Which projectile is already moving?
- Which element do I need to switch to before firing the next shot?
Symbol orb section
The second half of B9 replaces elemental orbs with symbol orbs. These do not just drop barriers; they change the room state.
Your goal is to move a block through the room, use symbol orbs to create paths, and eventually fire lightning into the final pillar.
| Symbol / object | What it does |
|---|---|
| Star symbol | Creates a bridge or path. |
| Arrow / movement symbols | Move the block through the room. |
| Buttons | Hold parts of the route open while the block moves. |
| Final pillar | Requires the correct lightning shot at the end. |
Symbol orb sequence
- Activate the large rings.
- Hit the purple pedestal rock to activate the orb.
- Catch the orb and fire it into the block.
- Switch to wind so you can move the block around the room.
- Move the block onto the first button.
- Shoot the star symbol to create the bridge.
- Move the block across the new path.
- Fire the projectile into the up-arrow orb.
- Push the block onto the next button.
- Stand on the second button when the barrier drops.
- Shoot into the “S” symbol to move the block along the route.
- Repeat the button-and-block setup for the next section.
- Shoot into the “U” shaped orb.
- Switch to Aether / lightning.
- Fire the lightning projectile into the final pillar.
If you are stuck in the symbol section
If the block will not move where you expect, check whether you are hitting a symbol orb or just shooting the block.
If the bridge is missing, you probably skipped the star symbol.
If the final pillar does not react, you are probably still using wind. Switch back to Aether / lightning before firing into the pillar.
Important Trial of Aether Rewards
This is not a full 100% chest checklist, but these rewards are worth calling out because they either improve your build or confirm that you solved an optional route correctly.
| Reward | Where to look | Why it matters |
|---|---|---|
| Whisper of the Gods x3 | Early side chest near the first platform detour. | Easy early pickup before the dungeon becomes more complex. |
| Verse of the Gods x2 | Right platform / Hammer route into A4. | Useful route reward if you are already detouring for resources. |
| Libra’s Blessing Construct | West platform detour around A5. | Confirms you explored the optional A5-side route. |
| Dirty Quill | Hidden chest outside the Hall of Trials after the left-side ring puzzle. | Strong ranged gem: +20% ranged attack and +35% Blight resistance. |
| Boom Snare Divine Art | B7 enemy gauntlet chest. | A meaningful combat reward before the later Trial route. |
| Stardrop Counter chest | B8 left-side route. | Optional reward tied to the enemy lightning-ball route. |
Other Trial of Aether Rooms, Briefly
These rooms matter, but they usually do not need full puzzle breakdowns unless you are doing a complete walkthrough.
| Room | What matters |
|---|---|
| A2 | Interact with the floating object, then hit crystals to unlock paths one side at a time. Once you reach a door, that path stays unlocked. |
| A3 | Use spawned blocks and floor markers to create jump paths. The floor markings are the clue for final block placement. |
| A4 | Floating rings redirect projectiles. Shoot into the rings, then steer the projectile toward the orb. |
| B1 / B2 | Shoot purple orbs from Aether panels. Frogs take more damage from lightning; the large turtle’s projectile can be reflected. |
| B3 | Crystals near platforms move them. When the second platform stops, shoot the crystal on the platform to drop barriers. |
| B4 | Mostly a connector and key route. You need a key before going north. |
| B6 | Lightning orbs can be moved and caught like puzzle objects. Use them to hit pillars and purple rocks. |
| B7 | Enemy gauntlet. The chest rewards the Boom Snare Divine Art. |
| B8 | Enemy lightning balls can release catchable orbs. The left route can lead back toward a Stardrop Counter chest. |
| B10 | Enemy waves before returning toward the top and boss route. |
Rana Lingua Magna Boss Quick Answer
Rana Lingua Magna is the Trial of Aether boss. The full fight belongs in the Boss Guide, but the dungeon page should still give the basic answer.
| Mechanic | What to do |
|---|---|
| Break meter | Build break safely before forcing damage. |
| Tongue window | When the boss breaks, attack the tongue immediately. |
| Lightning pillars | If the tongue is protected, use Chakram to catch or redirect the balls fired in the arena into the lightning pillars. |
| Main mistake | Attacking the boss body while ignoring the pillar protection. |
The simple rule is: break first, clear pillar protection with Chakram if needed, then punish the tongue.
Common Trial of Aether Mistakes
| Mistake | Why it hurts | Better habit |
|---|---|---|
| Shooting purple orbs with normal shots | They may not activate. | Use Aether panels or Aether attunement. |
| Leaving the Aether panel early | Your shot may lose its element. | Fire while the shot is still Aether-charged. |
| Treating blocks as only platforms | A5 uses blocks as part of a lightning chain. | Align blocks between the rock, pillar, and orb. |
| Ignoring rings | Some crystals or orbs only matter after ring interaction. | Interact with rings before shooting nearby targets. |
| Treating Chakram like a normal projectile | B5 needs catch-and-redirect. | Catch the ball, then fire it into the ring. |
| Solving only one B9 element | Only one barrier drops. | Match wind and Aether projectiles to the correct orbs. |
| Skipping Dirty Quill | You miss a strong ranged gem. | Check the left platform after exiting the Hall of Trials. |
| Forcing B5 from a bad setup | You waste time on impossible angles. | Reset the room state or reload if needed. |
| Treating B9 as a one-projectile puzzle | You only solve half the room. | Keep track of different elemental projectiles and switch elements mid-sequence. |
| Forgetting the B9 symbol orbs | The block route never opens correctly. | Use star, arrow, button, and final lightning steps in order. |
| Attacking Rana Lingua Magna while pillars protect the tongue | You waste the real damage window. | Use Chakram to redirect arena balls into the lightning pillars, then punish the tongue after break. |
FAQ
What is the main Trial of Aether mechanic?
The main mechanic is using Aether-charged projectiles to activate purple orbs, purple rocks, crystals, and lightning puzzle targets.
Why are my purple orbs not activating?
Your shot is probably not Aether-charged. Stand on the Aether panel, attune to Aether if you have unlocked it, and shoot again from the correct angle.
Is A6 a separate room?
For this guide, no. The screenshot you may think of as A6 is treated as the second A5 puzzle: the A5 block-chain section.
How do I solve A5?
A5 has two major parts. First, stand on the Aether panel and shoot the four purple orbs. Then use movable blocks to create a lightning chain from the pedestal rock to the pillar and orb.
Where is Dirty Quill?
Dirty Quill is in a hidden chest outside the Hall of Trials. After exiting, jump left, shoot the left-side ring, reveal the ring / orb sequence, and complete it to spawn the chest.
What does Dirty Quill do?
Dirty Quill gives +20% ranged attack and +35% Blight resistance.
How do I solve B5?
Move the block, drop the ball to the lower platform, catch the ball with Chakram, fire it into the ring on the block, then move the block and fire the ball into the tentacles.
How do I reset the B5 ball puzzle?
If the ball or block ends up in a bad position, leave and re-enter the room or reload from the last checkpoint if the room does not naturally reset. Do not keep forcing the puzzle from a broken setup.
How do I solve B9?
Match the projectile element to the orb. Use wind for the left orb, Aether / lightning for the right orb, and any projectile element for the center orb. Later, switch elements while projectiles are already moving through rings.
How do I beat Rana Lingua Magna?
Build the break meter first. When Rana Lingua Magna breaks, attack the tongue. If lightning pillars protect the tongue, use Chakram to catch or redirect the balls fired in the arena into those pillars, then punish the exposed tongue.
What are the most important Trial of Aether rewards?
Dirty Quill is the biggest build reward because it gives +20% ranged attack and +35% Blight resistance. Other useful route rewards include Whisper of the Gods x3, Verse of the Gods x2, Libra’s Blessing Construct, Boom Snare, and the Stardrop Counter chest.
Does this guide cover every chest?
No. This is a puzzle-focused Trial of Aether guide. It covers important rewards like Dirty Quill and key route rewards, but it is not a full 100% checklist.
Version and Footage Note
This page is based on the current Early Access build plus Trial of Aether footage. Some available Trial footage comes from a demo-style sequence where the game explicitly notes that some content may not carry over exactly into the final game.
Use this guide as a puzzle-logic guide first: Aether charging, Chakram catching, Filia weaving, block alignment, ring redirection, element switching, and Rana Lingua Magna’s break-to-tongue punish are the important lessons. If a room label, reward, or layout changes in your build, follow the current in-game behavior first and check the main Alabaster Dawn Guide for update notes.
Continue Reading in the Alabaster Dawn Guide Cluster
This article is part of our Alabaster Dawn strategy cluster. Use these guides to keep learning the game's core systems and routes.