Alabaster Dawn Guide
Alabaster Dawn Early Builds, Gems & Food Guide
Optimize your Alabaster Dawn setups! Learn the best early builds, 4-element weapon pairs, essential gem slots, and Palate Level food boosts.
Alabaster Dawn does not ask you to make a perfect build in the first few hours.
It asks you to stop building randomly.
The early game gives you several systems at once: weapon Growth Charts, element loadouts, gem slots, Divine Arts, food boosts, Palate Level, and puzzle tools like Filia. If you only look at weapon names, the whole thing feels messier than it really is. The better way to think about early builds is simple:
Pick one dependable weapon pair, give it useful gems, cook before hard routes, and only spend Growth Points on power you can actually use right now.
I made the mistake of treating some early gems like generic stat sticks. Dirty Quill looked like “just another resistance gem” at first, but it started making sense once Trial of Aether asked for more ranged comfort. That is the kind of early decision this guide is built around.

Quick Answer: Best Early Setup
For most players, the safest early setup is:
| Slot / system | Recommendation | Why it matters |
|---|---|---|
| Main melee | Claio Solas / Sword | Reliable close-range pressure and early Combat Arts. |
| Main ranged | Bogha Solas / Crossbow | Switches, flying enemies, Aether puzzles, and safer pressure. |
| Heavy tool | Ortrom Solas / Hammer when needed | Rocks, shells, armored enemies, and heavier break windows. |
| Puzzle tool | Fain Solas / Chakram when required | Object-catching and later routing puzzles. |
| First gem direction | Survivability, stamina comfort, or ranged value | Consistency matters more than perfect DPS early. |
| Food habit | Cook before long routes and bosses | Food boosts are part of your build, not emergency flavor text. |
| Filia habit | Use her for puzzle logic, not combat damage | Trial-style rooms often care about what she can interact with. |
The short version:
Build around Sword + Crossbow first. Use Hammer and Chakram as problem-solvers. Add Dirty Quill if you lean ranged. Cook different dishes and actually use boosts so Palate Level starts working for you.
One Early Access Note
This guide is based on the current Early Access build. Alabaster Dawn already feels polished enough that you do not need a warning after every paragraph, but values, available gem slots, food numbers, and Growth Chart details can still change. When in doubt, trust the tooltip in your build of the game.
How Elements, Weapons, and Divine Arts Fit Together
The biggest missing piece in many beginner builds is the element system.
Alabaster Dawn is not just “eight weapons in a bag.” The game is structured around 4 elements, and each element can have 2 weapons slotted at a time. That means your build is really a set of element kits: an element, two weapons, gems, and a Divine Art.
| System | What it means | Early build rule |
|---|---|---|
| Elements | Combat loadout layers that hold weapon pairs. | Do not judge weapons in isolation; judge the pair inside the element. |
| 2 weapons per element | Each element can carry two weapons. | Pair one reliable damage tool with one utility or ranged tool. |
| Divine Arts | Element-linked special attacks / spells. | Treat them as part of the element kit, not as ordinary weapon skills. |
| Weapon Growth Charts | Each weapon has its own unlocks. | Invest in the weapons you actually use, not every weapon evenly. |
| Gems | Slotted into weapons or core/armor depending on type. | A good gem in the right slot beats an empty slot you unlocked too early. |
For early play, do not overcomplicate this. Keep one element setup comfortable with Sword + Crossbow, then swap tools when rooms demand Hammer or Chakram. Trial of Aether is where this starts to click, because ranged shots, Aether logic, and puzzle timing matter more than raw melee damage.
Early Weapon Roles
Your first build decision is not “which weapon is best?” It is:
Which two tools let me survive most rooms without getting stuck?
| Weapon | Early role | Best use |
|---|---|---|
| Claio Solas / Sword | Main melee pressure | General fights, safe combos, early Combat Arts. |
| Bogha Solas / Crossbow | Ranged pressure and puzzle interaction | Switches, flying enemies, Aether shots, safer boss pressure. |
| Ortrom Solas / Hammer | Heavy impact and break support | Rocks, hard shells, armored targets, committed punish windows. |
| Fain Solas / Chakram | Object-control and puzzle routing | Ball/ring/catch mechanics and rooms that ask for weapon utility. |
I would not try to “main” everything at once. The first time the Hammer solves a shell enemy or rock obstacle, it is tempting to start dumping points into it immediately. Resist that unless the game is repeatedly asking for it. Early on, your build gets stronger faster when your main pair stays focused.
Recommended Early Build Paths
You do not need to lock into one build forever. Use these as directions, but do not treat all four paths as equal starting points.
If this is your first playthrough, start with Path 1: Safe Sword + Crossbow. It gives you melee pressure, ranged utility, puzzle coverage, and enough defensive room to learn the game. After that, branch into Ranged / Aether if Trial-style rooms or flying enemies are the problem, Break Pressure if enemies feel too tanky, and Parry Follow-Up only once Divine Shield timing feels natural.
| Recommended order | Build path | Use it when |
|---|---|---|
| 1 | Safe Sword + Crossbow | You are new, still learning patterns, or want the safest default. |
| 2 | Ranged / Aether | Trial of Aether, flying enemies, and ranged puzzle-combat rooms are slowing you down. |
| 3 | Break Pressure | Armored enemies, shells, or bosses feel too durable. |
| 4 | Parry Follow-Up | You can already guard on timing instead of panic-dodging. |
1. Safe Sword + Crossbow Build
Best default setup for new players.
| Focus | Pick |
|---|---|
| Main melee | Claio Solas |
| Main ranged | Bogha Solas |
| First melee upgrade | River Tap, Rain Fall, or another Combat Art you can trigger consistently |
| First ranged upgrade | Charged or piercing-style Crossbow option |
| Gem style | Max life, armor/protection, Tenacity, or ranged attack |
| Food style | Defensive, sustain, or simple damage boost before bosses |
Use this if you are still learning enemy patterns, Divine Shield timing, and dungeon puzzles.
2. Ranged / Aether Build
Best when Trial of Aether or flying enemies are your main problem.
| Focus | Pick |
|---|---|
| Main ranged | Bogha Solas |
| Key gem | Dirty Quill if available |
| Upgrade style | Charged shots, piercing shots, safer ranged pressure |
| Food style | Boosts that help you keep distance or survive mistakes |
| Best use | Aether puzzles, flying targets, puzzle-combat rooms |
Dirty Quill is the gem that makes this path feel more like a real build. It gives +20% ranged attack and +35% Blight resistance, so it helps both damage comfort and route safety.
3. Break Pressure Build
Best when enemies feel too tanky or you miss punish windows.
| Focus | Pick |
|---|---|
| Main melee | Claio Solas with break-friendly Combat Arts |
| Heavy tool | Ortrom Solas / Hammer when shells or armor appear |
| Gem style | Breaker, Strength, Tenacity, or survivability |
| Food style | Damage, stamina comfort, or defensive boosts |
| Best use | Hard-shell enemies, armored targets, longer boss windows |
Use slow Hammer attacks after an enemy commits, during a break window, or when the room clearly asks for blunt pressure. Do not throw heavy swings in neutral just because they look strong.
4. Parry Follow-Up Build
Best if you already like Divine Shield.
| Focus | Pick |
|---|---|
| Defensive habit | Timed guard / Divine Shield |
| Ranged synergy | Crossbow follow-ups after successful parries |
| Gem style | Tenacity, armor, counter-damage, or safe damage |
| Food style | Defensive boost while learning timing |
| Best use | Projectile enemies and reactive playstyles |
This is not the easiest beginner route, but it becomes strong once you stop panic-dodging every projectile.
Growth Chart Priorities
Growth Chart points should solve current problems.
Use this order early:
| Priority | Why |
|---|---|
| 1. One reliable melee Combat Art | You need a punish option you can use without thinking. |
| 2. One reliable ranged upgrade | Crossbow solves enemies and puzzles that melee cannot. |
| 3. Survival stats if you are dying | Max life and armor/protection fix many early mistakes. |
| 4. Stamina or break support | Helps if you dash, guard, or stagger enemies often. |
| 5. Gem slots only when you have useful gems | Empty slots are not power. |
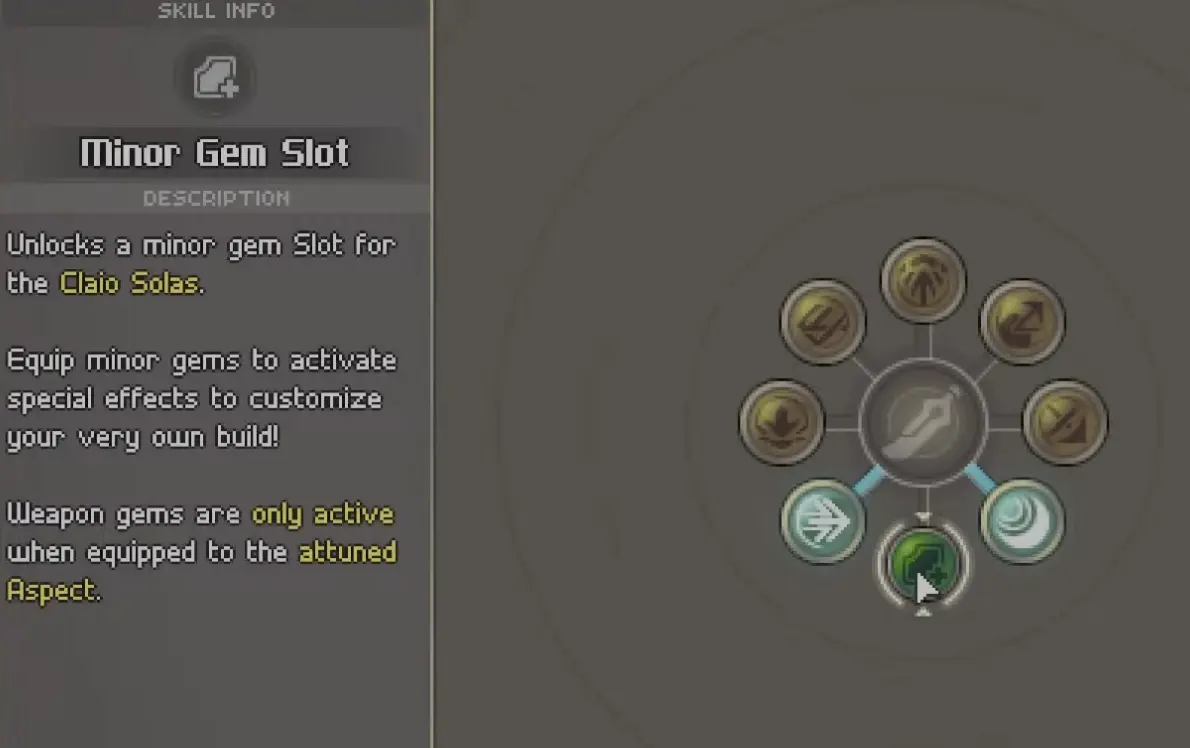
Do not unlock empty gem slots too early
Minor gem slots are valuable, but only when you can fill them. If you unlock a slot and leave it empty, you spent a Growth Point for no immediate gain.
There is also an Early Access-specific trap: some weapon Growth Chart slots may not have useful minor weapon gems available yet. For example, if your current build shows a slot on Ortrom Solas but no matching minor weapon gem can actually be equipped, treat that node as a later investment rather than an early priority.
Gem Slot Basics: Weapon Gems vs Core / Armor Gems
Gems are not all the same kind of equipment.
| Slot type | What it affects | Good early use |
|---|---|---|
| Weapon gem slot | A specific weapon’s performance or style. | Ranged attack on Crossbow, damage on your main weapon, weapon-specific utility. |
| Core / armor gem slot | Juno’s broader stats or defense. | Max life, armor/protection, Tenacity, resistance, general survivability. |
| Divine Arts | Separate element-linked equipment / special attack system. | Burst, spell-style effects, and element identity. Do not confuse these with gems. |
This distinction matters because a gem like Dirty Quill should be thought of as part of your ranged weapon setup, not as a generic “put it anywhere” upgrade. If a gem will not fit the slot you are looking at, check whether you are trying to place a weapon-side gem into a core/armor slot or vice versa.
Gem Forge, Constructs, and Artificers
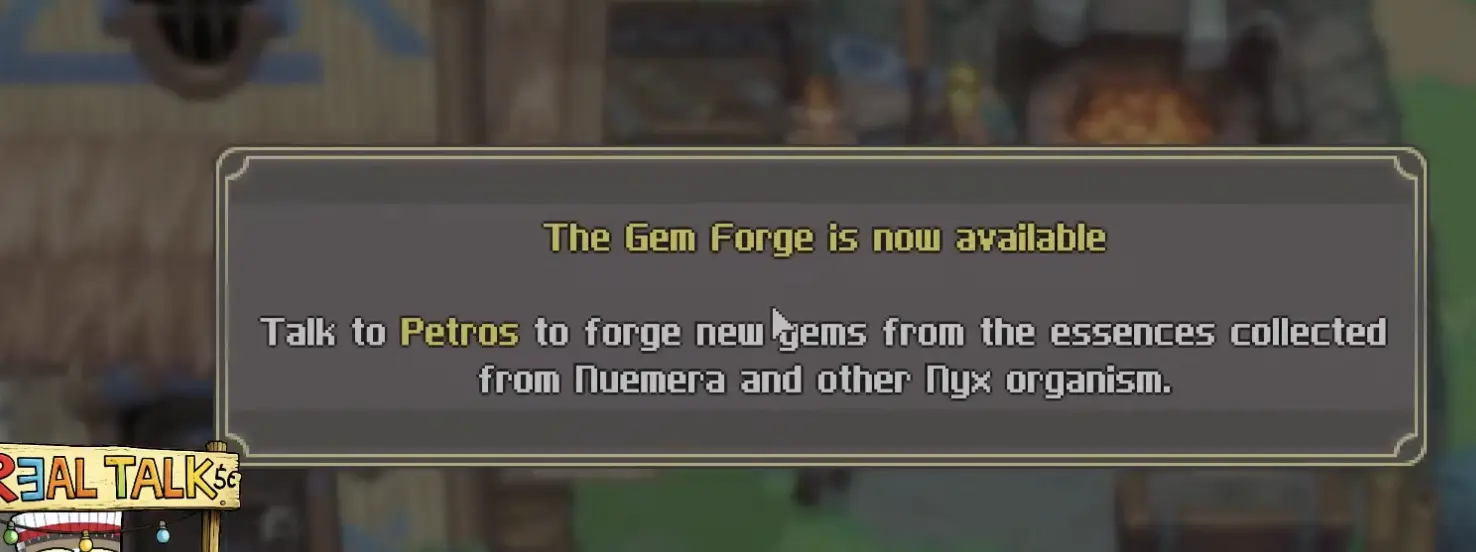
The Gem Forge turns your materials into actual build power, but only if you craft with a purpose.
| Item / system | What it means |
|---|---|
| Construct | Material used to craft a minor gem. |
| Artificer | NPC / system used to craft or upgrade gems. |
| Gem Forge | Interface where gem crafting becomes available. |
| Purity grade | Higher purity means stronger enchantments. |
Before crafting, ask:
- Does this gem help my main weapon pair?
- Do I already have a slot for it?
- Does it solve a problem I am actually having?
- Is it better than a simple survival or ranged option?
If the answer is no, save the material.
Useful Early Gem Effects
| Effect | What it helps with | Best for |
|---|---|---|
| Max life | More room for mistakes | New players, long routes, bosses. |
| Armor / protection | Lower incoming damage pressure | Players still learning enemy timing. |
| Strength | More direct damage | Confident players who already survive. |
| Ranged attack | Stronger Bogha Solas pressure | Trial of Aether, flying enemies, safer boss attempts. |
| Tenacity | Lower stamina cost for dashing and guarding | Dodge-heavy or guard-heavy players. |
| Gamble | More damage against enemies that are attacking or preparing to attack | Aggressive players who punish active enemies. |
| Resistance | Less pressure from specific hazards or statuses | Dungeons with repeated status or element problems. |
Dirty Quill Location and Best Use
Dirty Quill is one of the strongest early reasons to care about ranged gems.
| Stat | Value |
|---|---|
| Ranged attack | +20% |
| Blight resistance | +35% |
Dirty Quill is found in the hidden chest outside the Hall of Trials after the left-side ring puzzle.
Who should use Dirty Quill?
Use Dirty Quill if:
- Bogha Solas is one of your main weapons,
- you use Aether-charged ranged shots often,
- Trial of Aether combat feels uncomfortable,
- you prefer mid-range pressure instead of forcing melee,
- or Blight resistance is helping you survive a specific route.
I would not sell or ignore it early. Even if you do not feel the damage immediately, the combination of ranged attack and resistance is exactly the kind of practical value that makes puzzle-combat routes smoother.
Filia: What She Does and Does Not Do
Trial-style progression is not only about weapons. Filia matters because she fills the “Wise” side of the puzzle formula.
A simple way to remember it:
Juno fights and triggers weapon logic. Filia helps with Wise / weaving logic.
| Filia role | What it means in practice |
|---|---|
| Weaving interaction | Some panels or room objects need Filia’s Wise ability to become usable or change state. |
| Puzzle partner | She helps rooms progress when the solution is not just “shoot the switch.” |
| Not your main damage source | Do not build your combat plan around Filia killing enemies for you. |
| Position / room logic | If a room looks solved but nothing happens, check whether Filia needs to enter, stand near, or interact. |
This is easy to miss if you only think in terms of weapons. Trial of Aether is closer to a two-character puzzle dungeon than a pure combat gauntlet. Before blaming your build, ask whether the room is waiting for Filia.
Food and Boosts
Food is not just healing. It is build preparation.
You cook a meal, gain a boost, and then activate that boost during combat. Boosts appear near your Healing Bulb UI. When you hold the input to apply a boost, time slows slightly, which makes it much safer to use during fights.

| Boost mechanic | What it means |
|---|---|
| Cook first | Raw ingredients do not do the job by themselves. |
| Active dish | Your current meal determines what boost you bring. |
| Boost slot | Boosts appear around your Healing Bulb area. |
| Hold to apply | Holding the input starts applying the boost. |
| Time slow | Time slows slightly while applying, so mid-fight use is practical. |
| Buff display | Active buffs appear under your life bar. |
| Recharge / cooldown | Some boosts can recharge through combat after use. |
Use boosts before:
- bosses,
- long routes,
- Trial of Aether puzzle-combat rooms,
- enemy waves,
- and fights where you keep losing by a small margin.
Do not wait until a boss feels impossible before learning the food system. If you are entering every hard fight with no active meal, you are voluntarily playing weaker.
Palate Level: The Part Players Usually Underuse
Palate Level is the long-term reason to cook early.
The practical trigger is not “cook one safe dish forever.” It is:
Cook different dishes, use the boosts, then keep rotating meals so the food system gains value over time.
| Palate habit | Why it matters |
|---|---|
| Cook new dishes | Variety helps build food progression instead of repeating one basic meal. |
| Actually use boosts | Boost use is part of turning food into progression value. |
| Rest and repeat | Treat cooking as a loop before routes, not a one-time tutorial. |
| Match food to the route | Defensive boosts for learning, damage boosts for confident boss attempts, utility for exploration. |
The first time I paid attention to Palate Level, the useful lesson was not “optimize every recipe.” It was “stop hoarding ingredients and start treating food like equipment.” The game is nudging you to spend food, learn what each boost does, and make future meals better.
Seasonings
Seasonings are the extra layer on top of recipes. They can be added during cooking to modify or improve the result, usually by adding extra effects.
| Seasoning rule | Practical use |
|---|---|
| Add them to recipes | They are not a separate meal; they modify cooking. |
| Use them before hard content | Save stronger combinations for bosses or long routes. |
| Test effects gradually | Do not burn rare Seasonings just to fill a slot. |
| Pair with build needs | Ranged build wants safety/pressure; break build wants damage/stamina comfort; beginner build wants survival. |
For early play, do not obsess over perfect Seasoning math. Just know they exist, read the boost preview, and use them when a route is actually difficult.
Pre-Fight Checklist: Trial of Aether and Bosses
Instead of repeating separate “before Trial” and “before bosses” sections, use one checklist.
| Check | Trial of Aether | Bosses |
|---|---|---|
| Main weapon pair | Bogha Solas + a comfortable melee option | Sword + ranged fallback is safest. |
| Element awareness | Know when Aether logic is required. | Use the element kit you can execute under pressure. |
| Filia / Wise logic | Check whether Filia needs to weave or interact. | Usually less important unless the encounter has puzzle setup. |
| Key gem | Dirty Quill if available for ranged comfort. | Defensive, damage, or resistance gem depending on the boss. |
| Food | Bring at least one useful boost. | Cook before attempts; do not hoard. |
| Healing Bulbs | Refill before long routes. | Start full. |
| Break plan | Useful for enemy waves and armored targets. | Save heavy damage for break or recovery windows. |
| Empty slots | Do not enter with obvious empty power. | Fill useful slots before repeated attempts. |
For boss-specific attack patterns, use the Boss Guide.
Common Build Mistakes
| Mistake | Why it hurts | Better habit |
|---|---|---|
| Leveling every weapon equally | Your main tools stay weak. | Focus one melee and one ranged weapon first. |
| Ignoring the element system | You miss how weapon pairs and Divine Arts fit together. | Think in element kits, not isolated weapons. |
| Unlocking empty gem slots | You gain no immediate power. | Unlock slots when you have useful gems. |
| Confusing weapon and core gems | Gems appear “unusable” or get placed poorly. | Check the slot type before judging the gem. |
| Ignoring Bogha Solas | Puzzle rooms and flying enemies punish you. | Keep Crossbow comfortable. |
| Ignoring Filia | Some puzzle rooms look impossible or bugged. | Check Wise / weaving interactions. |
| Hoarding food | You enter hard fights weaker than necessary. | Cook before long routes and bosses. |
| Repeating one meal forever | Palate progression stays shallow. | Rotate new dishes and use boosts. |
| Forgetting Seasonings | You miss extra cooking value. | Add them when the route is worth the cost. |
| Crafting random gems | You waste materials. | Craft gems that solve current problems. |
| Picking only damage | You die before damage matters. | Add survival if you are still learning. |
| Using slow attacks in neutral | Animation commitment gets punished. | Save heavy attacks for recovery or break windows. |
FAQ
What is the best early build in Alabaster Dawn?
The safest early build is Claio Solas + Bogha Solas, with one reliable melee Combat Art, one ranged upgrade, a useful gem, and food boosts before hard fights. Add Hammer and Chakram when the room asks for them.
How do elements affect builds?
Each element can hold two weapons, so your build is not just “which weapon is best.” It is an element kit: two weapons, their Growth Chart investment, gems, and Divine Arts.
Should I level every weapon?
No. Focus one melee and one ranged weapon first. Level other weapons when they solve a repeated problem, not just because they exist.
Are weapon gems and core / armor gems different?
Yes. Weapon gems affect specific weapon setups, while core or armor gems are broader defensive or character upgrades. If a gem will not slot where expected, check whether it belongs to a different slot type.
Is Dirty Quill worth getting?
Yes, especially for ranged or Trial of Aether-focused play. Dirty Quill gives +20% ranged attack and +35% Blight resistance, which makes Bogha Solas safer and more useful.
What does Filia do?
Filia is mainly a puzzle partner. She helps with Wise / weaving interactions and room logic. Do not treat her as your main combat damage source.
How does Palate Level work?
Palate Level rewards cooking variety and boost usage. Cook different dishes, actually use their boosts, and keep rotating meals instead of relying on the same basic dish forever.
What are Seasonings for?
Seasonings are added to recipes during cooking to grant extra effects. Save stronger Seasoning use for bosses, long routes, or sections where the boost actually matters.
When should I unlock gem slots?
Unlock gem slots when you have a useful gem ready. An empty slot does not make you stronger.
What should I check before Trial of Aether?
Bring Bogha Solas, understand Aether shot logic, check Filia interactions, equip Dirty Quill if available, refill Healing Bulbs, and cook a useful boost.
What should I check before bosses?
Bring one reliable melee punish option, a ranged fallback, full Healing Bulbs, a food boost, and gems that support either survival or your main damage plan.
Continue Reading in the Alabaster Dawn Guide Cluster
This article is part of our Alabaster Dawn strategy cluster. Use these guides to keep learning the game's core systems and routes.