Gold Gold Adventure Gold Guide
How to Survive Early Waves in Gold Gold Adventure Gold
Learn how to survive early waves in Gold Gold Adventure Gold. Master Archer Towers, Fear Quests, Defend Quests, and Godbeast support to protect your town.
Early defense in Gold Gold Adventure Gold is not about killing every enemy on the map. It is about building a town that can survive the first pressure cycle without losing heroes, farms, or the castle.
The safest beginner defense plan is the Defense Triangle:
| Defense piece | What it does |
|---|---|
| Tower | Holds the route and deals steady damage. |
| Quest | Pulls heroes into the fight before enemies reach town. |
| Godbeast | Stabilizes emergencies while heroes gather. |
If one side of the triangle is missing, the defense becomes unstable. A tower with no heroes gets overwhelmed. A defend quest with no tower arrives too late. A Godbeast with no support can be forced into bad pathing or heavy damage.
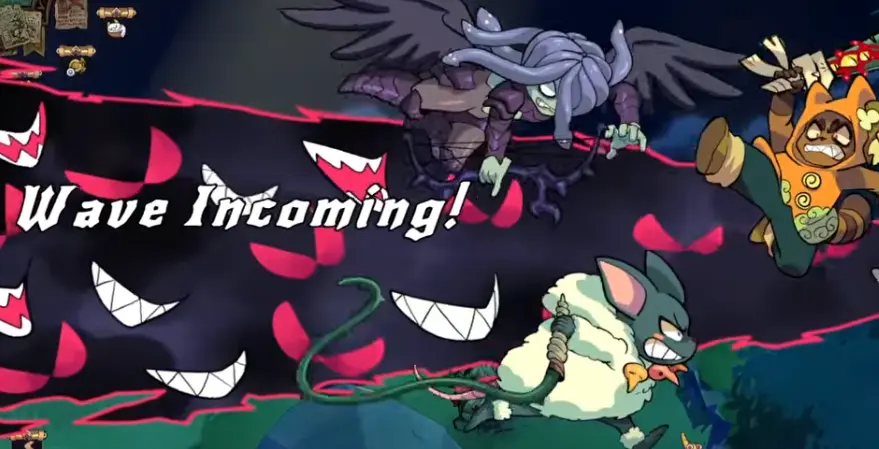
Wave warning with tower and defend quest support. The important detail is the setup before enemies reach the town, not the fight after buildings are already under attack.
Fast Answer
| Problem | Fix |
|---|---|
| Monsters are reaching town | Put an Archer Tower on the route and place a defend quest before the wave arrives. |
| Heroes keep dying | Use Fear Quest to block unsafe fights, then improve Forge, party size, and hero levels before pushing harder enemies. |
| A wave is coming | Pause, identify the route, set a defend quest, raise bounty if needed, and cancel distractions. |
| Checkpoint attack backfires | Build defense first. Checkpoints can trigger retaliation or open new pressure routes. |
| Dungeon pressure grows | Send expeditions when ready; neglected dungeons can become wave pressure. |
| Godbeast is fighting alone | Add tower coverage, defend quest, Inn support, and hero bounty. |
| You have no gold for defense | Stop expansion and use safe income / farm quests before opening a new front. |
Mode Differences: Defense Is Not the Same in Every Mode
Do not use the same defense plan in every mode. The map objective changes what “safe” means.
| Mode / situation | Defense priority | Timing rule | What to avoid |
|---|---|---|---|
| Survival / wave pressure | Tower + Forge + defend quest early | Watch for the wave icon or warning prompt on the map; your tower and defend quest should already be in place before it appears. | Waiting for passive income while enemies scale. |
| Conquest Mode | Checkpoint timing, dungeon control, Godbeast lane | Build tower + defend quest support before destroying a checkpoint or pushing a boss route. | Attacking checkpoints before tower, bounty, and party support are ready. |
| Colony growth | Protect farms, markets, tax routes, and dungeon approaches | Defend your income base before expanding the town footprint. | Expanding so far that farms and markets cannot be defended. |
| Tutorial / first run | Learn tower placement, defend quest, Fear Quest, and Godbeast support | Pause before spending and identify the first enemy route. | Building a pretty town before understanding enemy routes. |
The footage does not confirm exact universal wave days or retaliation timers, so do not hard-code “Day X” rules unless you have tested the mode yourself. Use the objective card, wave warning, dungeon warning, and checkpoint prompt as your real timing signals.
Practical Bounty Ranges for Defense Quests
These ranges are working estimates based on early-game footage and community-style play patterns, not fixed formulas. Treat them as starting points. Higher difficulty, longer distance, stronger enemies, or bad party setup can push the needed bounty much higher.
| Defense situation | Starting bounty |
|---|---|
| Safe nearby defend quest | 100–250g |
| Defend quest near town under light pressure | 200–500g |
| Wave already moving toward town | 500–800g |
| Checkpoint retaliation or high-risk defense | 800g+ only if heroes can survive |
| Dungeon / boss pressure | 1000g+ only with party, Forge, and Godbeast support |
The key rule:
If you need a huge bounty to make heroes move, the problem is not only money. It is probably danger, distance, party strength, or timing.
Read next:
Step 1: Read the Objective Before Spending
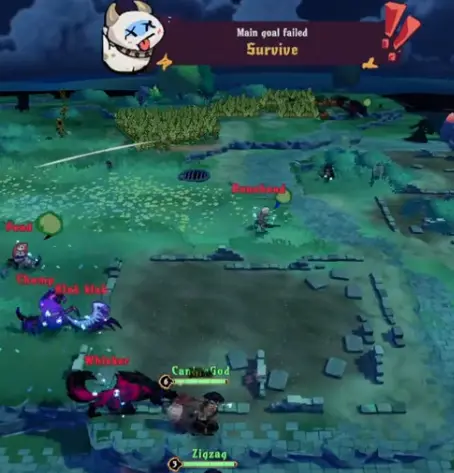
Some starts ask you to survive for several days. In those runs, the first goal is not expansion. It is building a defense triangle that can last.
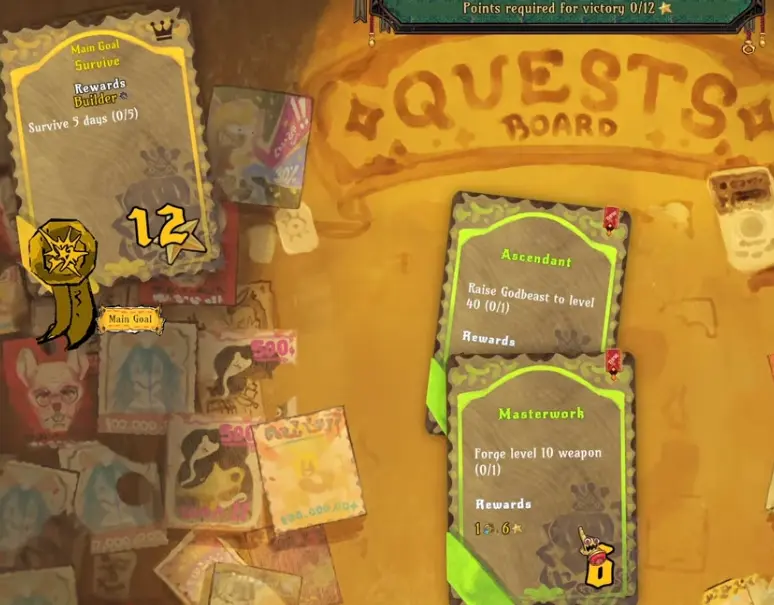
Survive objectives should change your build order. Do not spend your first gold on greedy expansion when the win condition is staying alive.
Before building, check:
| Question | Why it matters |
|---|---|
| Where are enemies likely to enter? | Towers must cover the actual route. |
| Is there a dungeon nearby? | Dungeons can become wave pressure if ignored. |
| Is there a checkpoint nearby? | Destroying it may trigger retaliation or new threats. |
| Can heroes reach the route quickly? | Long travel time makes defend quests weaker. |
| Is the Godbeast near the danger side? | It can stabilize the first contact. |
| Do you have enough gold for bounty? | Defense quests need gold to pull heroes in time. |
Step 2: Build the First Tower on a Real Route
The first Archer Tower should cover a route enemies actually use. Do not place it just because an area looks central.
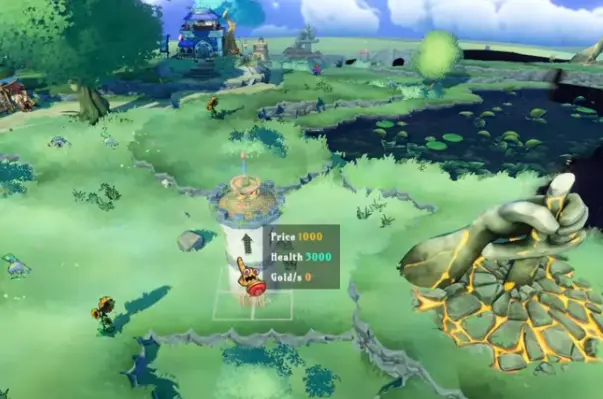
An Archer Tower is strongest on a bridge, checkpoint approach, dungeon path, farm edge, or castle approach.
Good early tower locations:
| Location | Why it works |
|---|---|
| Bridge | Enemies funnel through a narrow path. |
| Checkpoint approach | Retaliation may come from that side. |
| Dungeon path | Helps contain monster pressure. |
| Farm edge | Protects long-term income. |
| Castle approach | Buys time during emergencies. |
| Choke point | Keeps enemies in tower range longer. |
If a tower does not shoot during the first real attack, it was probably placed on the wrong route.
Step 3: Place Defend Quest Before Contact
A defend quest is how you gather heroes near the danger route. The timing matters more than the icon.
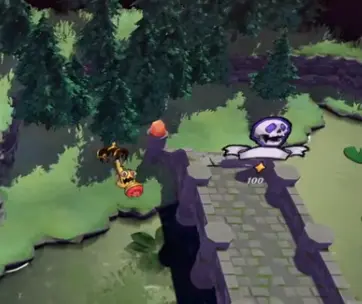
A defend quest placed near the danger route gives heroes time to gather before monsters reach buildings.
Use a defend quest when:
| Situation | Why it helps |
|---|---|
| Wave warning appears | Heroes need time to move before combat. |
| Farm route is exposed | Protects income before enemies destroy it. |
| Tower needs backup | Keeps enemies from walking past static defense. |
| Godbeast is fighting alone | Brings heroes into the same fight. |
| Checkpoint was just attacked | Prepares for retaliation. |
Defend Quest timing
Place the defend quest while enemies are still approaching. If you wait until buildings are already under attack, heroes may arrive too late.
Defend Quest vs Fear Quest
Use Defend Quest when you want heroes to move toward a place.
Use Fear Quest when you want heroes to stay away from a place.
| Situation | Use Defend Quest | Use Fear Quest |
|---|---|---|
| A wave is approaching town | Yes — gather heroes near the route. | No, unless weak heroes are walking into the wrong side. |
| A farm route is under threat | Yes — pull heroes to protect income. | Only if a nearby monster is too strong to fight now. |
| A high-level enemy is sitting near the map edge | Not yet, unless you are ready to fight. | Yes — keep weak heroes away. |
| Dungeon path is too dangerous | Not until party and Forge are ready. | Yes — prevent accidental solo exploration. |
| Checkpoint retaliation is expected | Yes — prepare the route. | Maybe — block heroes from chasing into unsafe territory. |
| Heroes keep dying one by one | Use only with party support. | Yes — stop bad fights until stronger heroes are ready. |
You can use both at the same time: place a Fear Quest on the dangerous enemy zone, then place a Defend Quest closer to your tower or town. This tells heroes where not to go and where to gather instead.
Step 4: Use Fear Quest to Prevent Bad Fights
Fear Quest is most useful when weak heroes keep walking into fights they cannot survive.
Instead of pulling heroes into combat like a defend quest, Fear Quest blocks unsafe movement and buys time for your town to scale.
See the Defend Quest vs Fear Quest comparison above for the most common situations.
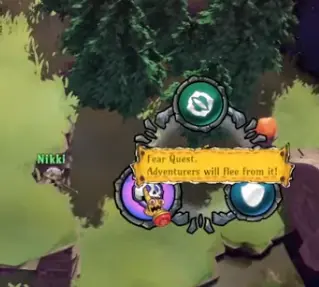
Fear Quest is strongest when used to block weak heroes from dangerous dungeon paths, bosses, or early high-level enemies.
Step 5: Do Not Attack Checkpoints Too Early
Checkpoints are one of the easiest ways to lose an early run. They look like progress, but they can also open a new danger route.
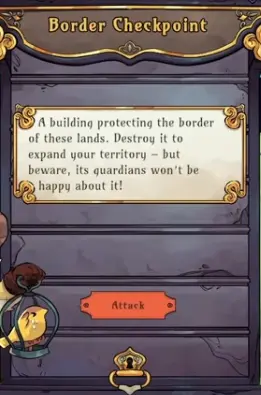
Before destroying a checkpoint, assume the guardians may respond. Build the defense line first.
Before attacking a checkpoint, confirm:
| Ready check | Push if… | Delay if… |
|---|---|---|
| Tower | It covers the expected retaliation path. | It is on the wrong side of town. |
| Heroes | Enough heroes are available and alive. | One weak hero is likely to go alone. |
| Forge | Gear is not badly behind. | Heroes are already losing normal fights. |
| Godbeast | It can help hold the lane. | It is far away or stuck in town. |
| Gold | You can pay a defend / attack bounty. | The attack empties your treasury. |
| Timing | No wave is already active. | A wave, dungeon, or farm attack is happening. |
If several checks fail, do not pay a bigger bounty. Delay the checkpoint.
Step 6: Control Dungeon Pressure
Dungeons are not only loot opportunities. In some modes, neglected dungeons can create wave pressure.
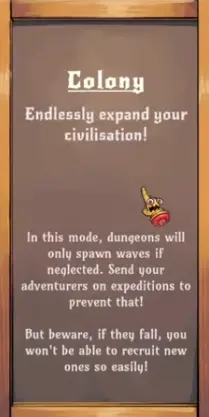
Dungeon warning explaining that neglected dungeons can spawn waves. This makes dungeon control part of defense, not just exploration.
Use this rule:
| Dungeon state | Defense response |
|---|---|
| Nearby dungeon is quiet | Prepare party, Forge, and bounty before it becomes urgent. |
| Dungeon pressure is rising | Send an expedition when the party can survive. |
| Dungeon is too dangerous | Use Fear Quest and level heroes elsewhere first. |
| Dungeon route points toward farms | Add tower / defend support near that route. |
| Heroes die inside | Stop forcing it and improve party strength. |
Do not ignore dungeons forever, but do not rush them with weak solo heroes either.
Step 7: Use the Godbeast as First Contact, Not Solo Defense
The Godbeast stabilizes a fight by taking the first contact, slowing enemy pressure, and buying time for heroes to gather. It does not replace towers or defend quests.
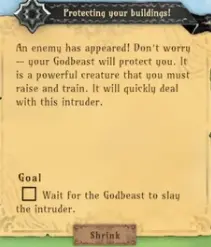
The Godbeast can take the first fight, but it works best when the same route also has tower coverage and a defend quest.
Use the Godbeast like this:
| Situation | Concrete action |
|---|---|
| Intruder reaches town | Let the Godbeast make first contact while you place or fund a defend quest. |
| Defend quest is slow | Keep the Godbeast near the route so it buys time for heroes to arrive. |
| Checkpoint retaliation starts | Pull the fight back toward tower range instead of letting the Godbeast chase too far. |
| Dungeon route threatens farms | Put the Godbeast lane between dungeon route and farms. |
| Heroes refuse the fight | Use the Godbeast to hold the route while you adjust bounty, party size, or minimum level. |
| Godbeast is taking heavy damage | Stop pushing, add support, or retreat the fight closer to tower / hero coverage. |
Read next:
Failure Case: What a Bad Defense Looks Like
A failing defense usually has one of these patterns:
Failure case: the town is stretched thin, enemies are pressuring buildings, and the defense line is no longer clearly between the enemy route and the commercial core.
In this type of failure state, look for three problems:
| What to look for in the screenshot | What it usually means | Fix next run |
|---|---|---|
| Enemies are already beside production or religious / support buildings | The defense line was placed too deep inside town. | Move tower and defend quest outward. |
| Heroes and Godbeast are reacting after damage starts | The defend quest was late or the bounty was too low. | Place defend quest before contact and fund it earlier. |
| Buildings are spread across multiple exposed paths | The town expanded faster than it could defend. | Keep the first town compact until tower + quest + Godbeast support is ready. |
Emergency Plan: When a Wave Is Coming
When you see a wave warning, do this immediately.
| Step | Action |
|---|---|
| 1 | Pause or slow down. |
| 2 | Find the route enemies are likely using. |
| 3 | Check whether your tower covers that route. |
| 4 | Use the Defend Quest timing rule above: place it near the route before contact. |
| 5 | Raise bounty if heroes do not move. |
| 6 | Cancel side quests pulling heroes away. |
| 7 | Use Fear Quest if weak heroes are walking into a bad fight. |
| 8 | Keep the Godbeast near the lane. |
| 9 | Do not attack a checkpoint during the wave. |
| 10 | Rebuild gold and repair the route before expanding again. |
This is the one checklist worth keeping. It is the fastest way to recover from a wave warning without rewriting your whole town.
Early Defense Build Order
Use this as your default build order, then adjust based on the map.
| Step | Build / action | Why |
|---|---|---|
| 1 | Quest Board | Enables defend, attack, fear, and exploration quests. |
| 2 | Inn | Helps heroes recover and form parties. |
| 3 | Recruitment building | Gives you enough bodies to defend. |
| 4 | Archer Tower | Covers the first danger route. |
| 5 | Forge | Keeps heroes from falling behind enemies. |
| 6 | Defend Quest | Pulls heroes to the tower lane. |
| 7 | Market / income support | Helps after the defense loop works. |
| 8 | Checkpoint attack or dungeon expedition | Only after the defense triangle is ready. |
When to change the order
| Map situation | Adjustment |
|---|---|
| Dungeon is very close | Move Archer Tower and Forge earlier. |
| First objective is survival | Delay Market and expansion. |
| Farms are exposed | Put tower / defend support near the farm route. |
| Heroes are dying | Move Forge earlier. |
| Heroes are too few | Add recruitment before Market. |
| You have no gold buffer | Stop before checkpoint attack. |
Read next:
Common Early Defense Mistakes
Keep this short. These are the mistakes that actually lose runs.
| Mistake | Why it loses runs | Better move |
|---|---|---|
| Fighting too early | Weak heroes die before they become useful. | Use Fear Quest and level on safer targets. |
| Expanding before defense | New routes open before you can hold them. | Build tower + defend quest + Godbeast lane first. |
| Placing towers randomly | The tower never fires when pressure arrives. | Cover bridges, checkpoints, dungeons, farms, or castle paths. |
| Treating bounty as strength | A higher reward does not make heroes survive. | Add Forge, party support, and safer timing. |
FAQ
Why do my heroes die even when I raise bounty?
Bounty only makes a quest more attractive. It does not increase hero level, gear, party size, or survivability. If heroes die after accepting, the fight was too dangerous or the party was too weak.
When should I use Fear Quest?
Use Fear Quest when weak heroes keep walking into high-level enemies, dangerous dungeon paths, bosses, or areas you are not ready to fight yet.
Should I attack checkpoints early?
Only if you can defend the retaliation path. Have a tower, defend quest, enough heroes, Godbeast support, and enough gold for bounty before attacking.
Can I use Defend Quest and Fear Quest at the same time?
Yes. Use Fear Quest to keep weak heroes away from a dangerous enemy or dungeon path, then use Defend Quest closer to your tower, farm route, or town entrance. This gives heroes a safer place to gather instead of wandering into the worst fight.
Continue Reading in the Gold Gold Adventure Gold Guide Cluster
This article is part of our Gold Gold Adventure Gold strategy cluster. Use these guides to keep learning the game's core systems and routes.
Heroes ignoring quests in Gold Gold Adventure Gold? Learn how to fix 'too dangerous' warnings, set the right bounties, and adjust party size to survive.
Strategy GuideHow to Make Gold Fast in Gold Gold Adventure GoldBroke in Gold Gold Adventure Gold? Discover the fastest ways to make money using right-click farm quests, active hero taxes, and safe bounties.
Strategy GuideBest First Buildings & Build Order in Gold Gold Adventure GoldDiscover the best first buildings in Gold Gold Adventure Gold. Learn optimal build orders, when to place the Forge, and how to use the Quest Board.
Strategy GuideGold Gold Adventure Gold Godbeast & Evolution GuideDiscover the best Godbeast in Gold Gold Adventure Gold. Compare Pebble, Sphinx, and Holydoll. Learn how to fix town grid issues and trigger evolutions.