Goblin Vyke Guide
Goblin Vyke Goldleaf Bank Walkthrough: Keys & Vault
Complete Goldleaf Bank walkthrough for Goblin Vyke. Learn how to unlock the Aliya route, beat laser switches, find gold keys, and clear the underground vault.
Goldleaf Bank is where Goblin Vyke changes from a normal steal-and-sell loop into a route puzzle. The first visit is about opening vents and laser paths. Later visits are about Aliya’s archive route, gold and silver keys, Lucius’ Seed, the underground vault, and the Shears of Fate.
Use this guide by stage. If you just unlocked the bank, follow the vent route. If you already finished the vent route, skip to the archive fire or ending sections.
Quick Answer
To unlock Goldleaf Bank, progress Aliya’s questline and complete at least one of her supply orders. After that, she sends you into the bank to open three vents.
The first bank route is:
Sewer entrance → lower laser switch → elevator → 5F east vent → upper laser switch → 3F east vent → 3F west vent
After the vents are open, the later action night starts from the 3F west side and leads to the archive, where you burn the contract and escape.
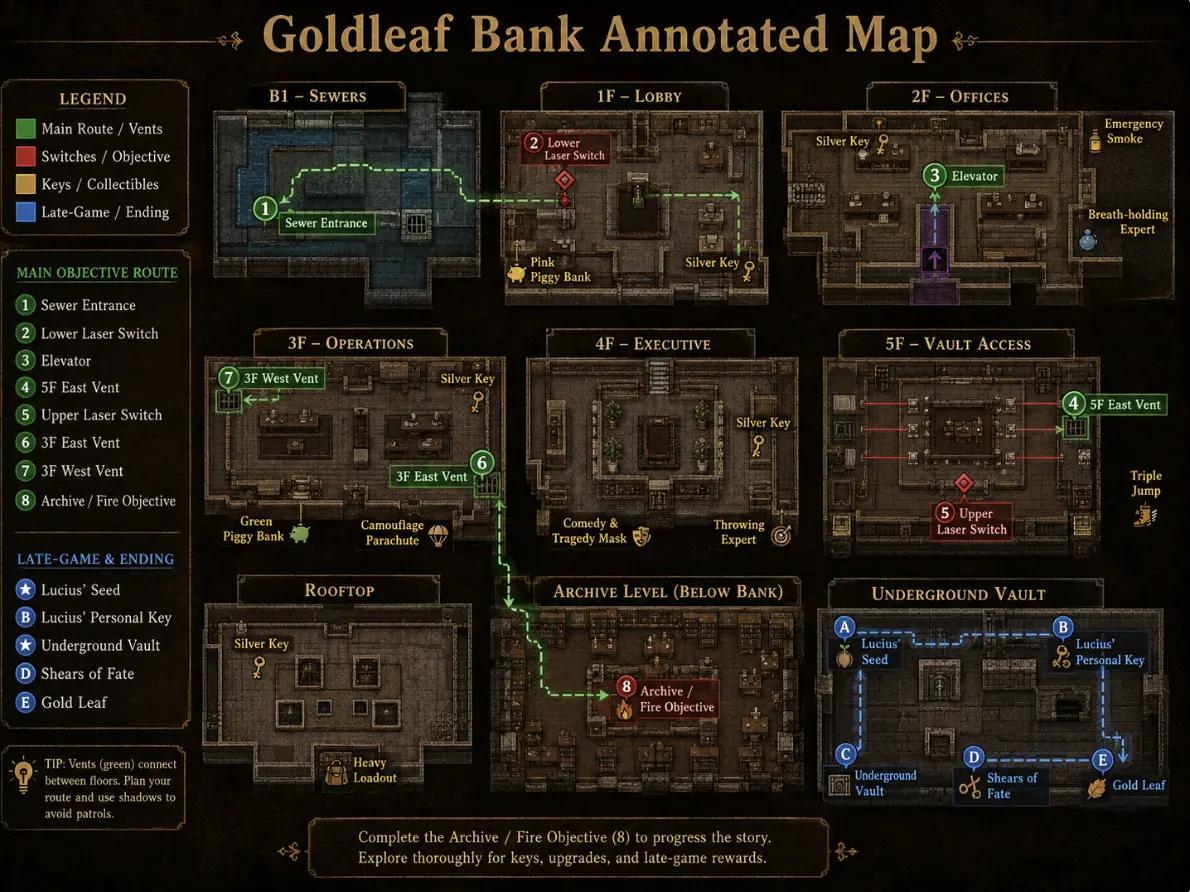
Use the map as your route anchor: green is the first infiltration route, red marks switches and objectives, yellow marks keys and collectibles, and blue marks late-game ending steps.
Before you enter: time, tools, and route stage
| Requirement | Recommendation |
|---|---|
| Difficulty | Intermediate |
| First clear time | About 20-30 minutes while learning the route |
| Repeat vent route time | About 10-15 minutes once you know the switches and vent order |
| Minimum comfort tools | Double Jump, smoke support, healing item, empty backpack space |
| Strongly recommended tools | Grappling Hook, Shadow Rewind, mobility charm, stealth tools |
| Important progression note | Finish Mine of Echoing Cries before chasing the Lucius’ Seed route, because you need Demon Lord’s Eye to identify the real chest safely. |
If your movement is still weak, finish the Best Early Skills Guide route first. If your inventory is always full, read the Backpack and Storage Guide before entering.
Where are you in the Goldleaf Bank route?
| Your current stage | Go to this section | Your goal |
|---|---|---|
| Aliya has not sent you to the bank yet | How to unlock Goldleaf Bank | Complete at least one Aliya order. |
| You just unlocked the bank | First infiltration route | Open the three vents. |
| You already opened the vents | Archive fire route | Enter from 3F west, burn the contract, and escape. |
| You need silver keys | Silver keys and Scroll Knowledge | Sweep the bank route for four silver keys. |
| You need gold keys | Gold armored soldiers | Steal gold keys without fighting directly. |
| You are chasing Lucius’ Seed | Lucius’ Seed route | Use Demon Lord’s Eye to identify the real chest. |
| Lucius has died | Underground vault | Steal Lucius’ personal key and enter the vault. |
| You are chasing the true route | Shears of Fate and true route | Get the Shears of Fate and resolve the Golden Tree route. |
The bank has multiple visits. The first vent route, the archive fire route, and the ending cleanup route are separate jobs.
How to unlock Goldleaf Bank
Goldleaf Bank is tied to Aliya’s questline. You do not unlock it just by finding the door.
| Step | What happens | What to do |
|---|---|---|
| 1 | Aliya returns 100 gold early in the questline. | Treat this as the start of her longer route. |
| 2 | On the third day, Aliya orders 5 bows and returns three days later. | Store bows separately until the order is complete. |
| 3 | Around the tenth day, Aliya orders 10 potions and returns later to collect them. | Keep potion stock and upgrade tools ready. |
| 4 | After completing at least one order, Aliya asks you to infiltrate Goldleaf Bank and open three vents. | Prepare movement, smoke, and backpack space before entering. |
What if Aliya’s order is about to fail?
| Problem | Recovery |
|---|---|
| You sold one of the bows | Farm bow enemies again and stop selling bows until the order is complete. |
| You are short on potions | Farm potion routes, upgrade low-level potions if needed, and store the required amount first. |
| Your storage is too full | Sell low-value clutter, then separate Aliya items into their own storage zone. |
| Rent is also due | Pay rent first if missing it would end the run, then complete the order if the deadline allows it. |
A failed order does not help you reach the bank faster. Protect her order stock like progression loot.
Goldleaf Bank floor-by-floor layout
The annotated map above is the main visual reference. Use this table when you need a text version of each floor’s role.
| Area / floor | Main purpose | Key points |
|---|---|---|
| Sewer / lower entrance | First entry route into the bank | Leads toward the first large laser switch. |
| Lower bank route | Lower laser switch and later Lucius’ Seed setup | Disable the lower laser first. Return later for the Demon Lord’s Eye chest route. |
| Elevator route | Connects the lower route to the upper bank | Use it after the lower path is open. |
| 5F east side | First vent and vault-access transition | Open the 5F east vent, then move toward the upper laser route. The annotated map marks the Upper Laser Switch near the vault-access side of this upper route. |
| 4F executive / mid-bank route | Optional collectibles and charm pickups | This is where optional pickups such as Throwing Expert and Comedy & Tragedy Mask fit into the route. Do not treat these as required for the first vent clear. |
| Upper route | Upper laser switch | Disable this between the 5F east route and the third-floor route before pushing toward 3F east. |
| Rooftop | Optional key and charm cleanup | The rooftop route is mainly for later sweep runs, including a Silver Key and Heavy Loadout on the annotated map. |
| 3F east side | Second vent | Open the east vent, then move across toward the west route. |
| 3F west side | Third vent and later archive entry | Open this vent last. This side becomes your archive-night entry. |
| Bank hall | Lucius coffin route after the seed branch | Return here after Lucius dies to steal his personal key. |
| Underground vault | Shears of Fate route | Opened with Lucius’ personal key. |
| Archive | Contract-burning objective | Enter from the 3F west route on the action night. |
Route map at a glance
First infiltration: Sewer / lower entrance -> lower laser switch -> elevator route -> 5F east vent -> upper laser switch -> 3F east vent -> 3F west vent
Optional sweep paths: 4F executive / mid-bank route -> Throwing Expert -> Comedy & Tragedy Mask Rooftop -> Silver Key -> Heavy Loadout
Archive night: 3F west entry -> archive route -> burn contract -> escape
Ending return: Bank hall -> Lucius coffin -> Lucius’ personal key -> underground vault -> Shears of Fate
First infiltration route: open the three vents
Your first bank objective is to open the three vents listed in the floor layout above.
Step 1: Enter through the sewer route
Start from the sewer / lower entrance. Move toward the lower bank route and the first laser switch.
Recommended loadout:
- one emergency healing option,
- smoke or stealth support,
- enough empty space for important finds,
- no bulky routine sale clutter.
Step 2: Disable the lower large laser switch
The lower switch route is the first major bank obstacle. Check the room before moving, because the solution depends on what is guarding the lever.
Lower laser room: crate version
If the lever is protected by a laser and a movable crate, use the crate as cover.
- Enter the laser room and stop before the beam.
- Push the crate to the right until it blocks the laser guarding the lever.
- Move to the right side of the crate path.
- Pull the lever while the beam is blocked.
- After the lever is pulled, the gate below unlocks.
- Drop down or continue through the newly opened path.
Lower laser room: patrol or timing version
If your room is guarded by patrol timing or a watched lever path instead of a simple crate block, treat it like a stealth timing room.
- Stop outside the patrol’s vision or attack range.
- Watch one full cycle before moving.
- Use Smoke Mimic or Emergency Smoke if the lever path stays exposed.
- Pull the lever only when you have a clean exit route.
- Leave the switch area immediately after the path opens.
Do not mix the two plans. If you have a crate, solve the laser with the crate. If you have a timing room, solve the lever with patience, smoke, and a clear exit.
Step 3: Ride the elevator route to 5F east
After the lower route opens, use the elevator path to reach the east side of the fifth floor.
Heal before riding up if you are already low. The elevator leads into the upper bank section, so do not treat it as the end of the route.
Step 4: Open the first vent on 5F east
Once you reach the 5F east side:
- Clear or bypass the nearest patrol.
- Use smoke if the approach is watched.
- Open the vent.
- Continue toward the upper laser route.
The 5F east vent is the first checkpoint in the bank infiltration.
Step 5: Disable the upper large laser switch
After the 5F east vent, follow the upper route toward the switch marked near the vault-access side on the annotated map. This switch sits between your 5F route and the push toward 3F east.
Upper laser room: crate or object-block version
- Stop before entering the beam path.
- Look for the movable object or crate that can interrupt the laser.
- Push it into the beam before crossing toward the lever.
- Pull the switch.
- Move out toward the 3F east route.
Upper laser room: lever-timing version
- Watch the lever area before committing.
- Use Shadow Rewind if the lever timing is tight.
- Use smoke if a watcher controls the approach.
- Pull the switch only when your return path is clear.
- Continue toward the 3F east vent.
Do not sprint through the laser path unless you already know the timing. A clean lever pull is safer than recovering after a hit.
Step 6: Open the second vent on 3F east
After the upper laser switch, move toward the 3F east side and open the second vent.
This vent confirms that the upper route is working. If the path back is unsafe, use the vent route to reset instead of pushing deeper while damaged.
Step 7: Open the third vent on 3F west
The 3F west vent is the third vent and the one that matters most for the later archive route.
After opening it, the bank is ready for Aliya’s next objective. The later archive fire night starts from this side, so remember this route.
Archive fire route: how to burn the contract
The archive route happens on the agreed action night. This is Aliya’s contract-burning objective.
| Step | What to do |
|---|---|
| 1 | Enter from the 3F west side after the vent route is open. |
| 2 | Bring smoke, stealth support, and a light backpack. |
| 3 | Follow the archive route. |
| 4 | Reach the archive room. |
| 5 | Burn the contract. |
| 6 | Escape cleanly. |
| 7 | Return the next day for Aliya’s reward. |
If you die during the archive route, rebuild the same setup and repeat the objective path. Do not compensate by bringing a full combat backpack; the bank is still a stealth and route-control area.
Aliya reward: Gold Finger collectible
After you burn the archive contract and escape, Aliya rewards you the next day with the Gold Finger collectible.
That makes the archive route worth doing even if you are not chasing every ending yet. It is both a quest payoff and a progression reward.
Gold Leaf and important item rules
Gold Leaf is an important item that opens specific doors. The game warns that important items like this do not drop a second time in the normal way.
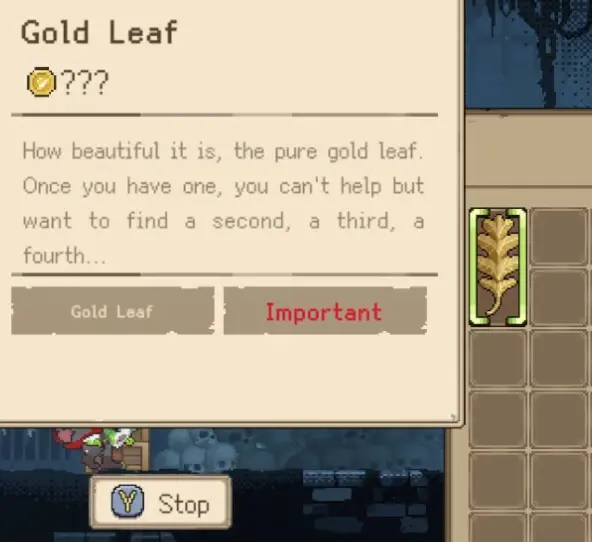
If you lose an important item, check the recovery system mentioned by the game rather than assuming the item will simply respawn.
Goldleaf Bank charms, collectibles, and keys
Goldleaf Bank contains optional rewards, but many of them are locked behind keys, movement tools, or dangerous rooms.
| Type | Known examples | How to approach it |
|---|---|---|
| Charms | Emergency Smoke, Triple Jump, Breath-holding Expert, vanish-style charm, Throwing Expert, Heavy Loadout, Camouflage Parachute | Some require stronger movement, specific charms, rooftop access, or fast lever timing. |
| Collectibles | Scroll Knowledge collection, Whistling Mask, Pink Piggy Bank, Green Piggy Bank, Comedy & Tragedy Mask | Some require silver keys, gold keys, 4F executive / mid-bank routing, or careful bomb chest routing. |
| Silver keys | Four silver keys | Spread through the bank route, including lower route, upper route, 5F side paths, 3F vent routes, and rooftop cleanup. |
| Gold keys | Four gold keys | Stolen from gold armored soldiers. Used for the Whistling Mask route. |
| Utility pickup | Emergency Smoke | Marked on the annotated map near the 2F / upper-side route; useful if a laser or watched lever path turns messy. |
| Ending items | Lucius’ Seed, Lucius’ personal key, Shears of Fate, Demon Lord hearts | These decide ending routes and should not be sold or dropped. |
Emergency Smoke
Emergency Smoke is marked on the annotated map as a utility pickup near the upper-side bank route. Treat it as a safety tool, not a treasure item.
Use it when:
- a watched lever path gives you no clean timing window,
- a laser switch route turns into a chase,
- a gold armored soldier sees you before the steal,
- you need to break line of sight before leaving with a key.
Silver keys and Scroll Knowledge
The Scroll Knowledge collectible route requires four silver keys.
Silver keys are spread across the bank rather than concentrated in one obvious room. Use this sweep order while revisiting the bank:
| Sweep area | What to check |
|---|---|
| Lower bank route | Check side rooms and chest paths near the lower laser route. |
| Elevator / upper route | Check rooms connected to the elevator path and the upper switch route. |
| 5F east side | Check the vent approach and nearby side rooms before leaving the floor. |
| 4F executive / mid-bank route | Check this optional route while sweeping for collectibles such as Comedy & Tragedy Mask or Throwing Expert. |
| Rooftop | Check the rooftop cleanup path for a Silver Key and Heavy Loadout. |
| 3F east and west sides | Check both vent-side routes while preparing for or revisiting the archive path. |
Before opening the silver-key door, check nearby bomb chests and make sure your backpack has room for the collectible.
Gold keys and Whistling Mask
The Whistling Mask route requires four gold keys.
Gold keys come from gold armored soldiers, so this is more of a stealth objective than a combat objective. Prepare lure tools before trying to farm them.
Gold armored soldiers: how to get gold keys safely
Gold armored soldiers are key carriers. Do not fight them directly if you can avoid it.
A safer approach:
- Watch the patrol route first.
- Use Garden Expert-style safety or terrain if your setup allows it.
- Use a bell or lure tool to pull the soldier into a safer position.
- Break line of sight with smoke or cover.
- Approach from behind or from a safe angle.
- Steal the gold key.
- Leave before the room becomes a chase.
What if the gold key steal goes wrong?
| Failure | Recovery |
|---|---|
| The soldier sees you before the steal | Dash out, hide, and reset the patrol instead of forcing a second steal immediately. |
| The room becomes crowded | Leave the room and re-enter with smoke or a lure tool. |
| Your backpack is full | Drop low-value clutter before trying again. Gold keys matter more than routine loot. |
| You keep failing the approach | Farm safer bank objectives first, then return with better mobility or stealth tools. |
Lucius’ Seed: how Demon Lord’s Eye finds the real chest
Lucius’ Seed is part of a later ending route, not the first vent objective. Do this after you have Demon Lord’s Eye.
To get Lucius’ Seed:
- Equip Demon Lord’s Eye.
- Enter the lower bank route.
- Find the lower bank chest group.
- Look for the real chest using Demon Lord’s Eye.
- Open the real chest.
- Take Lucius’ Seed.
- Give Lucius’ Seed to the Demon Lord if you are following the seed branch.
The chest group is dangerous because most chests in this area are traps or fake chests. The real chest can change between attempts, so do not memorize one chest position. With Demon Lord’s Eye equipped, the real chest has a slight glow. Use that glow instead of guessing.
How to reach the underground vault
The underground vault is tied to Lucius’ death and Lucius’ personal key. Do not look for it during the first vent route.
Underground vault requirements
| Requirement | What it means |
|---|---|
| Complete the Demon Lord seed line | This is the route that leads to Lucius dying the next day. |
| Wait for the next-day death / obituary event | The coffin route appears after Lucius is dead. |
| Return to the bank hall | The coffin is in the bank hall route, not the vent objective route. |
| Steal Lucius’ personal key | The key is taken from the coffin. |
| Open the underground vault | Use Lucius’ personal key to access the vault. |
| Take the Shears of Fate | The Shears are the key true-route reward from the vault. |
Underground vault route
- Finish the Demon Lord seed branch.
- Let the next-day Lucius death event play out.
- Return to Goldleaf Bank at night.
- Go to the bank hall.
- Find Lucius’ coffin.
- Steal Lucius’ personal key.
- Use the key to open the underground vault route.
- Enter the vault and obtain the Shears of Fate.
Shears of Fate and the true route
The Shears of Fate are not just a collectible. They are part of the take-all / true route.
The route structure is:
- Complete the Demon Lord seed line.
- Trigger Lucius’ death.
- Steal Lucius’ personal key from the coffin in the bank hall.
- Open the underground vault.
- Take the Shears of Fate.
- Steal the Demon Lord’s three hearts.
- Pass the bramble gate.
- Defeat the boss.
- Use the Shears of Fate on the Golden Tree.
The bank controls the vault, the shears, and the late ending route.
Where to find the three Demon Lord hearts
The three Demon Lord hearts are part of the late Demon Lord / Lucius ending route, not part of the first bank vent route.
| Heart objective | When it matters | What to do |
|---|---|---|
| Demon Lord heart 1 | After the Lucius / Demon Lord branch is active | Enter the Demon Lord route and treat the heart as a steal objective. |
| Demon Lord heart 2 | Same route chain | Keep inventory space open and avoid selling or dropping it. |
| Demon Lord heart 3 | Same route chain | Finish the full set before trying to resolve the branch. |
If you are following Lucius’ plan, the hearts are delivered to him for the backstab branch. If you are following the take-all route, the hearts come after the Shears of Fate step and before the bramble gate / Golden Tree resolution.
Ending branches connected to Goldleaf Bank
This section contains ending spoilers.
| Branch | Required bank connection | What happens |
|---|---|---|
| Spokesperson ending | Equip Demon Lord’s Eye, find the real lower-bank chest, get Lucius’ Seed, and give it to the Demon Lord. | Lucius dies the next day. Agreeing to become the spokesperson leads to this branch. |
| Backstab ending | Follow Lucius’ plan, steal the Demon Lord’s three hearts, and deliver them to Lucius. | This favors Lucius over the Demon Lord seed route. |
| Take-all / true route | Complete the seed line, steal Lucius’ personal key from the coffin, open the underground vault, and take the Shears of Fate. | After stealing the Demon Lord hearts, pass the bramble gate, defeat the boss, and use the shears on the Golden Tree. |
| Aliya route reward | Burn the archive contract on the action night. | Aliya gives the Gold Finger collectible the next day. |
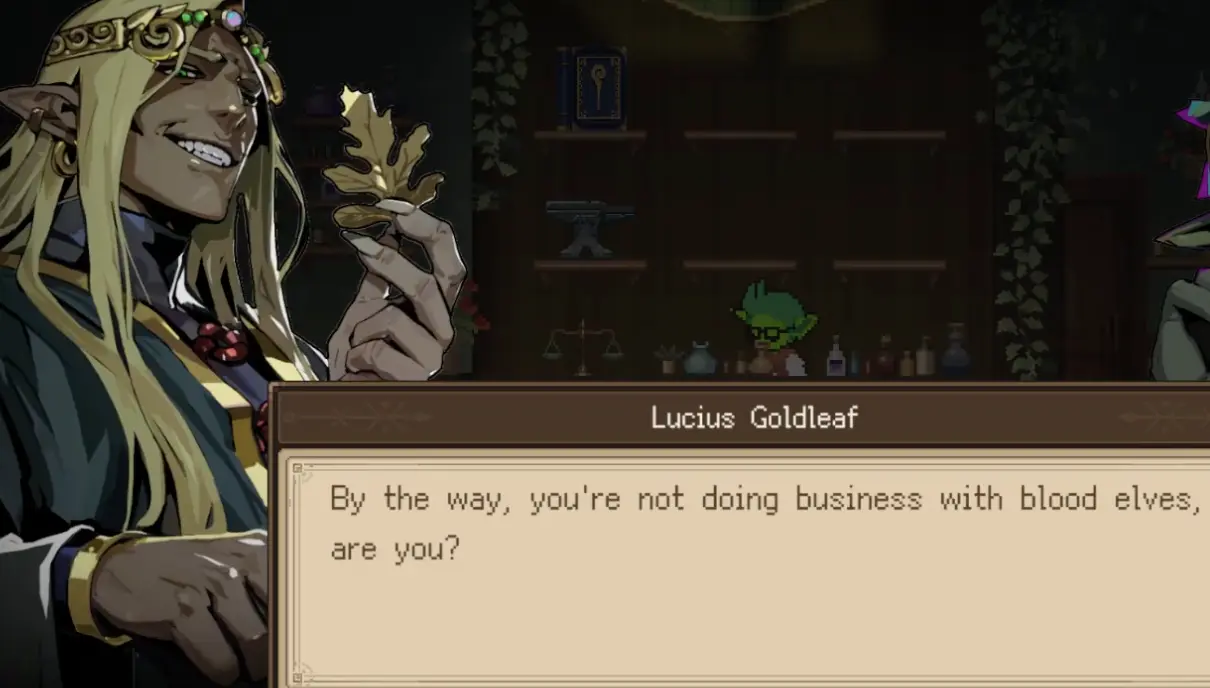
Lucius starts as a debt pressure point, but Goldleaf Bank turns him into a major ending route character.
Common Goldleaf Bank mistakes and fixes
| Mistake | Why it hurts | Fix if it already happened |
|---|---|---|
| Entering without enough mobility | Bank routes use vertical movement, elevators, and awkward exits. | Leave, buy or practice Double Jump / Grappling Hook, then return. |
| Bringing a full backpack | You need space for keys, charms, collectibles, and ending items. | Return to town, store order items, sell clutter, and restart the bank route. |
| Missing the 3F west vent | The west route matters later for archive entry. | Re-enter through the bank route and prioritize the 3F west vent before the archive night. |
| Rushing laser rooms | Lasers punish bad timing and panic movement. | Reset the room, use the crate / smoke / Shadow Rewind method, and pull the switch cleanly. |
| Fighting gold armored soldiers | They are key carriers, not normal enemies. | Stop fighting, isolate one soldier, then steal the key with smoke or a lure setup. |
| Opening chests blindly on the seed route | Fake or trap chests can waste the run. | Equip Demon Lord’s Eye and look for the glowing real chest. |
| Looking for the vault too early | The vault depends on Lucius’ death and personal key. | Finish the Demon Lord seed line first, then return after Lucius dies. |
| Mixing ending branches | Lucius, Demon Lord, and take-all routes use different hand-ins. | Decide the branch before carrying Lucius’ Seed, hearts, or Shears-related items. |
FAQ
Aliya did not unlock Goldleaf Bank. What did I miss?
Complete at least one of Aliya’s supply orders first. If you are still holding or missing the required items, finish that order before expecting the bank request.
Should I finish Mine of Echoing Cries before Goldleaf Bank?
Yes, if you are chasing Lucius’ Seed or the later ending route. Demon Lord’s Eye is needed to identify the real chest in the lower bank chest group.
Which vent should I open first?
Open the 5F east vent first as part of the first infiltration route, then the 3F east vent, then the 3F west vent.
Why is the 3F west vent important?
The 3F west side becomes important later because the archive fire route starts from that side.
How do I reach the rooftop route?
Treat the rooftop as an optional cleanup path, not part of the first vent objective. Return after your main bank route is stable, then follow the upper / side routes shown on the annotated map to sweep for the rooftop Silver Key and Heavy Loadout.
Where are the silver keys?
Silver keys are spread through the bank route. Sweep the lower bank route, elevator / upper route, 5F east side, 4F optional route, rooftop, and both 3F vent-side routes.
Do gold keys stack?
Treat gold keys as important route items and keep backpack space open for them. If your inventory is tight, cut low-value loot before trying to steal more keys.
How do I farm gold keys safely?
Steal them from gold armored soldiers. Use lures, smoke, stealth, and safe positioning instead of fighting the soldiers directly.
How do I know which chest is real with Demon Lord’s Eye?
Equip Demon Lord’s Eye and look for the chest with a slight glow. The real chest can change between attempts, so do not rely on memorizing one position.
Can I do the archive fire route before opening all vents?
The clean route is to open the vents first, especially the 3F west vent, because it sets up the later archive entry path.
When should I go for Lucius’ Seed?
Go for Lucius’ Seed only when you are following the Demon Lord seed branch and have Demon Lord’s Eye ready. It is not part of the first vent objective.
When can I open the underground vault?
Open the underground vault after the Demon Lord seed line leads to Lucius’ death. Then return to the bank hall, steal Lucius’ personal key from the coffin, and use it on the vault route.
Is Goldleaf Bank required for the true ending?
Yes. The true / take-all route depends on Goldleaf Bank progression, Lucius’ personal key, the underground vault, the Shears of Fate, the Demon Lord hearts, and the Golden Tree resolution.
Read next
Before entering the bank, read the Backpack and Storage Guide so you do not lose key items or order stock. If you are still missing movement tools, read the Best Early Skills Guide. If money is slowing your setup, read the Haggling and Shop Guide.
Continue Reading in the Goblin Vyke Guide Cluster
This article is part of our Goblin Vyke strategy cluster. Use these guides to keep learning the game's core systems and routes.
Fix your full inventory in Goblin Vyke! Learn backpack rules, storage expansion, death item recovery, Minimize Grease tips, and Goldleaf Bank prep.
Beginner GuideGoblin Vyke Guide: Rent, Debt, Mortgages & Emergency GoldLearn to survive rent pressure in Goblin Vyke! Master mortgage timing, early payments, death penalties, autosave tips, and emergency gold routes to avoid debt.
Skills GuideGoblin Vyke Best Early Skills: Double Jump & Grappling HookUnlock the best early skills in Goblin Vyke! Learn Double Jump costs, how to get the Grappling Hook, skill tree priorities, and Storm Sprint tips.
Shop GuideGoblin Vyke Shop Guide: Haggling, Employees & 3x ProfitMaster the shop in Goblin Vyke! Learn haggling tips, how to get 3x profits, manage Focus, hire employees, and use market demand to maximize gold.